
U-Cut for Long Hair — Complete Guide (Shape, Layers, Face Shape & Styling)
What Is a U-Cut?
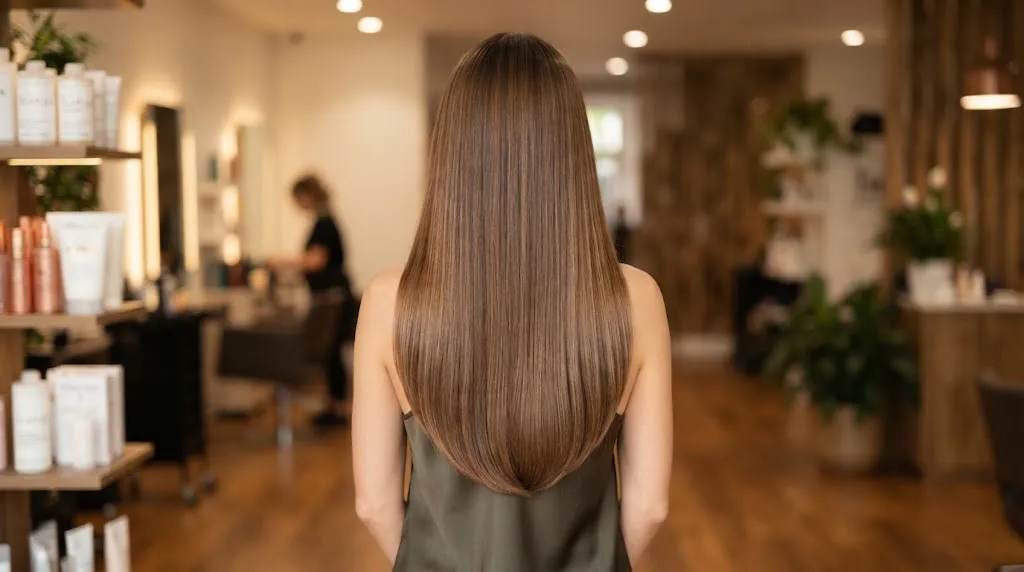
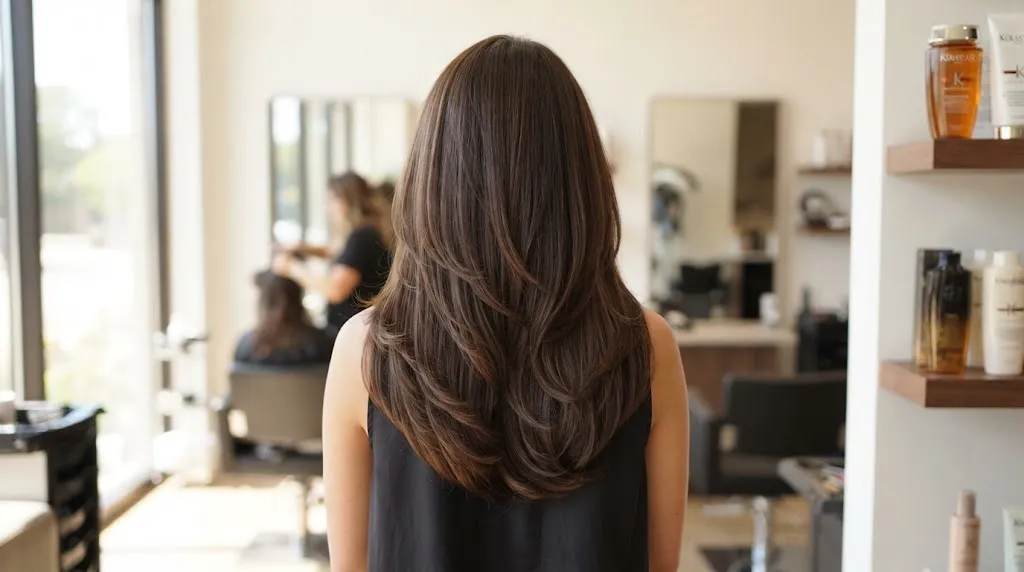
A U-cut for long hair is a classic styling technique where the ends are trimmed into a curved, horseshoe-like shape that leaves the center longest while the sides gently taper upward.
The back stays longest while the sides curve up shorter, creating a much softer and more natural silhouette than a sharp V-cut.
This haircut works best on hair that is at least shoulder-length or longer, ensuring enough length to showcase the gradual curve.
It removes heavy bulk and adds effortless bounce to the ends without requiring any significant sacrifice of overall hair length.
The shape adapts seamlessly to straight, wavy, curly, and coily hair textures by distributing weight evenly across the back.
U-Cut vs. V-Cut vs. Blunt Cut vs. Layered Cut
U-Cut vs V-Cut (rounded vs pointed edge)
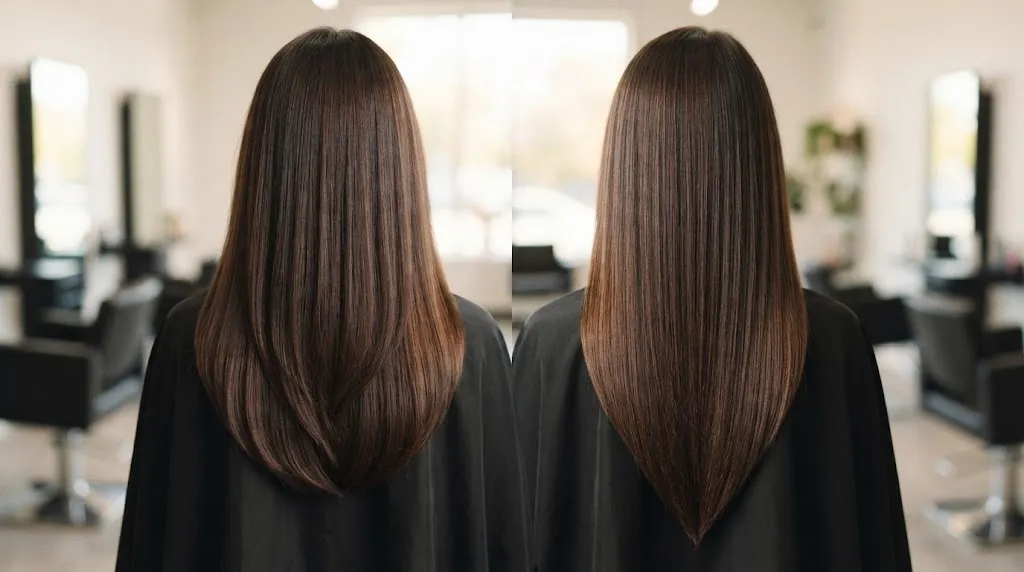
A U-cut features a soft, curved perimeter where the hair gently tapers shorter at the sides, resembling the letter U when viewed from behind. Conversely, a V-cut converges sharply toward the center back, creating a narrow, distinct point that looks much more dramatic and angular. When choosing between them, a U-cut is better for a balanced, softer aesthetic that keeps the ends looking thick, while a V-cut removes significantly more hair from the sides to create stark movement and a lighter feel.
U-Cut vs Blunt Cut (weight removal vs one-length heaviness)
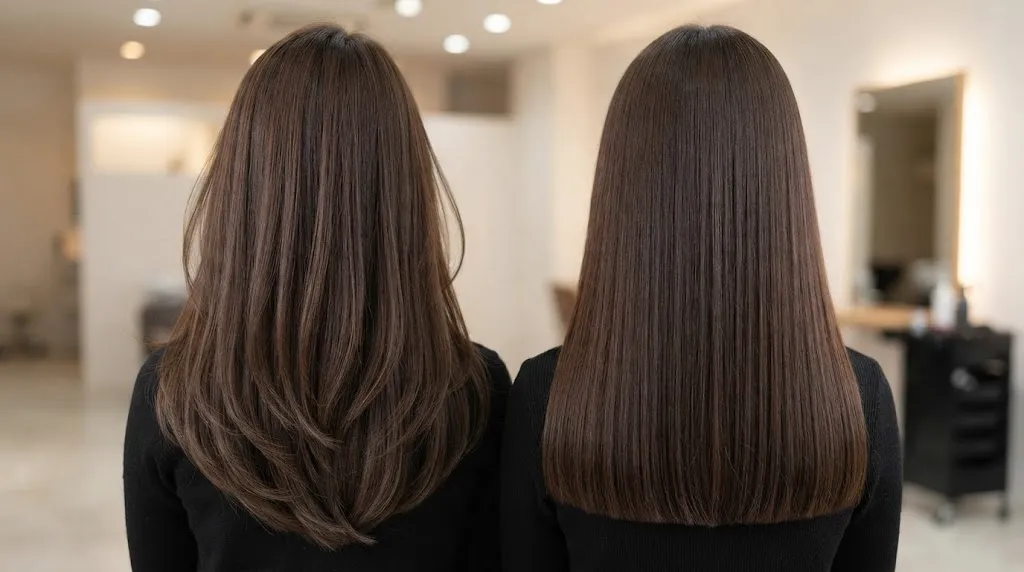
A U-cut strategically removes weight and bulk around the edges while preserving overall length, making it ideal if hair feels too heavy or blocky. A blunt cut slices straight across the bottom at one exact length, creating a dense, heavy perimeter that maximizes the visual thickness of fine strands. Choosing between the two comes down to weight management: a blunt cut provides a bold, graphic line with maximum density, whereas a U-cut introduces graceful curvature and eliminates the heaviness that can drag long hair down.
U-Cut vs Layered Cut (perimeter shape vs internal layering)
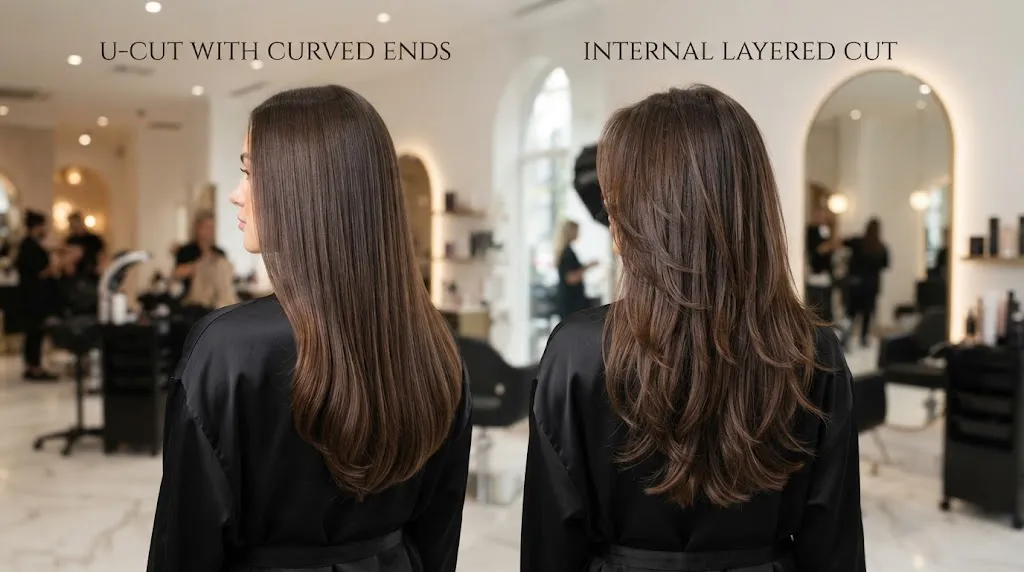
Understanding the differences in perimeter shaping, internal texture, end shapes, and maintenance schedules.
U-Cut: Primarily defines the shape of the outer perimeter, curving upward at the sides with minimal disruption to the main body of the hair. While a U-cut can incorporate gentle face-framing, its main focus remains on shaping the outer hemline.
Layered Cut: Focuses on internal texture, cutting shorter pieces throughout the crown and mid-lengths to boost volume and eliminate bulk everywhere. A dedicated layered cut is built entirely around stacked heights and all-over movement rather than just outer shaping.
| Cut Type | Shape at Ends | Best For | Trim Frequency |
|---|---|---|---|
| U-Cut | Rounded curve | Volume without losing length | 6–8 weeks |
| V-Cut | Sharp point | Dramatic movement | 4–6 weeks |
| Blunt Cut | Straight line | Maximum thickness look | 3–4 months |
| Layered Cut | Varies throughout | Texture all over | 8–10 weeks |
Does a U-Cut Suit Your Hair Type?
Straight Hair
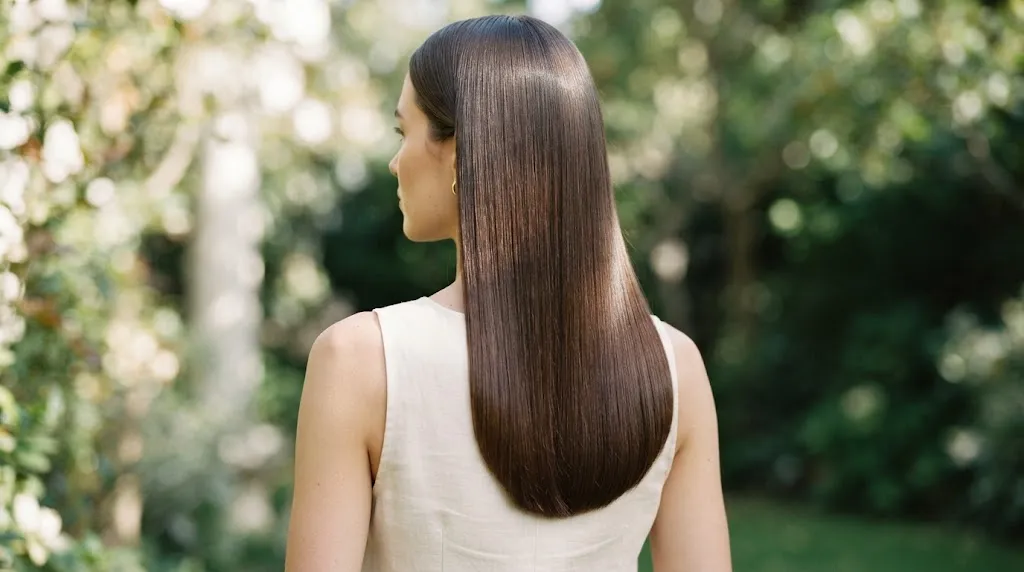
A U-cut on sleek, pin-straight hair creates an undeniably polished, high-definition silhouette where the curved perimeter catches the light with zero guesswork. Because straight textures lack natural bend, every single angle of that sweeping bottom curve remains entirely visible, making precision cutting non-negotiable. If you want to lean into this sleek aesthetic, pairing the shape with styling routines found in our guide to hairstyles for straight hair keeps the ends looking sharp rather than stringy. Maintenance usually involves a quick pass with a flat iron curving slightly inward at the tips to accentuate the rounded hemline.
Wavy Hair
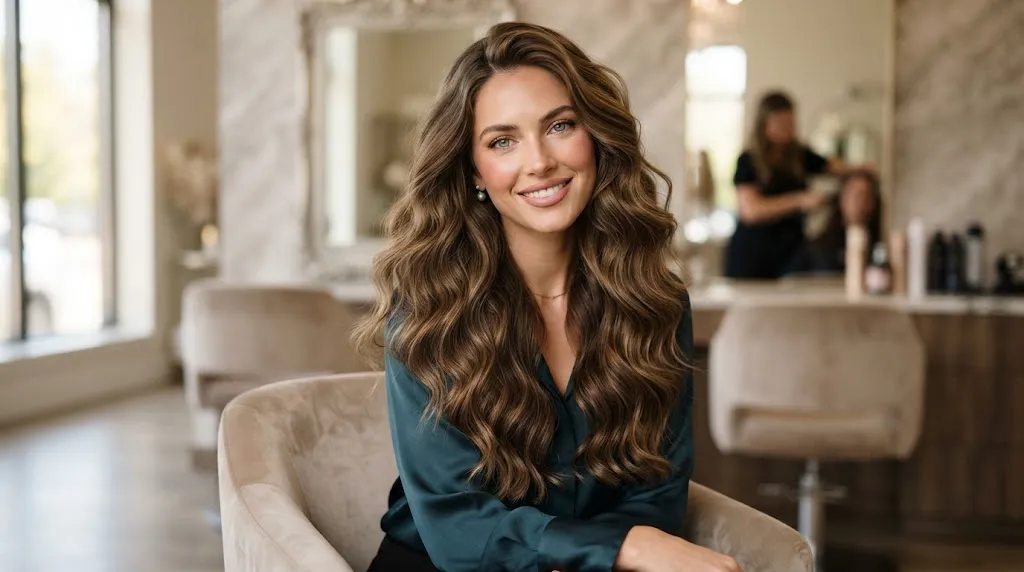
Natural bends and loose beach waves turn a U-cut into an effortless, cascading frame that looks remarkably soft without appearing overly styled. The shorter side pieces naturally coil inward toward the collarbones while the longer back sections preserve overall length, letting texture do the heavy lifting. This shape prevents waves from clumping into a blunt, heavy triangle shape at the bottom. Styling typically requires just a dollop of curl mousse or texturizing spray scrunched into damp lengths to encourage the layers to fall smoothly into each other.
Curly & Coily Hair

Coiled textures benefit immensely from a U-shape because it removes heavy bulk along the bottom corners, allowing tight ringlets to bounce and spring upward instead of collapsing into a heavy pyramid. Curls naturally shrink when dry, so stylists must cut them dry or use customized light curly hairstyles techniques to ensure the curved gradient remains even. The result is a rounded, voluminous halo of curls where individual coils stack gracefully on top of one another rather than tangling at the nape.
Thick Hair
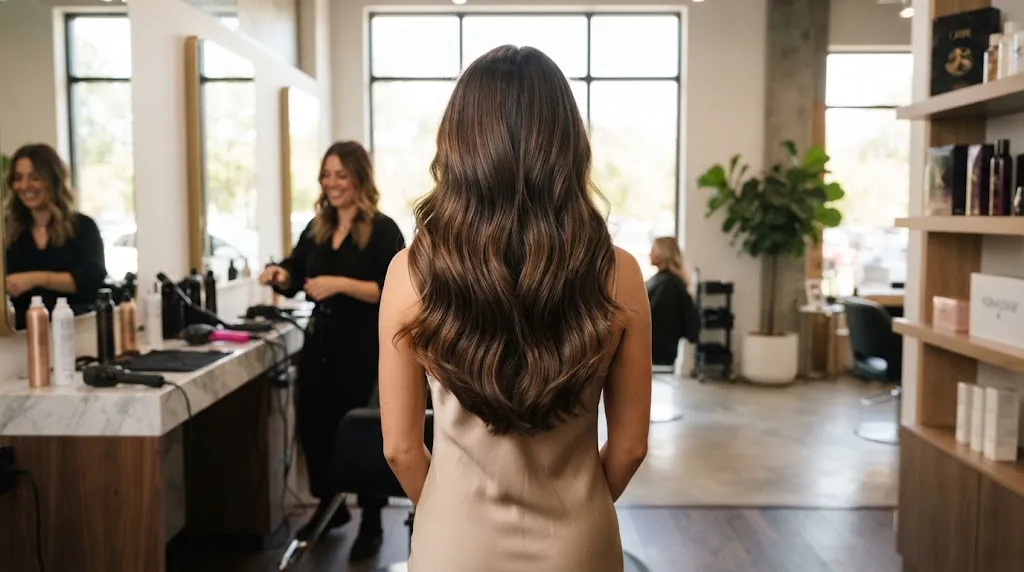
Curtain bangs are one of the smartest pairings for long, loose curls because they bridge the gap between your forehead and the rest of your hair without requiring high-maintenance daily blowouts.
When styling curtain bangs on curly hair, use a small round brush to direct them outward and away from the face while blow-drying, then let them blend right into your longest layers. The result is a soft, sweeping frame that naturally catches the cheekbones and makes long hair look intentionally styled even when you air-dry the rest of the length.
Fine/Thin Hair
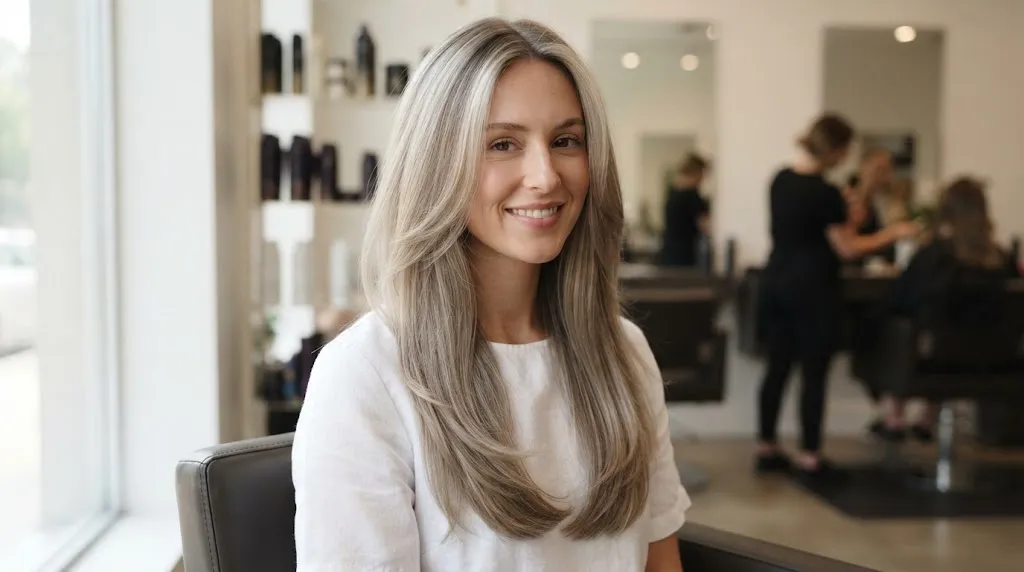
A U-cut is generally good for fine hair if the layers are kept long and minimal, preventing the ends from looking sparse or see-through. When stylists carve too deep into fine strands, the perimeter can easily end up looking wispy and frail. To keep fine hair looking dense, the innermost layers should start well below the collarbone, and point-cutting should be used sparingly to maintain clean, solid edges along the bottom curve.
Does a U-Cut Suit Your Face Shape?
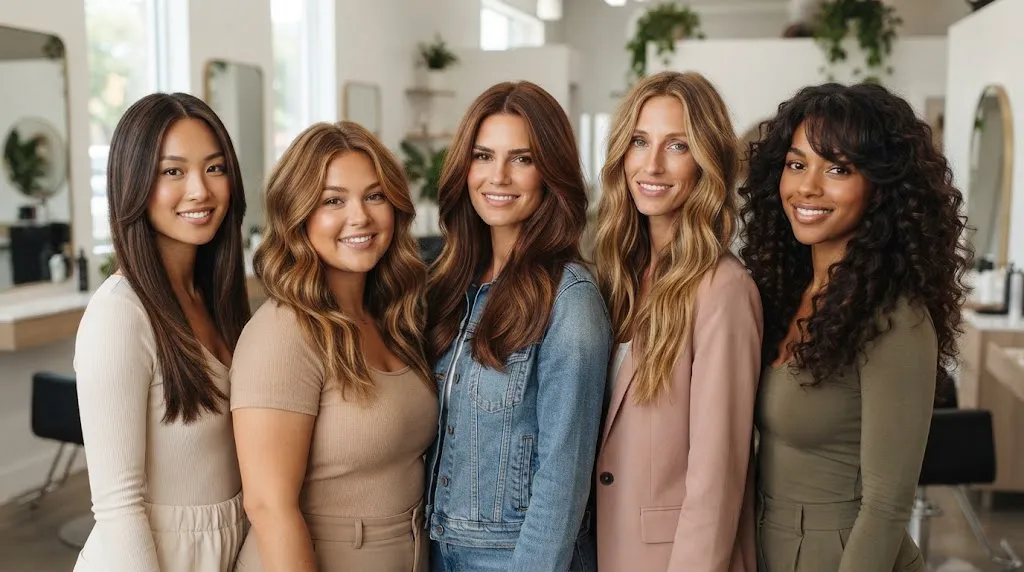
The curved, cascading perimeter of a U-cut creates natural vertical pull, which makes it one of the most versatile silhouettes to customize for different bone structures. By shifting where the shortest front layers begin and how deep the back curve sweeps, a stylist can balance proportions without sacrificing overall length.
Round Face
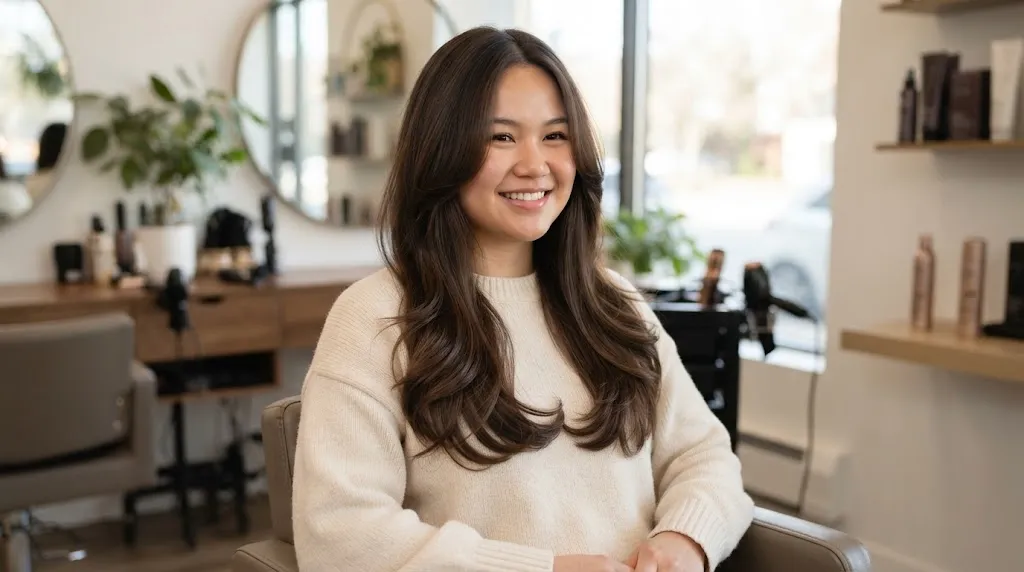
A round face benefits most from a U-cut when the shortest front layers fall well below the chin, typically around the collarbone. This placement draws the eye downward, visually elongating fuller cheeks. Keeping the back curve moderate rather than sharply tapered prevents width from building up around the jawline.
Oval Face
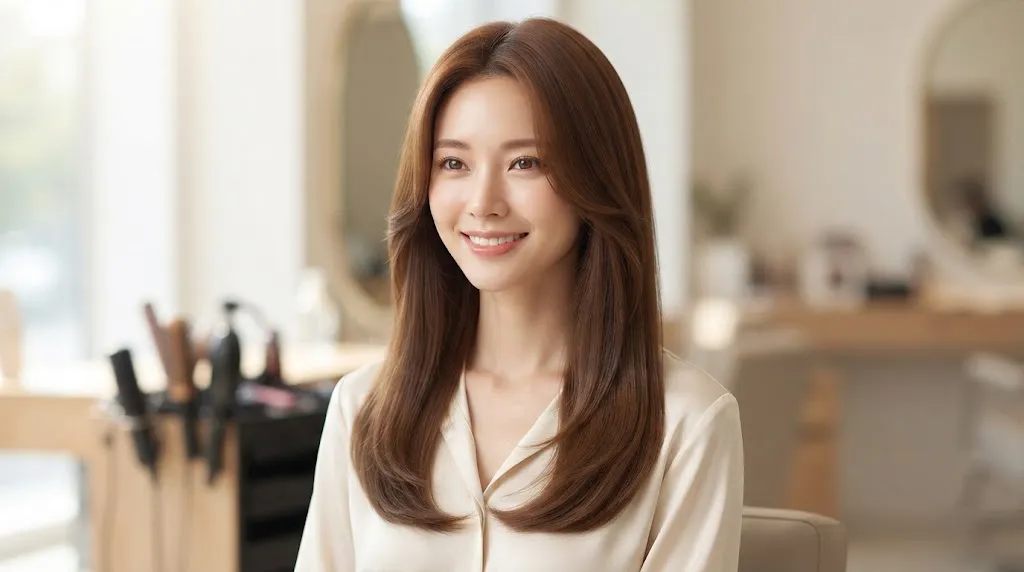
An oval face shape can carry almost any variation of the U-cut effortlessly. Because the proportions are naturally balanced, the main choice comes down to personal styling preference rather than structural correction. Soft, face-framing pieces starting near the cheekbones enhance the symmetry without altering the face’s natural lines.\
Square Face

A square jawline needs softening, which a standard blunt cut often fails to do. A U-cut softens strong angles through gradual, cascading layers that break up the horizontal line of the jaw. Starting the front layering slightly higher, around the mid-neck, helps diffuse heaviness at the corners of the face.
Long/Slim Face
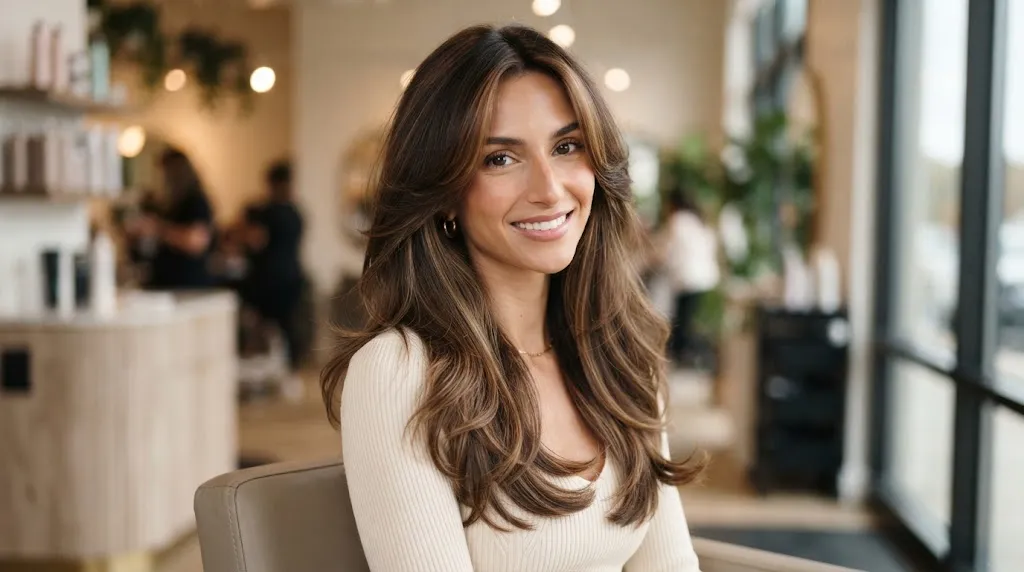
A long or oblong face requires width and fullness rather than vertical elongation. To achieve this, request a wider U-shape with shorter, bouncier layers starting near the cheekbones or lips to add horizontal volume at the sides. Keeping the back curve subtle prevents the hair from hanging too flatly down the back.
Heart-Shaped Face

Heart-shaped faces feature a broader forehead and a narrower chin, meaning the goal is to balance the upper and lower halves. Front layers that kick outward or curve inward right at the jawline fill in the negative space around a pointed chin. Pairing the cut with long side-swept bangs helps mask a wider forehead while maintaining the sweeping, cohesive flow of the back perimeter.
U-Cut Front View, Back View & Side View
Front View (face-framing layer)
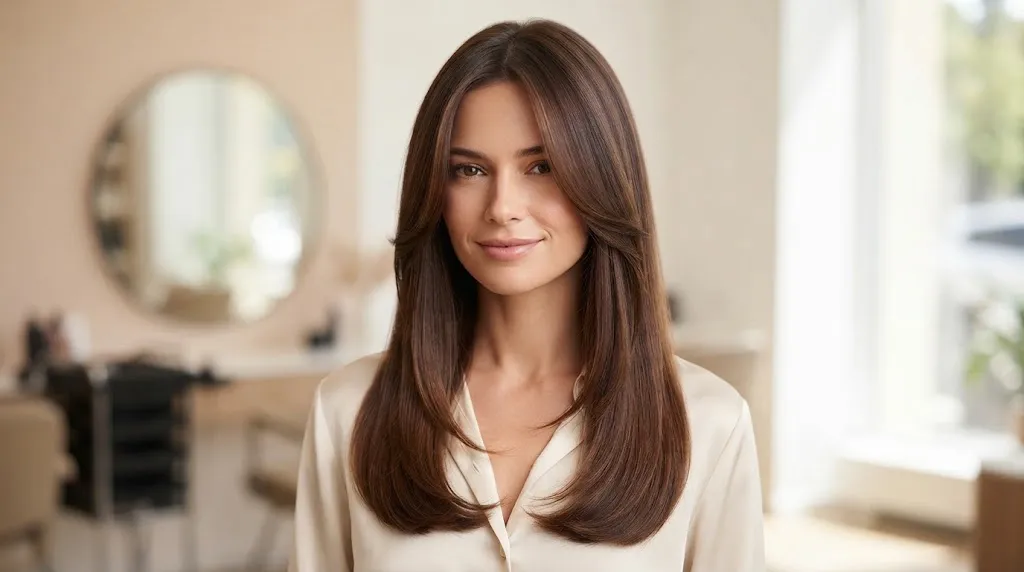
The front view of a U-cut on long hair keeps the main length intact while building softness around the face. Stylists typically start the shortest front piece anywhere from the chin to the collarbone, depending on your jawline and neck length. These framing pieces swoop inward toward the chest, which keeps the hair from looking heavy or boxy around the face. If you wear your hair straight, this creates a clean, intentional frame that opens up your features without sacrificing the overall length you have worked hard to grow.
Back View (the actual U-curve)
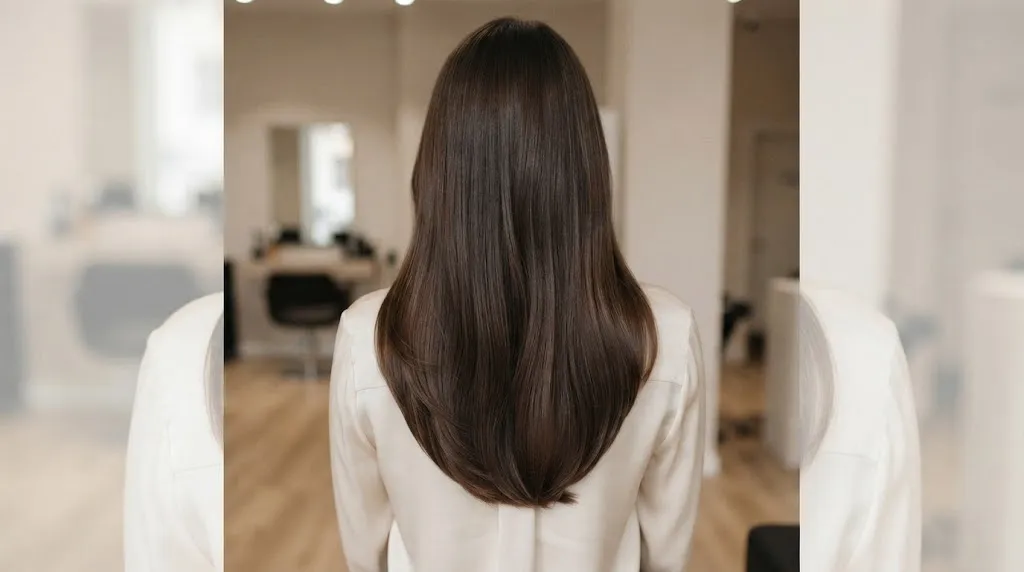
The back view reveals the signature curved shape that gives this cut its name, tapering up gently at the outer corners to form a soft U instead of a blunt horizontal line. In the salon chair, we achieve this by elevating the hair at different angles and cutting a curved guide from shoulder blade to lower back. This crescent-like sweep removes excess bulk from the bottom corners, making thick hair feel lighter and giving fine hair a much cleaner, healthier hemline.
Side View (targets "side layer haircut")
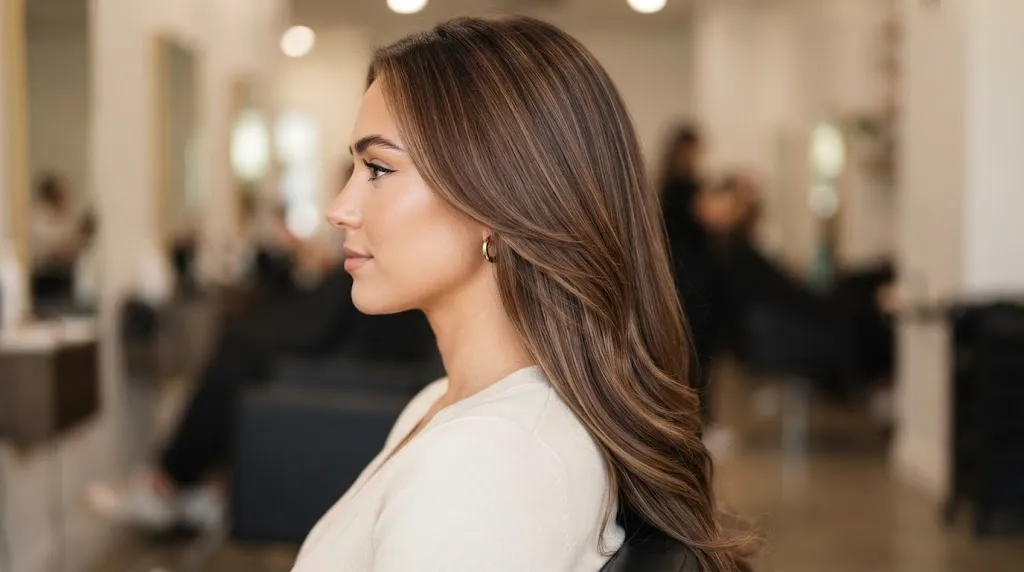
The side view highlights the seamless graduation that connects the shorter front pieces to the sweeping back length. Instead of harsh, disconnected steps like a traditional shag or tiered layers, a proper side view shows a smooth, diagonal slope where each strand cascades into the next. This gradient prevents the dreaded shelf effect behind the shoulders and ensures the hair moves naturally when you turn your head.
Deep U-Cut vs Subtle U-Cut (targets "deep u haircut front view" / "deep u cut for long hair")
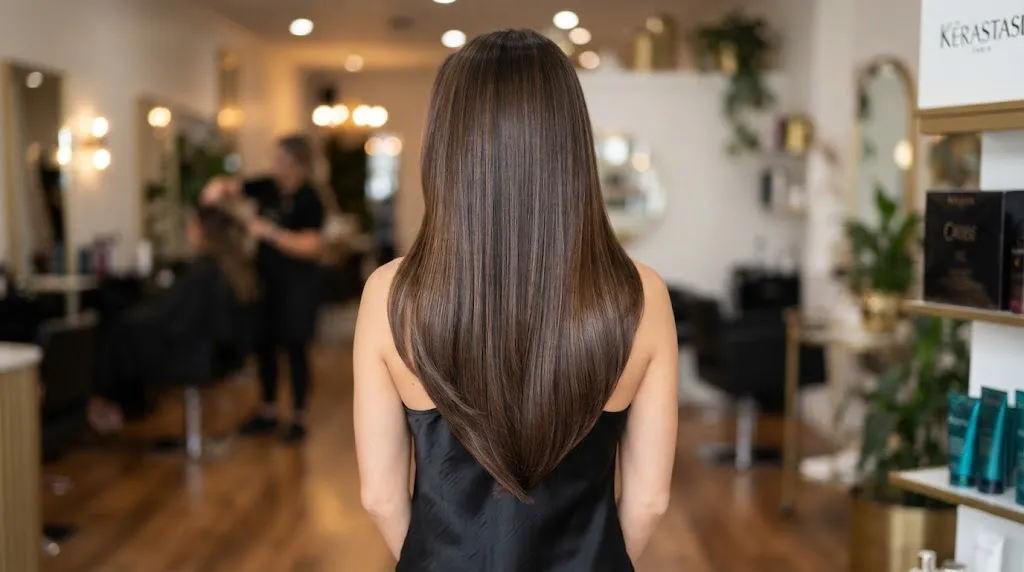
Feature Subtle U-Cut Deep U-Cut Back Curve Gentle, shallow curve with minimal difference between center length and side corners. Dramatic, pronounced curve with a sharp taper up toward the shoulders. Front View Impact Minimal face-framing; maintains a thick, dense perimeter around the chest. Pronounced layering; front pieces often start high near the cheekbones or chin. Best Hair Type Fine to medium hair that needs to retain density at the ends. Thick, coarse, or very long hair that requires serious weight reduction. Maintenance Trims needed every 10 to 12 weeks to maintain the soft shape. Trims needed every 6 to 8 weeks to keep the sharp V-like corners from looking frayed.
| Feature | Subtle U-Cut | Deep U-Cut |
|---|---|---|
| Back Curve | Gentle, shallow curve with minimal difference between center length and side corners. | Dramatic, pronounced curve with a sharp taper up toward the shoulders. |
| Front View Impact | Minimal face-framing; maintains a thick, dense perimeter around the chest. | Pronounced layering; front pieces often start high near the cheekbones or chin. |
| Best Hair Type | Fine to medium hair that needs to retain density at the ends. | Thick, coarse, or very long hair that requires serious weight reduction. |
| Maintenance | Trims needed every 10 to 12 weeks to maintain the soft shape. | Trims needed every 6 to 8 weeks to keep the sharp V-like corners from looking frayed. |
U-Cut Style Variations
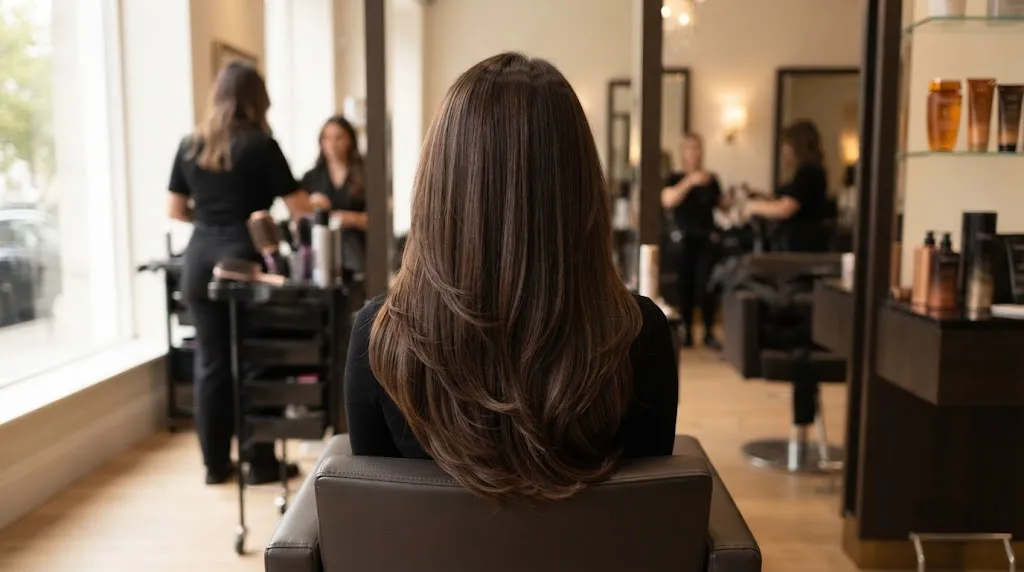
Subtle U-Cut
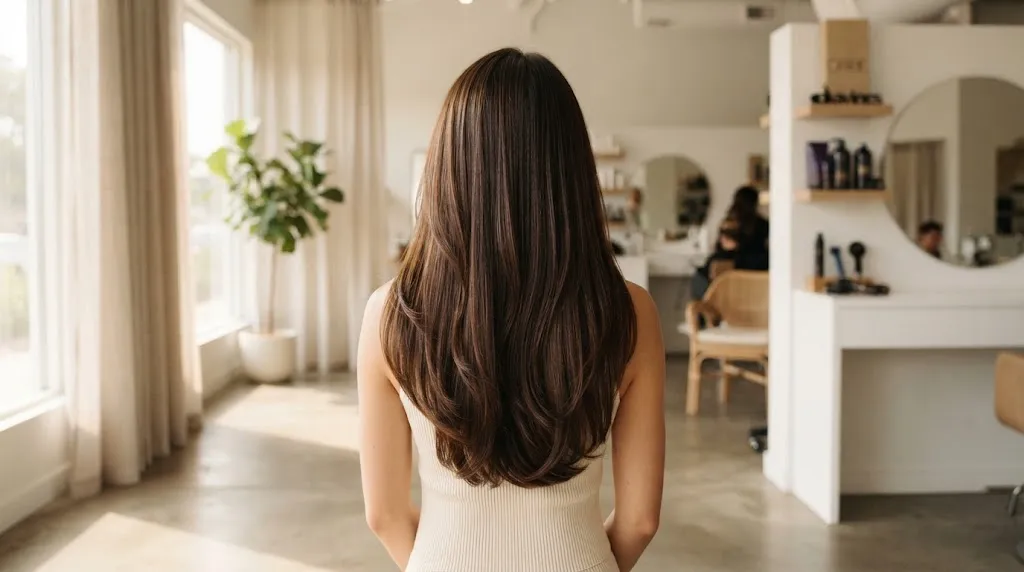
A subtle U-cut features a gentle, rounded curve at the bottom hemline where the center length is only slightly longer than the sides. This variation works best if you want the classic fullness of a straight-across cut while getting rid of heavy, blunt corners. It is the go-to choice for fine hair types because trimming away minimal density preserves thickness at the ends. Maintenance is straightforward, requiring a light dusting every eight to ten weeks to keep the soft perimeter clean.
Long Layered U-Cut
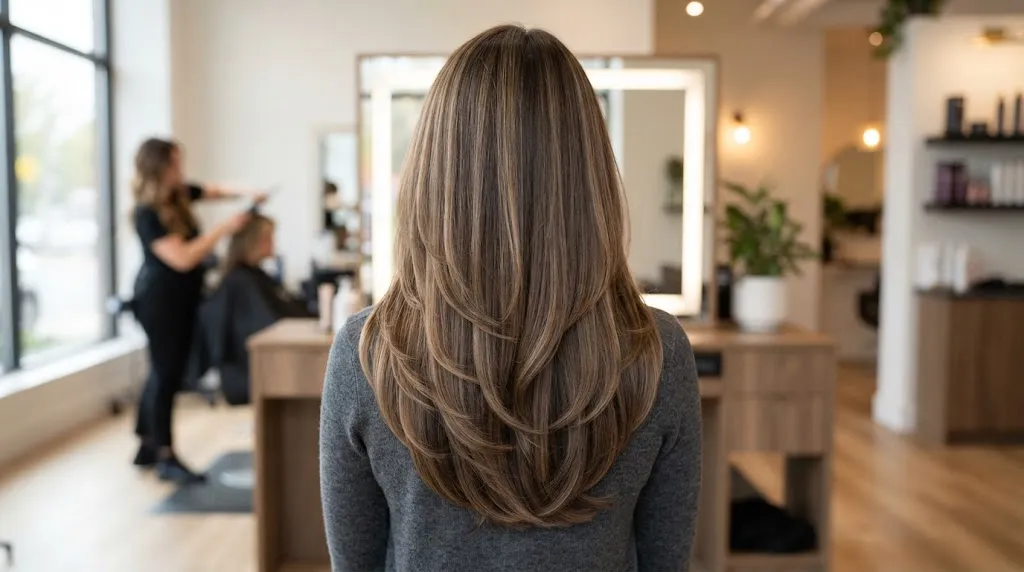
A long layered U-cut introduces cascading dimension throughout the lengths, blending seamlessly into the signature curved bottom edge as seen in these layer cut pics. Stylists typically cut these layers starting around the collarbone or mid-chest to remove bulk and add natural bounce without sacrificing overall length. This option excels at giving thick or coarse hair a lighter, more manageable feel while maintaining plenty of movement when worn straight or wavy. Expect to visit the salon every six to eight weeks to keep the layer transitions smooth and prevent split ends from weighing down the shape.
Steep/Deep U-Cut
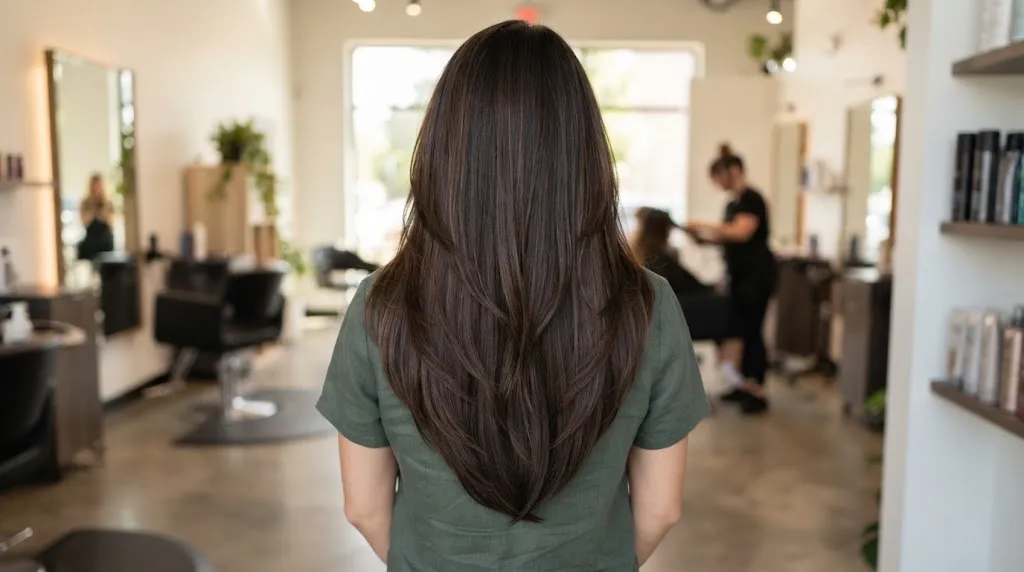
A steep or deep U-cut creates a sharp, pronounced V-like curve where the center point extends significantly past the shoulder blades while the front and side sections sit much higher. This dramatic silhouette delivers striking visual impact, especially from behind, making it a favorite for those who want maximum length retention with an edgy twist. It requires thick hair to pull off successfully, as fine hair can look stringy at the elongated center tail. Regular trims are non-negotiable here to maintain the crispness of the sharp angle and prevent the ends from looking sparse.
U-Cut with Curtain Bangs
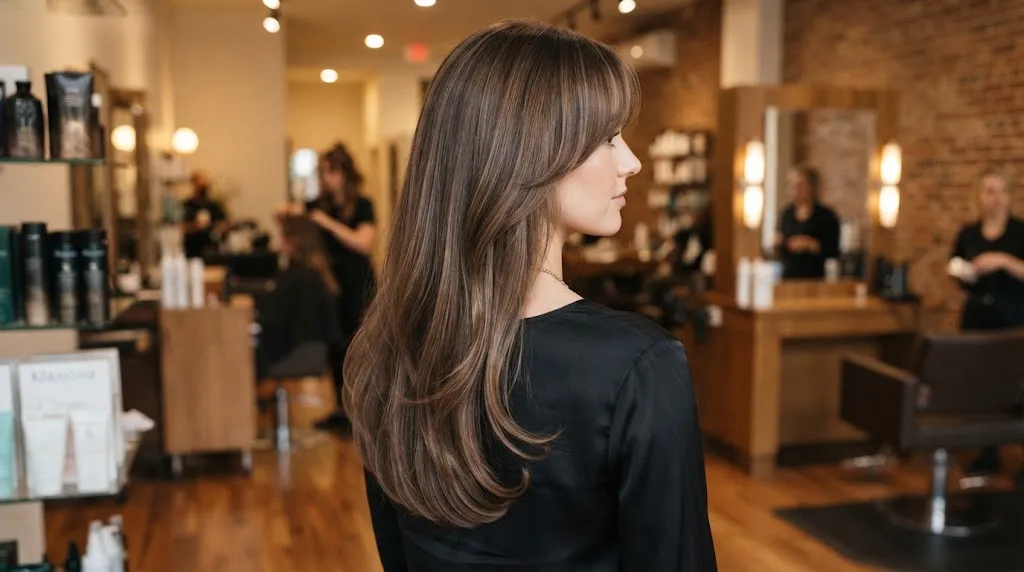
Pairing a standard U-cut with curtain bangs frames the face by sweeping outward from a center part and blending down into the length. The fringe adds soft, retro-inspired structure around the cheekbones, balancing the sweeping curve of the back hemline. This combination flatters round and square face shapes by drawing the eye downward and elongating the features. Plan on quick micro-trims for the fringe every three to four weeks to keep the bangs out of your eyes while letting the main U-shaped length grow out.
Mid-Length U-Cut
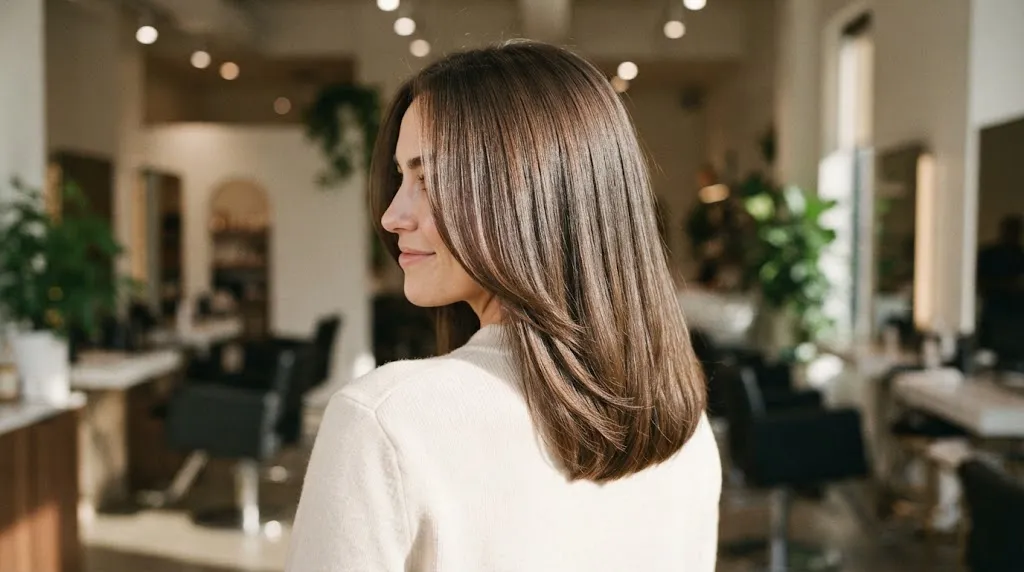
A mid-length U-cut adapts the signature curved perimeter for collarbone-grazing or shoulder-length strands, offering a refreshing alternative to traditional bobs as detailed in our guide to medium hair styles for women. This length hits the sweet spot for easy styling, holding heat curls remarkably well while still fitting into a quick ponytail. It provides instant bounce and texture to limp hair types without requiring extensive daily styling time.
Common U-Cut Problems (And How to Avoid Them)
"Will Layers Make My Hair Look Thinner?" — why it happens and how to prevent it
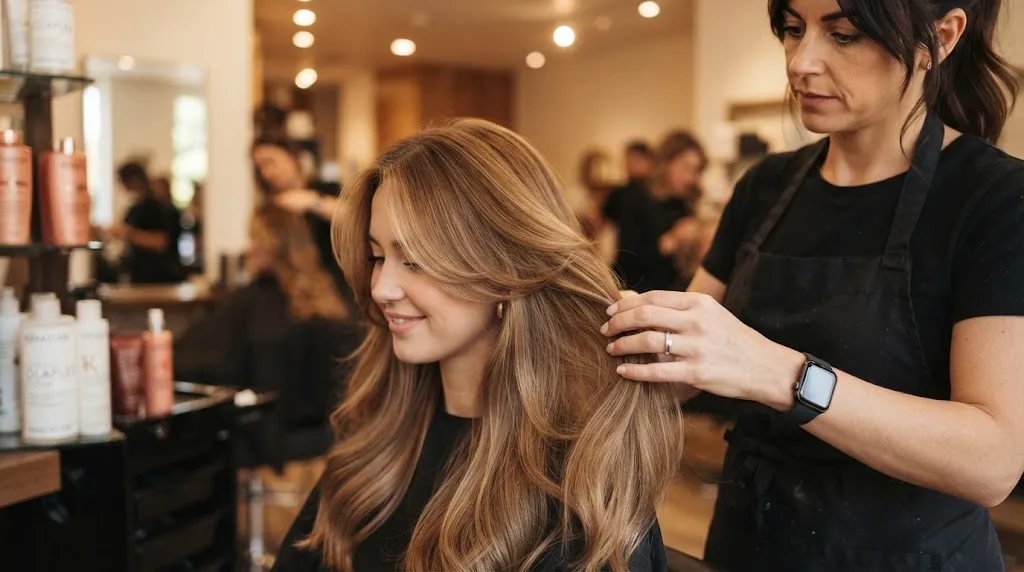
Layers can make long hair look thinner if the stylist takes away too much density from the ends or starts cutting too high up the shaft. When weight is removed incorrectly, the bottom perimeter loses its solid line, leaving the ends looking wispy and stringy rather than full and healthy.
Keep the transition gradual: Ask your stylist to keep the shortest layer at least chin-length or lower, ensuring the bulk of your hair retains its thickness.
Avoid aggressive thinning shears: Request blunt point-cutting instead of texturizing shears, which can create a hollow, see-through look on fine hair textures.
Maintain blunt ends: Ensure the U-shape curve is cut with sharp shears to keep the baseline dense, letting the upward curve do the work of creating shape.
What to Say So Your Stylist Doesn't Cut Too Short (long layers vs short layers wording fix)
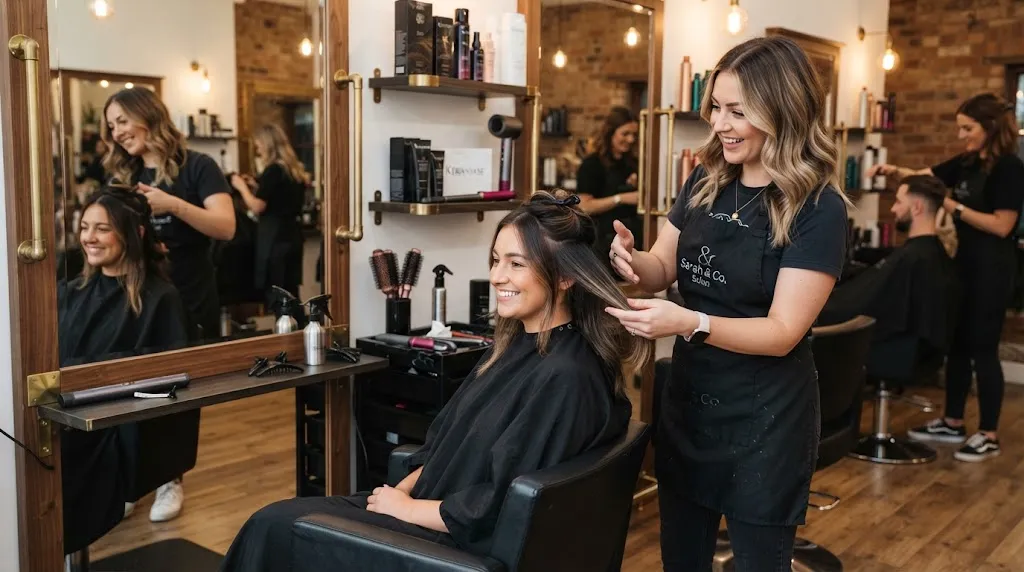
Miscommunication is the primary reason clients leave the salon with shorter hair than intended, usually because terms like “layers” mean different things to different people. Walk in armed with precise terminology that removes ambiguity and sets firm boundaries on length.
Use precise wording: Tell your stylist, “I want long, sweeping layers that start well below the collarbone, and I want to keep all of my overall length intact at the back.”
Define the shortest piece: Physically point to where you want the face-framing or top layer to fall—such as the collarbone or chest—rather than leaving it up to interpretation.
Request a conservative first pass: Ask for the layers to be cut slightly longer than you think you want them; you can always ask to take more off, but you cannot glue it back on
U-Cut Looks Uneven or Choppy — common causes
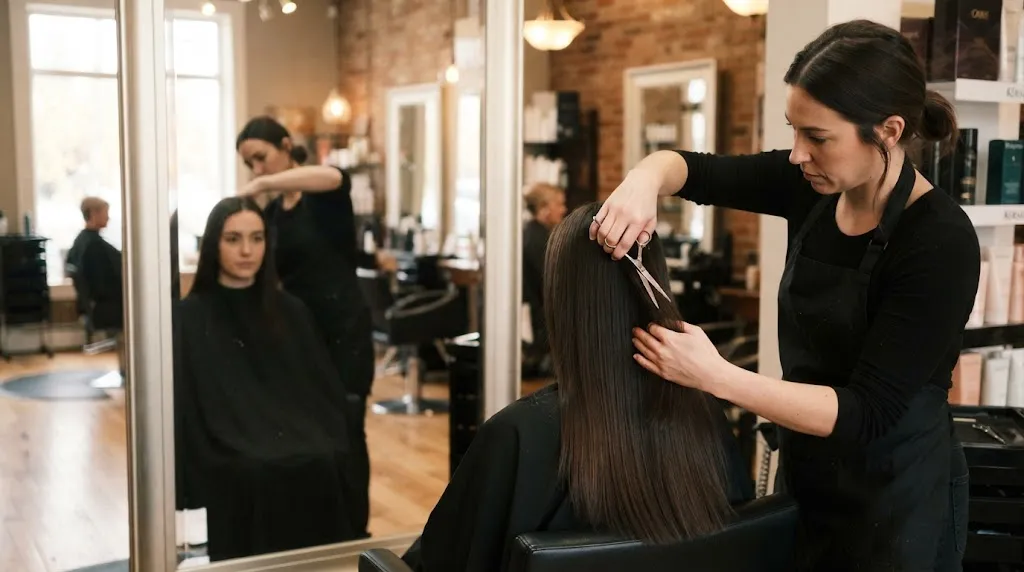
An uneven or choppy U-cut typically happens when the hair is cut while dry or when the stylist freehands the curved perimeter without checking the symmetry against a center guide. Because long hair naturally bends around the shoulders and back, failing to check the balance in a mirror from multiple angles leads to jagged transitions.
Cutting hair while dry: Dry cutting can leave jagged lines if the shears aren’t razor-sharp or if the hair has kinks from hair ties. Always insist on wet cutting for the initial perimeter and shape.
Rushing the guide: A choppy look occurs when the stylist pulls sections at inconsistent elevations instead of pulling every section back to a stationary center guideline.
Ignoring natural texture: If you have wavy or curly hair, cutting it straight across without accounting for spring-back results in an uneven hemline once the hair dries and bounces up.
Why Choosing a Specialist Stylist (Not a Walk-In) Matters for This Cut

A precise U-cut requires clean geometry, steady hand-eye coordination for curved lines, and an understanding of how weight distribution affects long hair. Quick-service walk-in salons often rely on fast, blunt or V-shaped techniques that can turn a soft, graceful U-shape into a harsh triangle.
Technical precision: A stylist who specializes in long-haired clients knows how to blend the side layers seamlessly into the back curve without creating a shelf or step.
Tailored consultation: An experienced stylist evaluates your face shape, hair density, and growth patterns before making the first snip, ensuring the depth of the “U” flatters your frame.
Long-term growth management: A specialist cuts with your grow-out phase in mind, meaning the shape will continue to look intentional and well-balanced even four to six months down the road.
Can You Cut a U-Shape at Home?
Cutting a U-shape haircut on long hair at home is possible if you have steady hands, sharp shears, and good mirror visibility, though achieving a balanced, symmetrical curve requires patience since you cannot directly see the back of your head. The main challenge lies in maintaining a smooth, continuous gradient from the shorter front face-framing pieces down to the deep point in the back without accidentally creating choppy steps or a blunt V-shape.
Tools You'll Need
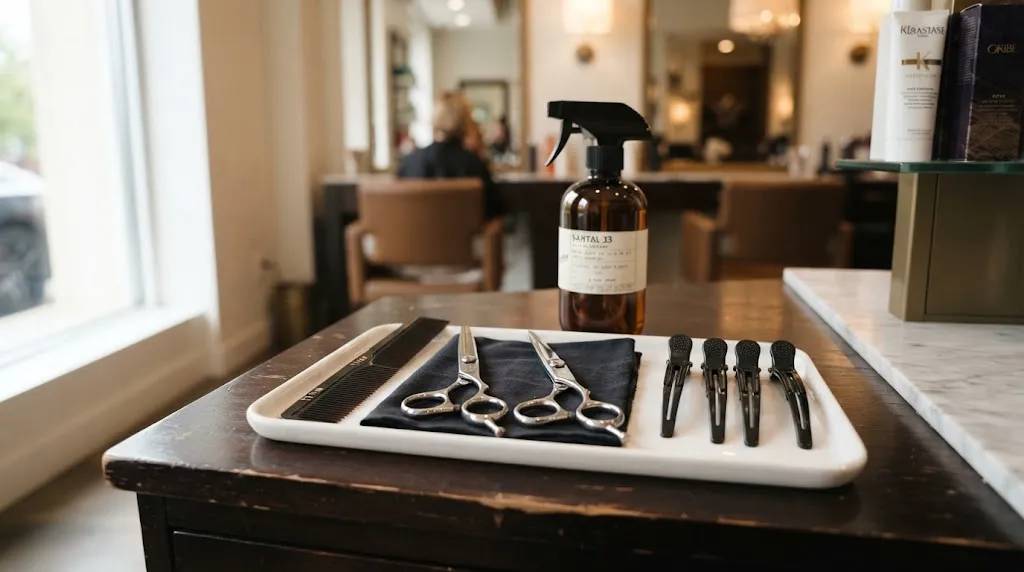
Professional hair cutting shears: Household scissors bend and fray hair shafts, leading to split ends; use dedicated shears meant for hair.
Sectioning clips: Large duckbill or alligator clips keep dense long hair organized while you work on individual sections.
Fine-tooth tail comb: Essential for clean, precise parting and checking tension while combing hair straight.
Two mirrors: A primary wall mirror paired with a hand-held or adjustable tri-fold mirror allows you to clearly check the back curve.
Spray bottle: Clean water keeps the hair evenly damp, which ensures precise tension and cutting lines.
Step-by-Step Process

Parting: Start with clean, damp hair and create a straight center part from your forehead all the way down to the nape of your neck, dividing your hair into two equal left and right halves. Bring both sections forward over your shoulders so you can easily see them and clip away the upper layers if your hair is thick, working from the bottom up.
Initial cut: Pull a small guide section from the front down to your desired length, slide your fingers down to create tension, and cut straight across. Work your way toward the back by taking thin, overlapping subsections from each side, angling your scissors slightly upward to follow a gentle, sweeping downward arc toward the spine.
Softening edges: Hold your shears vertically (point cutting) and snip lightly into the ends of the hair rather than cutting straight across. This technique diffuses harsh lines, creates softer movement, and helps the individual layers blend seamlessly into the U-shaped contour.
Removing bulk: Take vertical sections near the mid-lengths and ends, then use thinning shears or slide-cutting techniques sparingly to release internal weight. Focus primarily on the lower half of long hair to prevent the ends from looking heavy or blocky while preserving top volume.
Salon vs. DIY — Which Should You Choose?

| Feature | DIY U-Cut | Salon Professional Cut |
|---|---|---|
| Cost | Free (one-time tool investment) | Moderate to high, depending on salon tier |
| Precision | Low to moderate; high risk of uneven back symmetry | High; expert eye for head shape, growth patterns, and balance |
| Time Investment | 45 to 60 minutes of careful maneuvering | 45 to 60 minutes in the chair |
| Risk Factor | High risk of over-shortening or choppy layers | Low; easy to reference a hair cutting style photo for exact customization |
How to Style a U-Cut
Step-by-Step Layer Blending & Finishing
Watch directly on the page to see how the layers blend and move naturally.
Styling a U-cut comes down to highlighting the curved, cascading shape at the back and the soft pieces framing the face, rather than fighting the natural fall of the layers. Watch this step-by-step styling breakdown showing how the layers blend when styled to see these techniques in action on long hair.
Curling Iron Method (barrel size, technique)
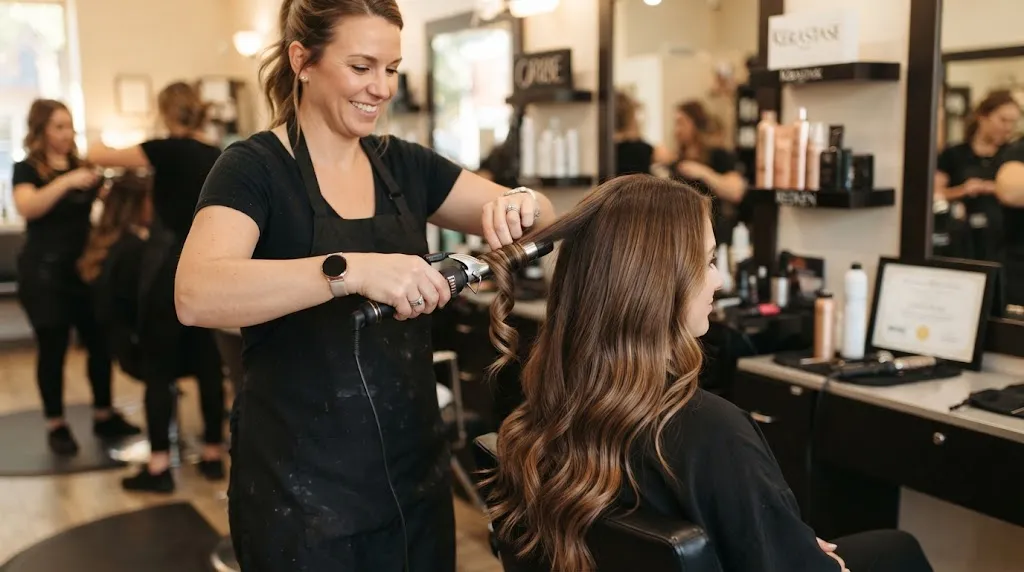
A 1.25-inch or 1.5-inch curling iron creates the ideal polished, bouncy wave for a U-shaped cut. Grab a 1.25-inch barrel if your hair struggles to hold a curl, or a 1.5-inch iron if you want loose, Hollywood-style bends.
Take medium-sized vertical sections, starting from the nape and working upward.
Clamp the hair mid-shaft, leaving the ends out for a modern, lived-in finish, and curl away from the face.
For the front framing pieces, roll the iron backward away from your cheekbones to accentuate the curved shape.
Let the curls cool completely before gently running your fingers or a wide-tooth comb through them to marry the layered lengths together.
Blow-Dry Method (round brush technique)
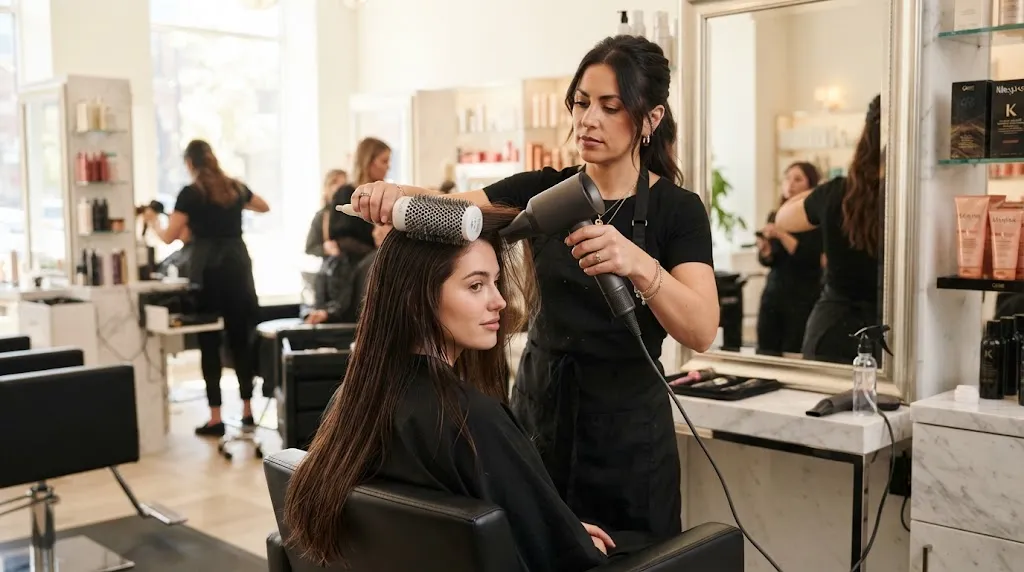
Achieving a salon-quality blowout on a U-cut requires a medium-to-large ceramic round brush (around 2 inches in diameter) to build volume and shape the ends inward.
Rough-dry your hair until it is about 80 percent dry, focusing on lifting the roots at the crown.
Working in horizontal sections from bottom to top, place the round brush under each section and pull downward while rolling the ends slightly inward toward your shoulders.
Direct the nozzle of the blow-dryer downward along the hair shaft to seal the cuticle and maximize shine.
Finish the front face-framing layers by over-directing them forward and rolling the brush back away from your face for an effortless sweep.
Low-Maintenance Air-Dry Styling

Air-drying a U-cut works best when you want to highlight your natural texture while keeping the curved perimeter looking neat.
Apply a lightweight leave-in conditioner or smoothing cream to damp hair, focusing mid-length to ends.
Scrunch the hair gently with your hands to encourage any natural wave pattern.
Twist the front face-framing pieces slightly away from your face while damp so they dry into a flattering shape.
Avoid touching the hair too much as it dries to prevent frizz, and scrunch in a tiny drop of lightweight hair oil once fully dry to define the tips.
How Much Does a U-Cut Cost?
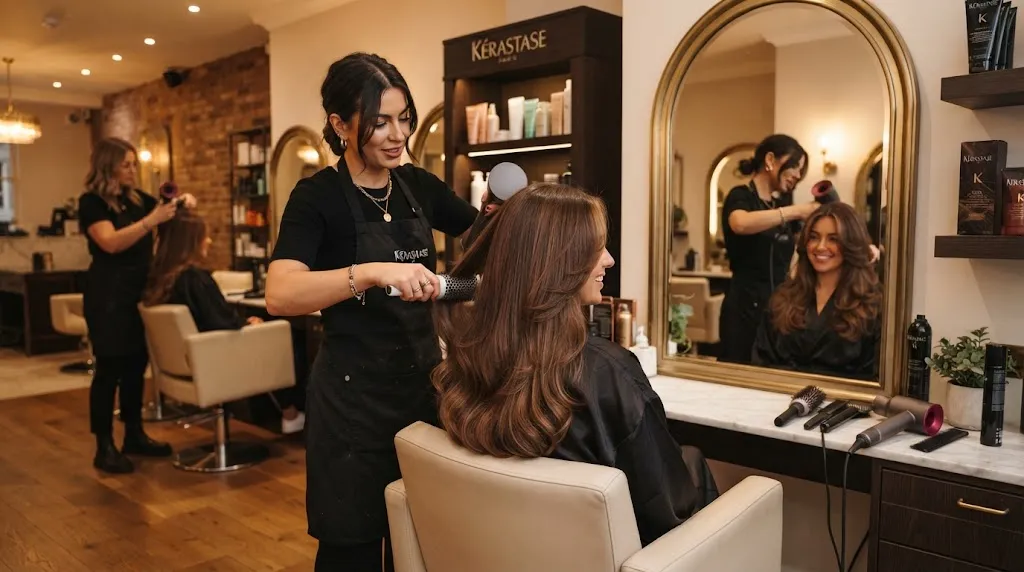
Getting a U-cut for long hair typically ranges from $30 at neighborhood salons to over $150 at luxury establishments, depending entirely on the tier of the salon and the expertise of your stylist. Because a proper U-shape requires precise curved point-cutting to maintain seamless blending down the back, prices shift across different market segments.
| Salon Tier | Approximate Price Range | What It Typically Includes |
|---|---|---|
| Budget Salon | $25 – $45 | Basic wet or dry cut, quick straight trim, minimal styling. |
| Mid-Range Salon | $60 – $100 | Consultation, precision U-cut technique, wash, and a standard blowout. |
| High-End / Luxury Salon | $120 – $250+ | Detailed structural consultation, custom layering, premium wash, and professional styling finish. |
Several distinct factors influence the final bill on your salon receipt. Hair length plays a primary role since extra-long or thick hair requires more time, product, and physical labor to section and shape cleanly. Adding internal or face-framing layers to your U-cut also increases the cost because it introduces advanced texturizing and structural blending work. Finally, check whether a professional blow-dry finish is bundled into the service or listed as an expensive add-on, as drying and styling long hair takes substantial salon time.
U-Cut Maintenance
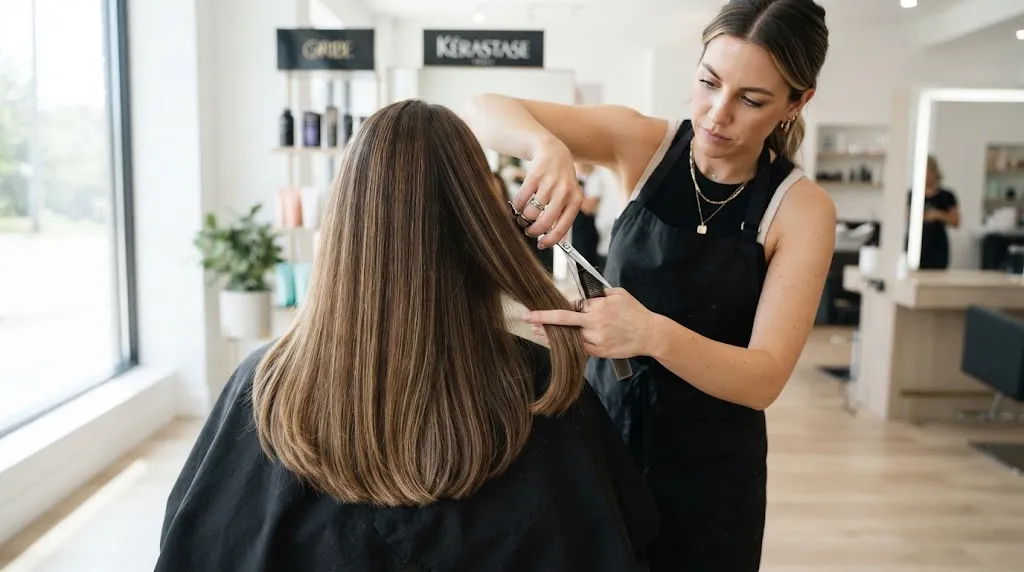
Maintaining a clean U-shape requires a trip to the salon every 6 to 8 weeks for a dusting or light trim. This schedule preserves the soft, curved perimeter at the bottom and prevents split ends from traveling up the hair shaft, which quickly dulls the signature cascading effect. Skipping trims past the two-month mark causes the lighter side layers to lose their definition, making the ends look thin and uneven.Over time, a U-cut grows out gracefully because the gradual taper eliminates the harsh blunt lines left by a straight-across cut. As the hair gains length, the curved shape softens into a more relaxed, blended silhouette rather than looking blocky or heavy at the bottom. This forgiving grow-out phase makes it a low-maintenance option for anyone trying to add length without committing to frequent restructuring cuts.
U-Cut Hair Questions & Answers
Is u cut good for long hair? ▼
Which is better, U or V cut? ▼
| Feature | U-Cut | V-Cut |
|---|---|---|
| Shape | Rounded, gentle curve resembling a horseshoe | Pointed, dramatic taper resembling the letter V |
| Volume at Ends | Maintains fuller, healthier-looking ends | Results in very thin, wispy ends at the bottom point |
| Versatility | Easier to pull into ponytails and updos without loose pieces falling out | Can make styling high ponytails difficult due to drastically shorter side layers |
What is the best cut for long hair? ▼
What is u cut hair? ▼
Is u cut good for fine hair? ▼
How to style u cut hair? ▼
What haircut makes you look 10 years younger? ▼
What haircut is trending for 2026? ▼
Is u cut good for men? ▼
Final Verdict
The U-cut remains the gold standard for anyone with long hair who wants movement, shape, and easy maintenance without sacrificing precious length. It suits those tired of heavy, blunt ends and works exceptionally well with natural waves or voluminous blowouts. Book your next salon appointment with a stylist experienced in precision dry-cutting to ensure your curved hemline matches your natural growth pattern.