
Wedding Hairstyles: The Complete Guide to Finding Your Perfect Bridal Look
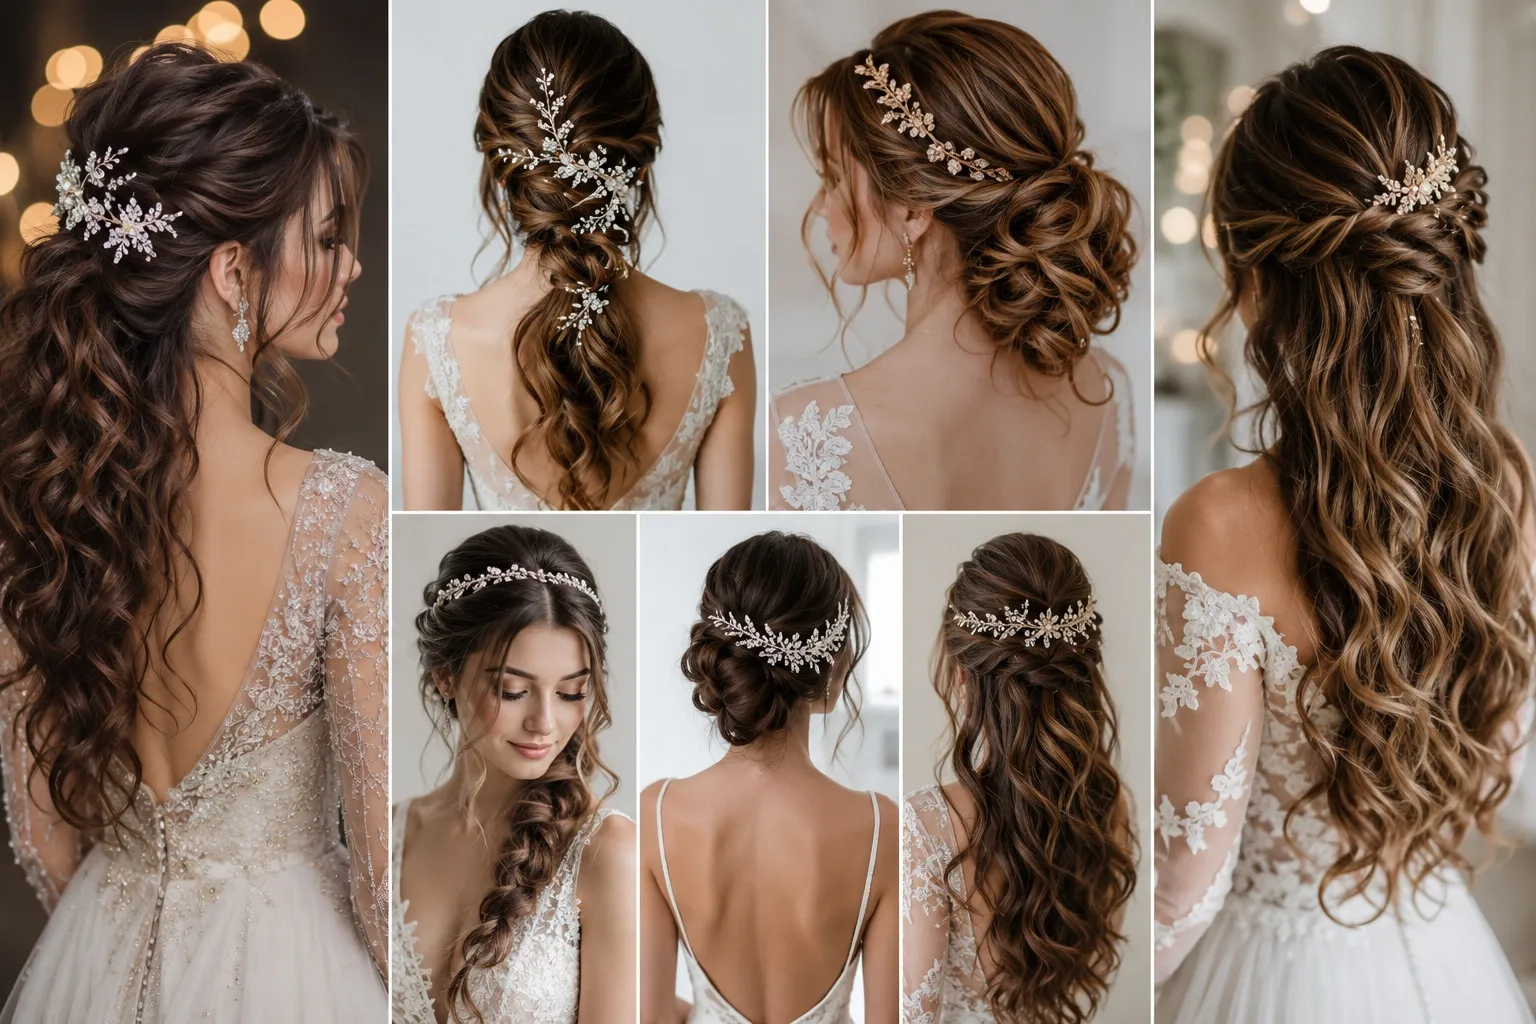
Locking in your wedding hairstyles is easily one of the most exciting—yet deceptively stressful—parts of your bridal beauty countdown. While Pinterest makes every cascading bohemian braid look effortless, real brides on forums like Reddit often share a harsher reality: hair extension tracks peeking through under harsh venue lighting, or curls dropping before the first toast. Finding a look that survives the dance floor requires matching your personal aesthetic with your specific hair texture, weather conditions, and gown neckline. This comprehensive playbook is designed to cut through the overwhelming inspiration boards and give you actionable, stylist-backed blueprints for your big day.
How to Choose the Right Wedding Hairstyle
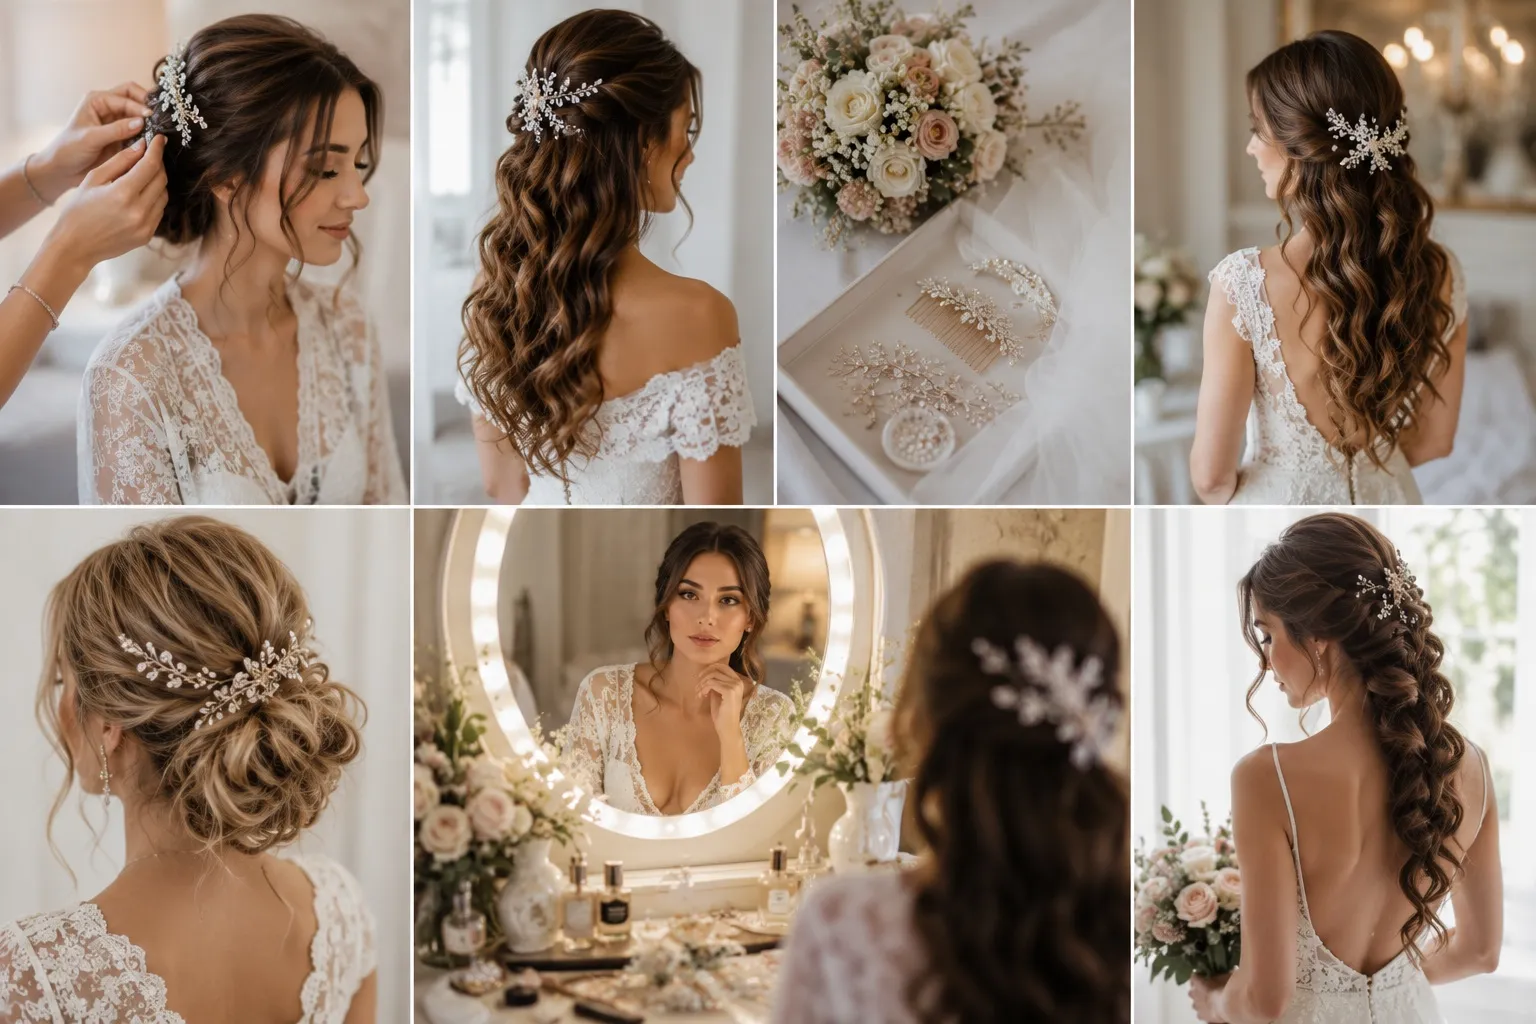
Finding the perfect wedding hairstyle is less about scrolling through endless Pinterest boards and more about understanding how your hair interacts with your entire bridal look. Before you fall in love with an intricate updo or effortless beach waves, you need a solid decision framework to ensure your choice lasts from the first photo to the final dance.
Start with Your Natural Canvas: Length & Texture
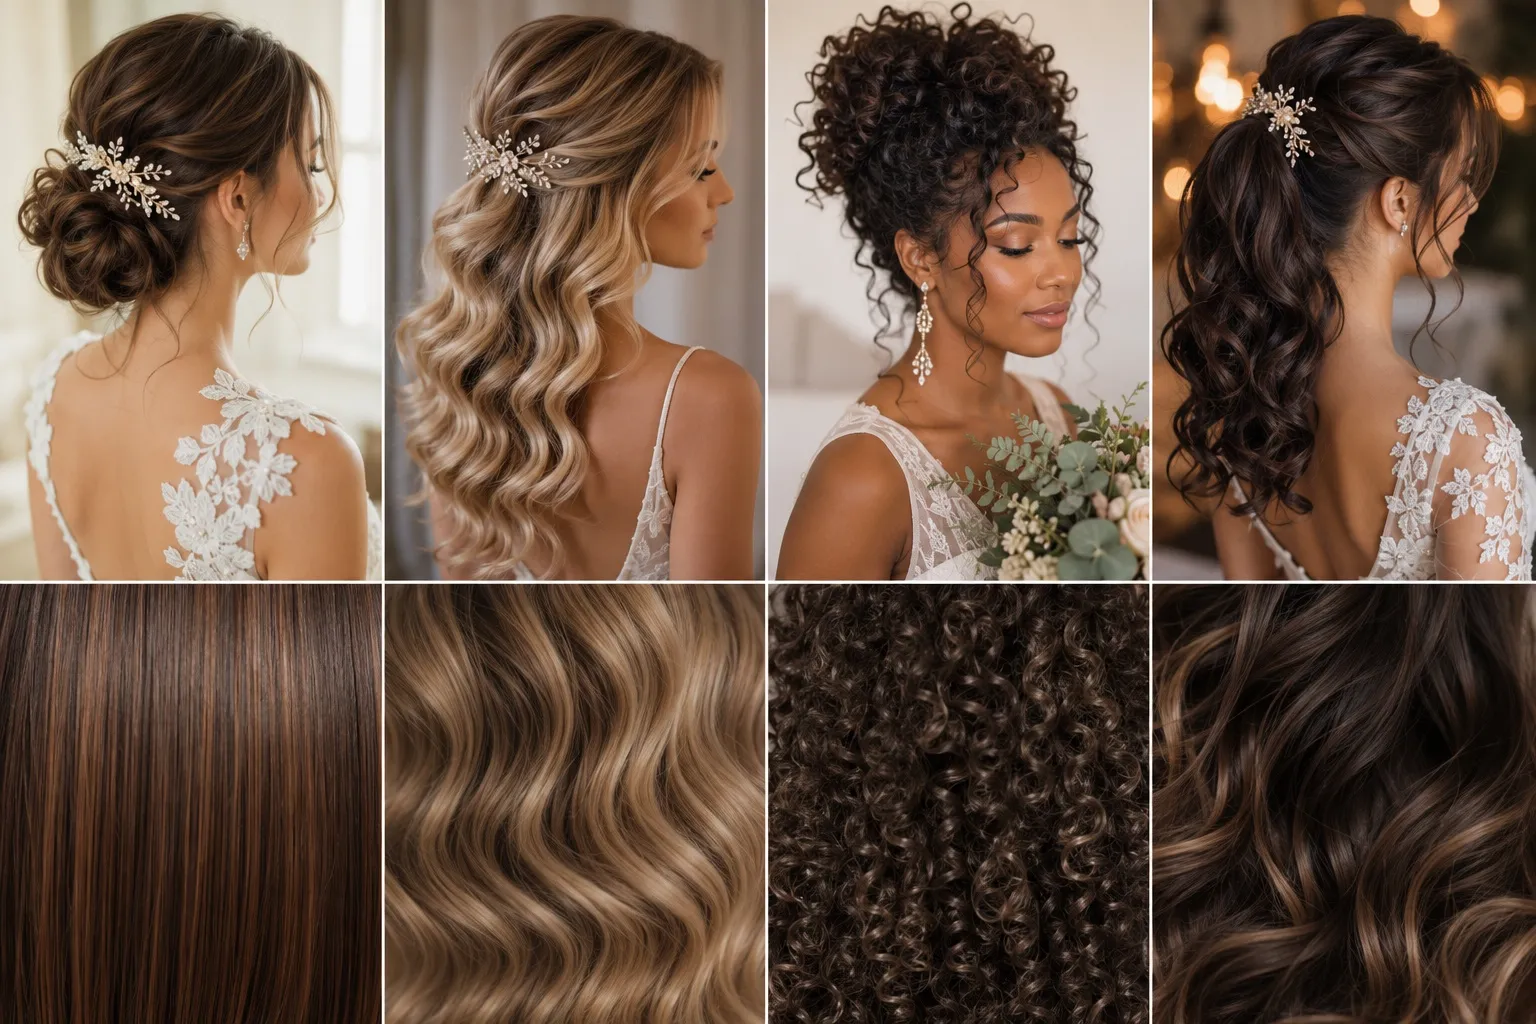
Your hair’s natural behavior dictates what it can realistically do for an eight-to-twelve-hour day. If you have fine, pin-straight hair, forcing it into voluminous Hollywood waves will likely leave you with flat strands by the reception—unless you invest in high-quality clip-in extensions for structural support. Coarse, curly textures hold structure beautifully for textured buns or defined twists, but fighting humidity with a sleek blowout requires heavy product layering and a backup plan. Work with your texture, not against it, to avoid midday panic.
Match Your Dress Neckline & Silhouette
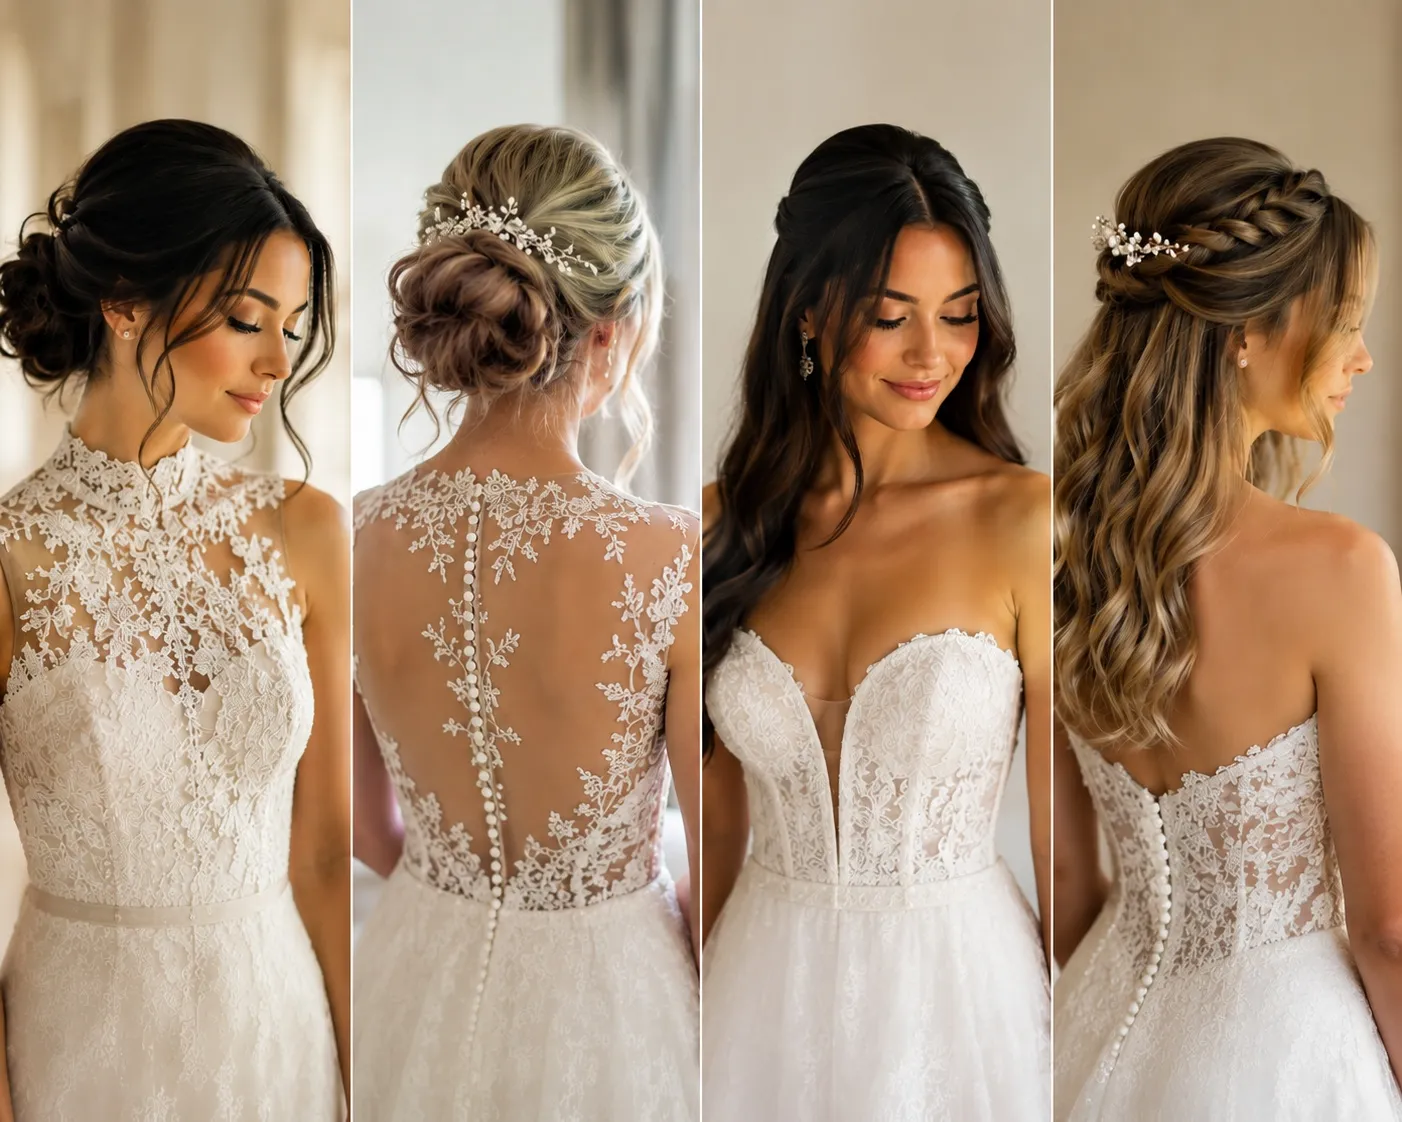
Your gown and your hair should never compete for attention. As a rule of thumb, high necklines, illusion lace, and intricate back details beg for an updo to showcase the craftsmanship of the dress. If you are wearing a strapless or plunging sweetheart neckline, keeping your hair down or in a half-up style beautifully frames your collarbone and balances the open skin.
Factor in the Veil and Hair Accessories
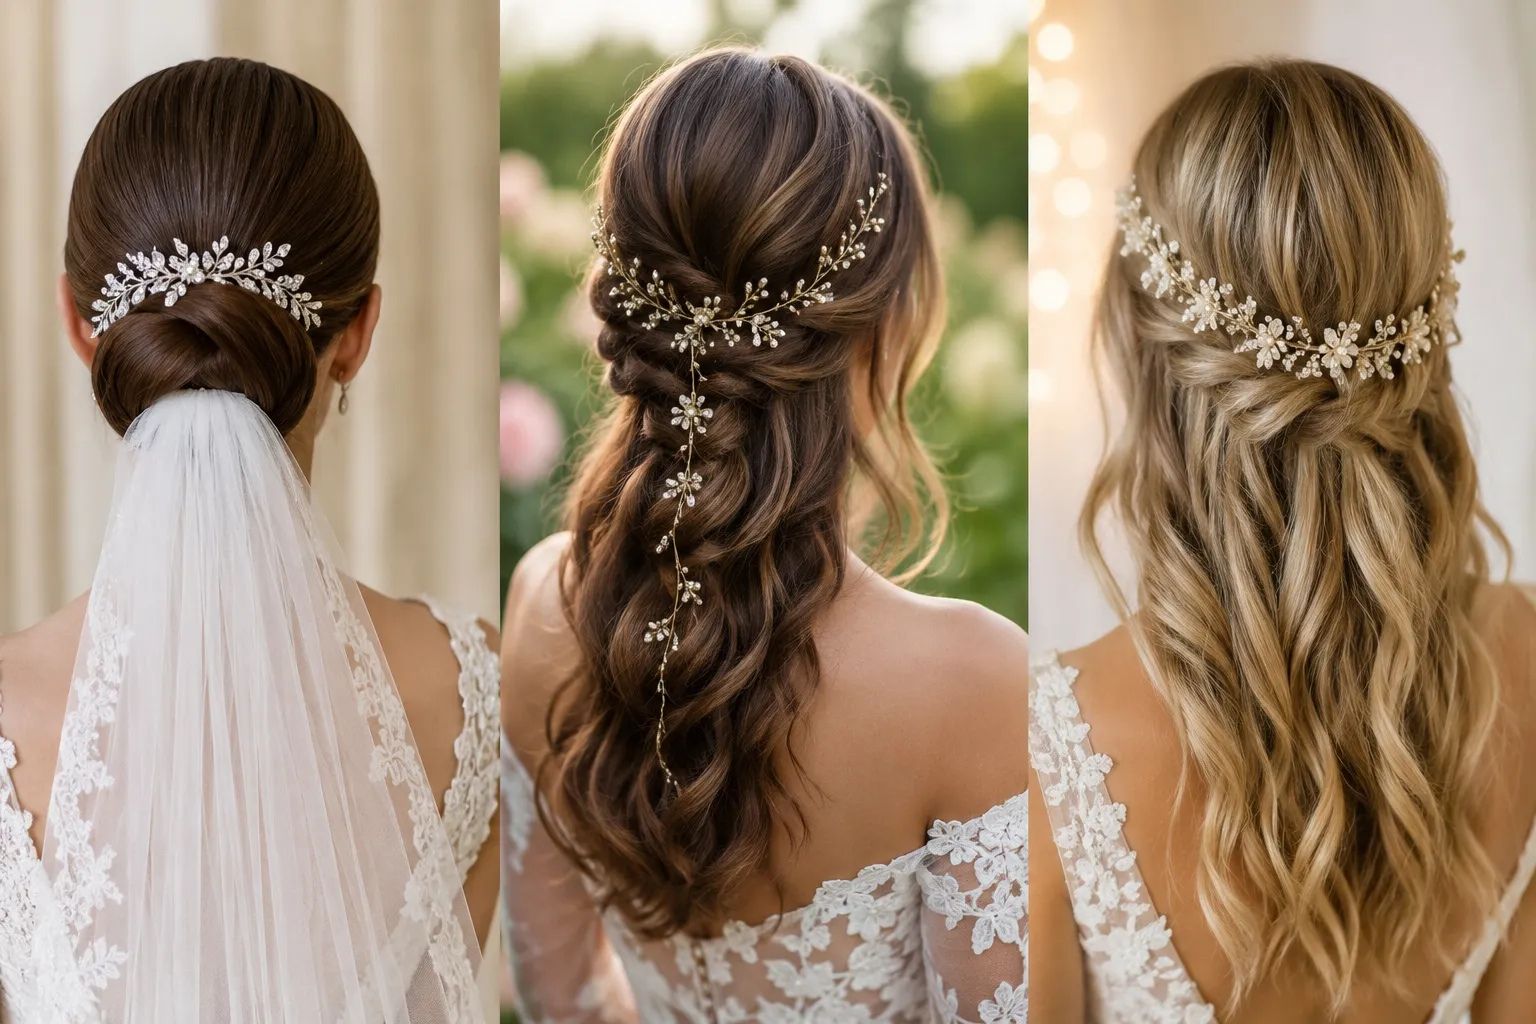
Never buy your hair accessories before deciding on your overall vibe. A heavy cathedral veil requires a sturdy foundation, like a low, tightly pinned chignon, to keep it from pulling your scalp backward. If you plan to wear a delicate halo or a delicate vine, a softer, bohemian half-up style offers the perfect weaving anchor.
Plan for Venue Variables and Weather
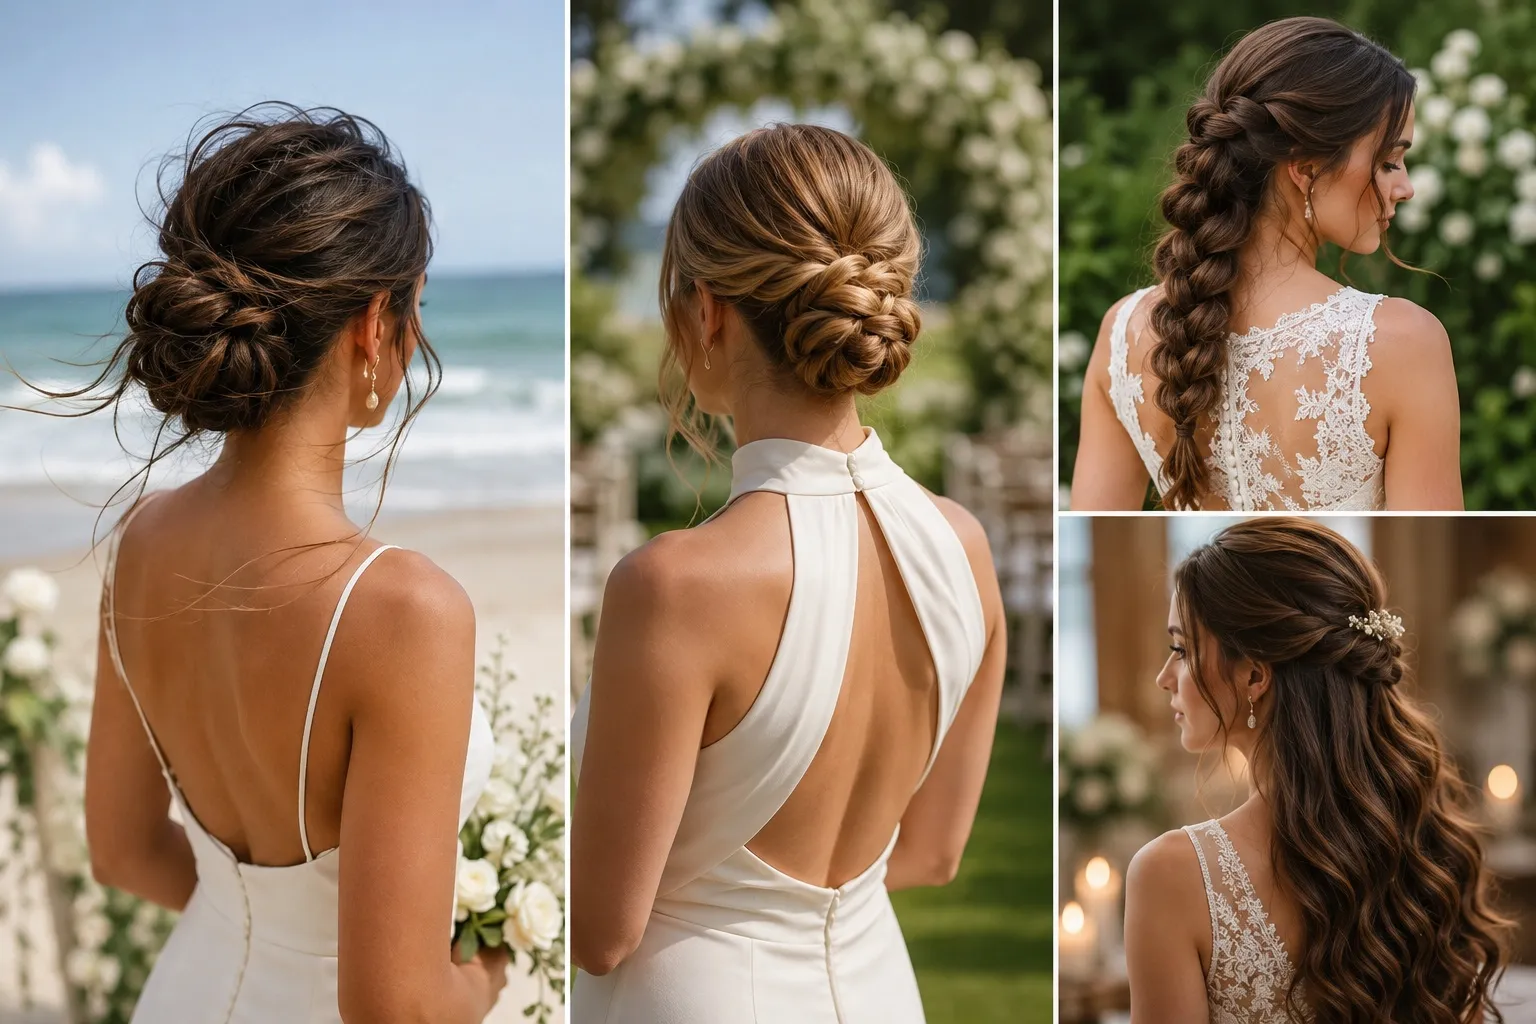
An outdoor ceremony requires a strategy. If you are marrying on a breezy beach or in a humid garden, a sleek, down style will likely frizz or stick to your lip gloss. Opt for a secure updo or a structured braid instead. Save the loose, flowing styles for climate-controlled indoor ballrooms or crisp autumn days where the elements won’t disrupt your look.
Consider a Transition: One Look vs. Two
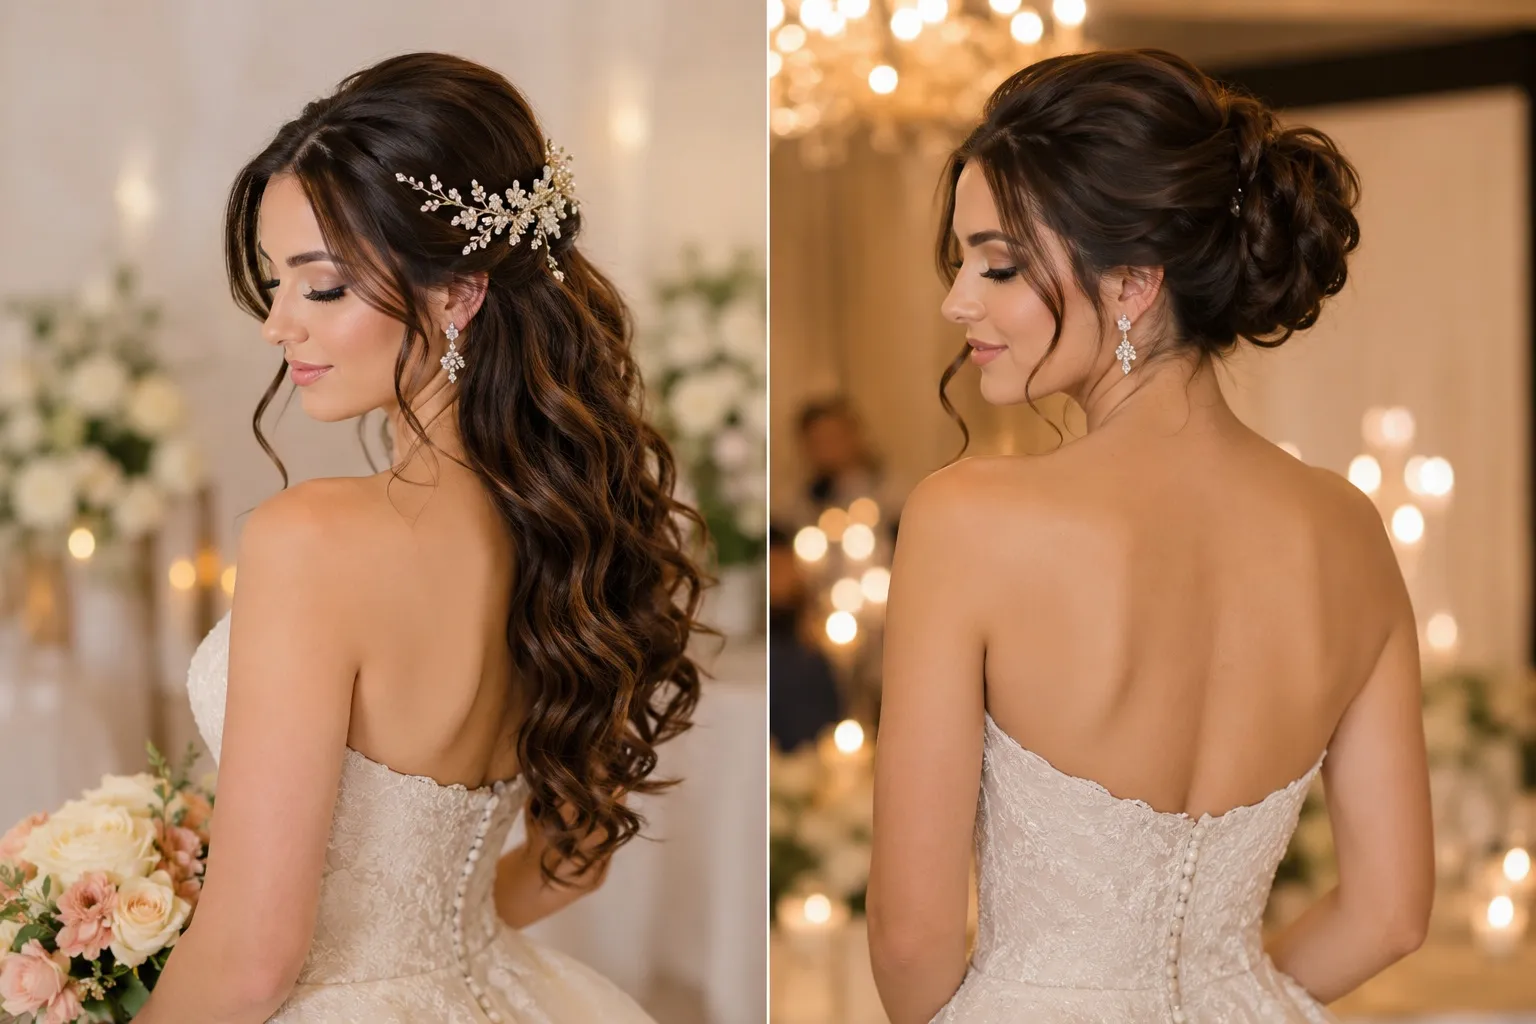
Many modern brides want the best of both worlds—down and romantic for the ceremony, then up and out of the face for the party. While we dive deep into the logistics of transitioning your look later in this guide, keep in mind that a two-look plan requires a stylist on retainer for touch-ups and a hair texture that handles manipulation without losing its shine.
Wedding Hairstyles by Hair Length
Choosing the right look starts with embracing your current length. Instead of fighting your hair’s natural tendencies or forcing it into a style that requires a pound of extensions, working with your canvas ensures your look stays secure from the first photo to the last dance.
Long Hair — loose waves, half-up half-down, low bun, braided styles
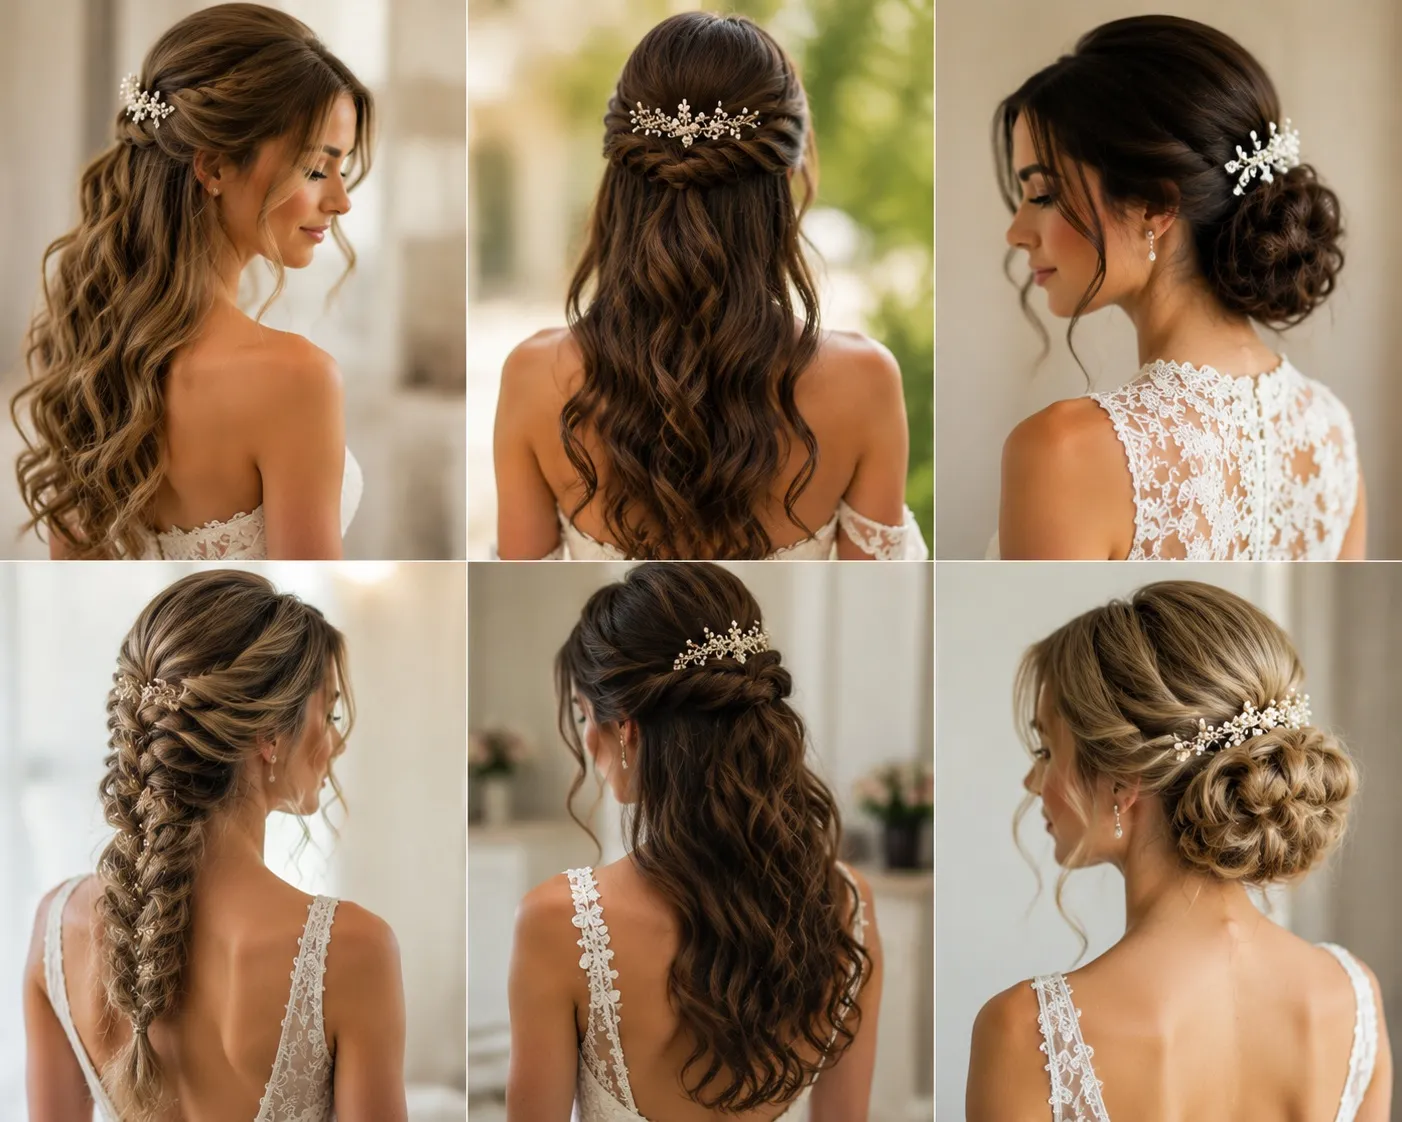
Long hair offers incredible versatility, but its biggest enemy on your wedding day is weight. If you opt for Hollywood waves or loose, romantic curls, keep in mind that gravity will pull them down over eight hours. A pro tip most guides miss: have your stylist use a texturizing liquid prep spray before blow-drying, which builds an internal scaffolding to keep those heavy waves from falling flat before the reception even starts.
For a style that survives the dance floor without constant touch-ups, a half-up, half-down look bridges the gap between glamorous and practical. Securing the crown section creates an anchor point for your veil while keeping hair out of your lip gloss during outdoor photos. If you prefer an updo, a low bun or a thick, multi-strand bohemian braid will distribute the weight of your hair evenly across your neck, preventing the midday headache that tight, high-swept styles often cause.
Medium Hair — blowout waves, twisted updo, low chignon
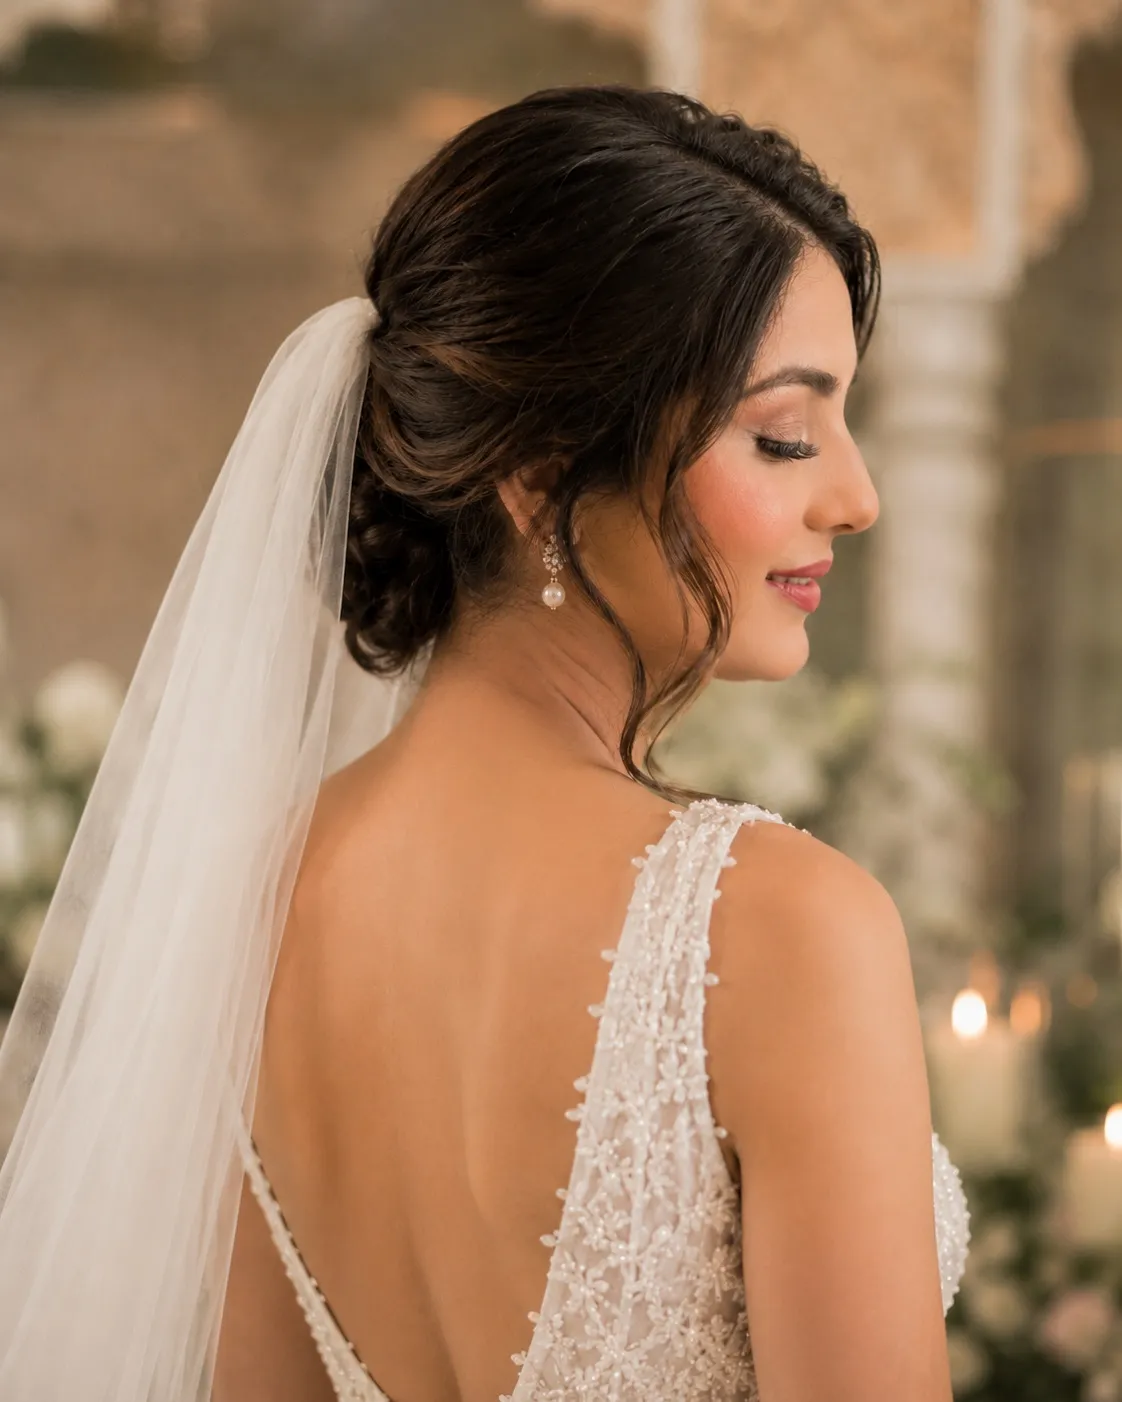
Medium-length hair—falling anywhere from the collarbone to the shoulder blades—is secretly the easiest length to style. You have enough length to create beautiful dimension without the heavy bulk that makes updos collapse. A bouncy, red-carpet blowout with flipped ends offers a classic, polished vibe that feels lightweight and moves naturally as you walk down the aisle.
If you want your hair fully up, a twisted updo or a structured low chignon works beautifully with this length. Because your hair isn’t excessively long, your stylist won’t have to tuck away massive amounts of excess ends, resulting in a cleaner, more secure silhouette. To give a chignon a modern, airy feel, ask your stylist to leave out a few face-framing pieces and curl them away from your face using a straightener rather than a curling iron for a softer, lived-in bend.
Short Hair — sleek pixie styling, finger waves, side-swept with clips
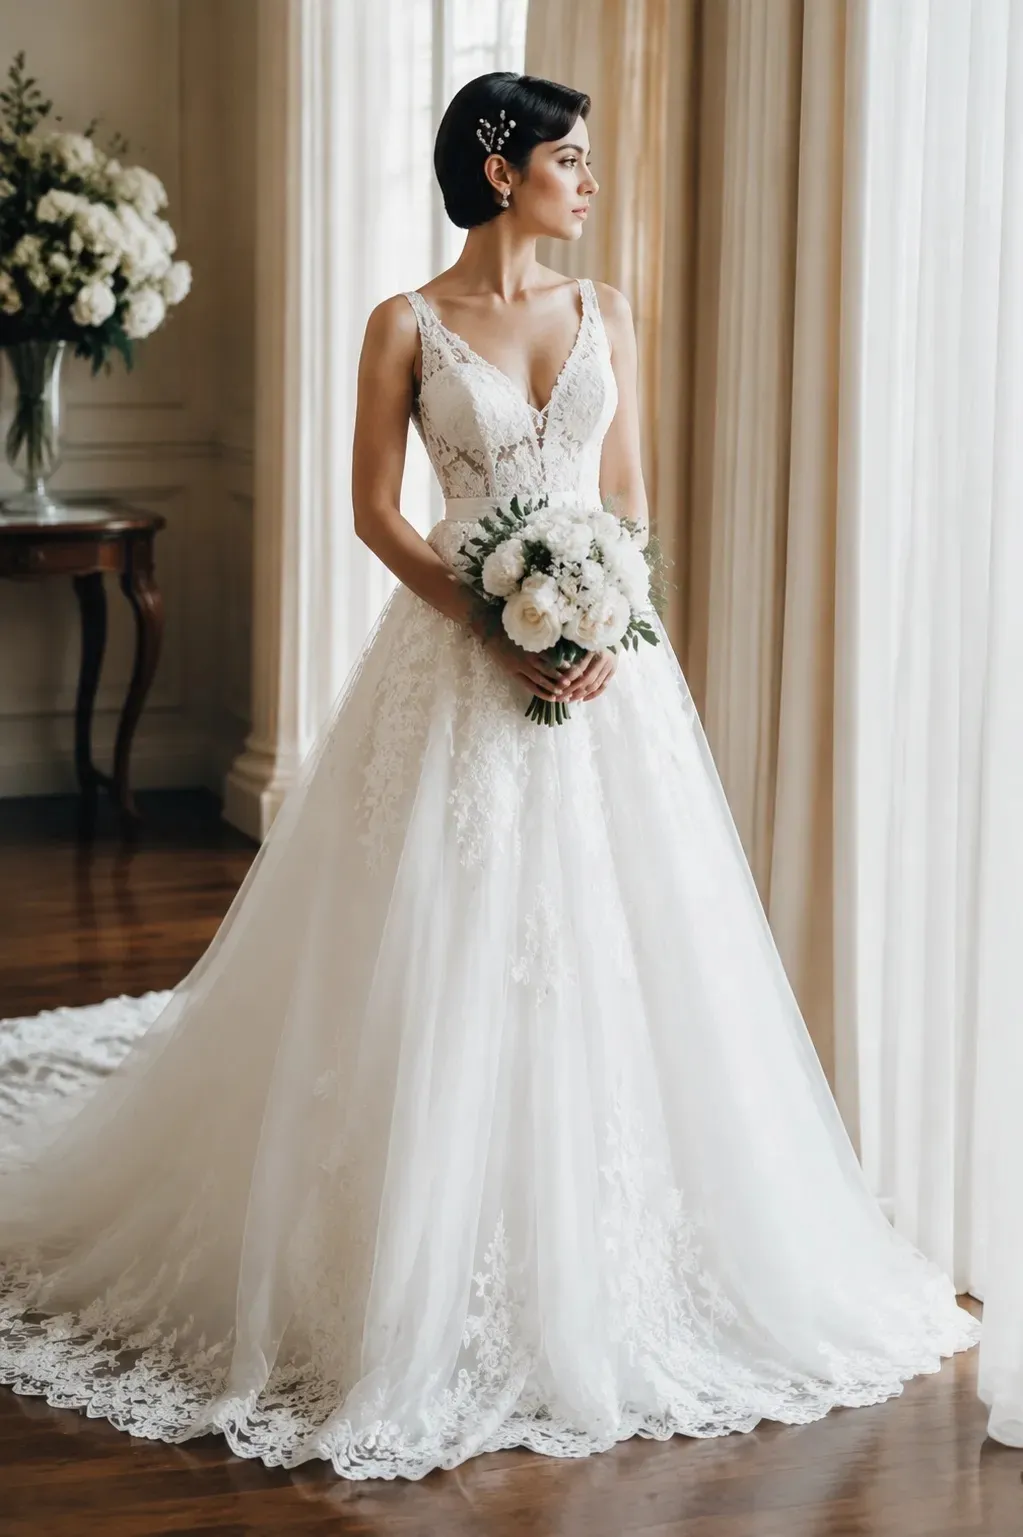
Short hair makes a powerful statement on your wedding day, proving you don’t need flowing locks to look deeply romantic. For ultra-short pixie cuts, the secret lies in high-shine texture. Instead of heavy waxes that make hair look matte or greasy in flash photography, use a lightweight pomade mixed with a drop of hair oil to create a sleek, sophisticated finish that catches the light beautifully.
If you are rocking a bob or a lob, vintage-inspired finger waves offer an elegant nod to Old Hollywood glamour while adding instant volume to finer textures. Alternatively, a deep side part with one side slicked back and secured with a cluster of pearl or rhinestone clips creates a stunning asymmetry. This technique not only adds a bridal touch to your everyday haircut but also ensures your face remains completely unobstructed in profile shots during the ceremony.
Bridal Bun Hairstyles — Which One Suits You
The classic bun is a bridal staple for a reason: it’s timeless, keeps you cool, and photographs impeccably from every angle. However, the placement and texture of your bun can completely alter your facial proportions, meaning the secret to the perfect bun lies in matching the silhouette to your specific face shape.
Low Bun
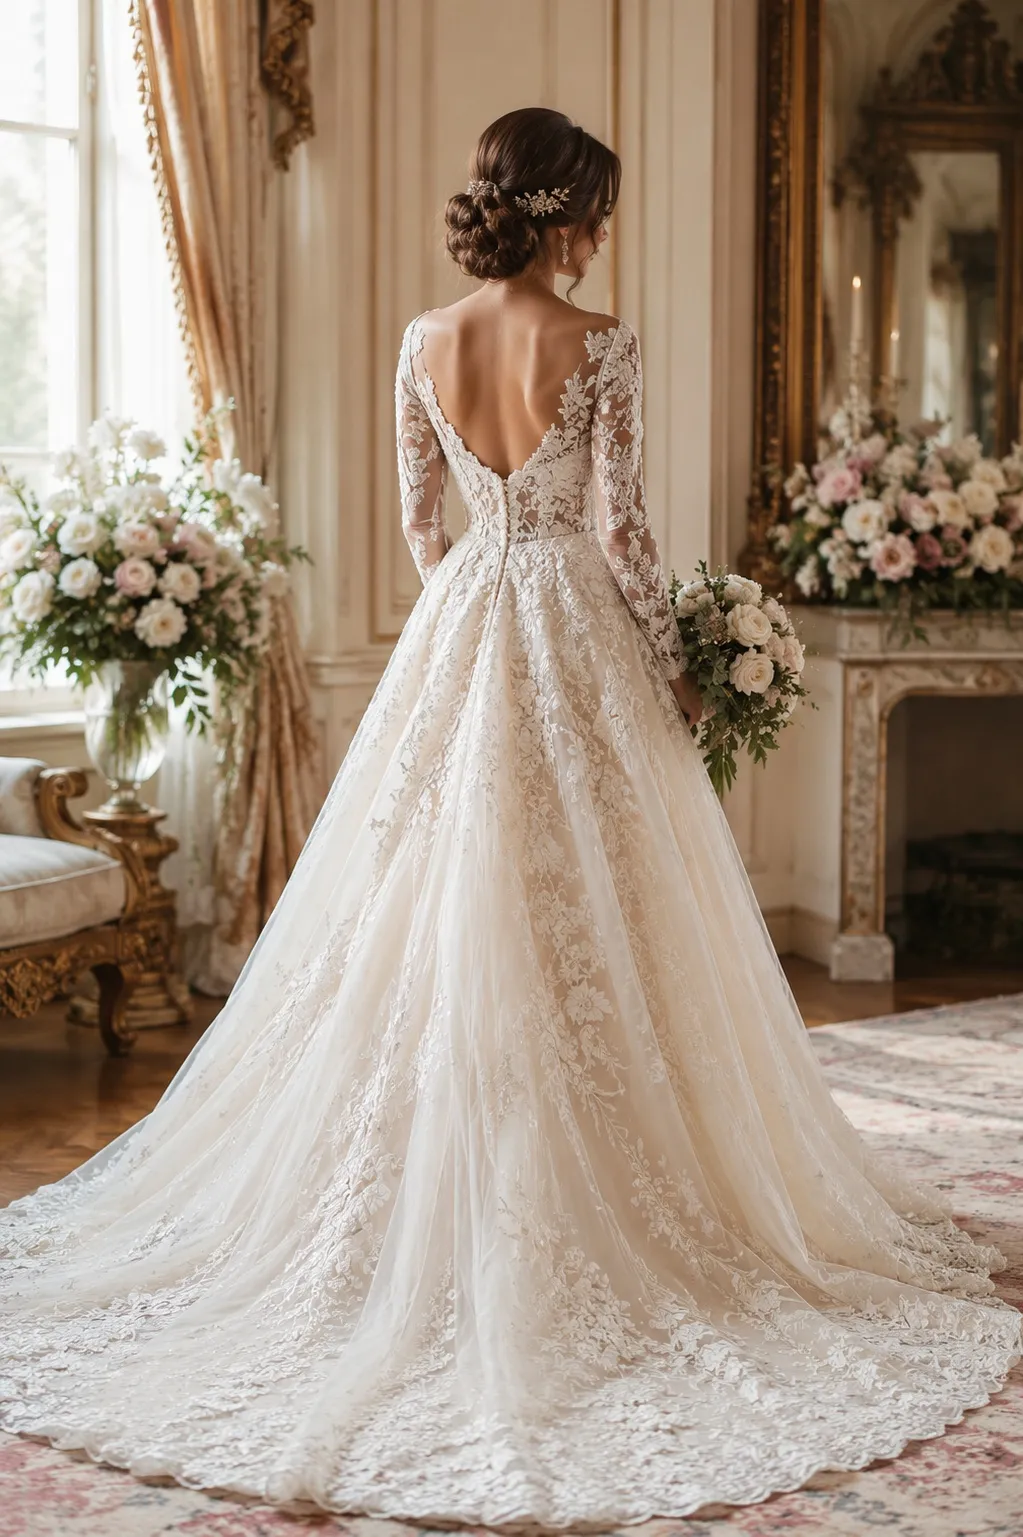
This ultra-elegant option sits right at the nape of the neck. It is the absolute best match for oval and heart-shaped faces because it grounds the look without adding unnecessary height to the top of the head. If you have a heart-shaped face, ask your stylist to leave a few soft, wispy tendrils around the jawline to beautifully balance a narrower chin.
Top-Knot
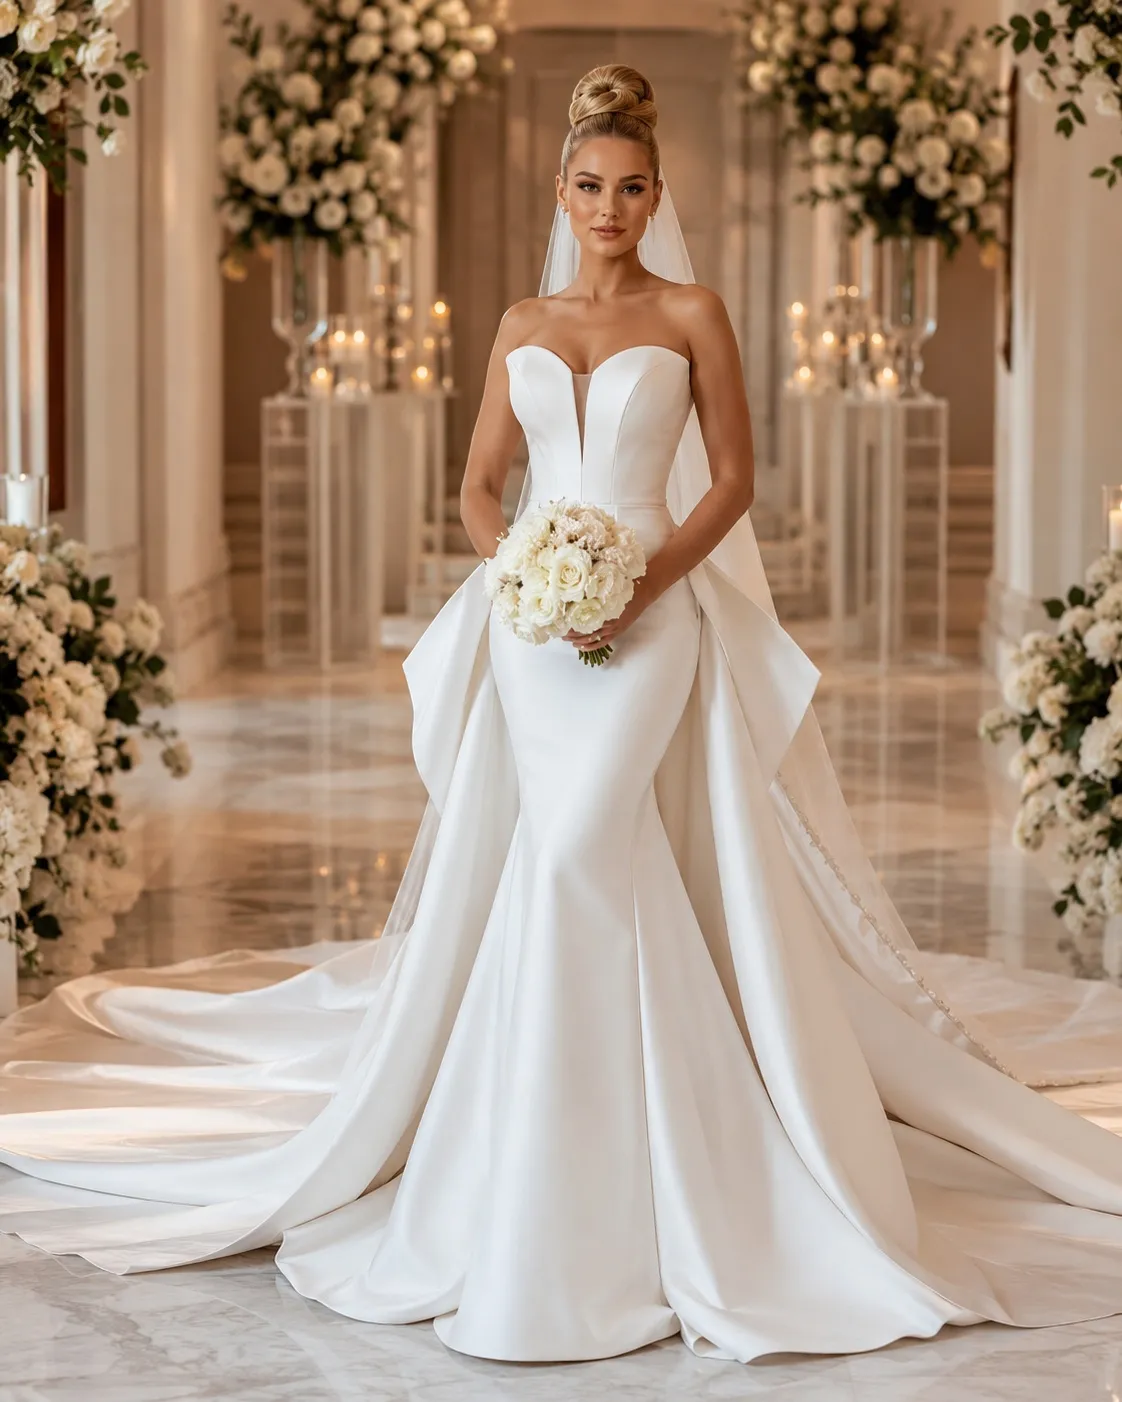
Sitting high on the crown, a sleek top-knot draws the eyes upward and creates an elongated silhouette. This makes it an exceptional choice for round face shapes, as it visually lengthens your face and adds a regal, statuesque element to your overall look.
Textured / Messy Bun
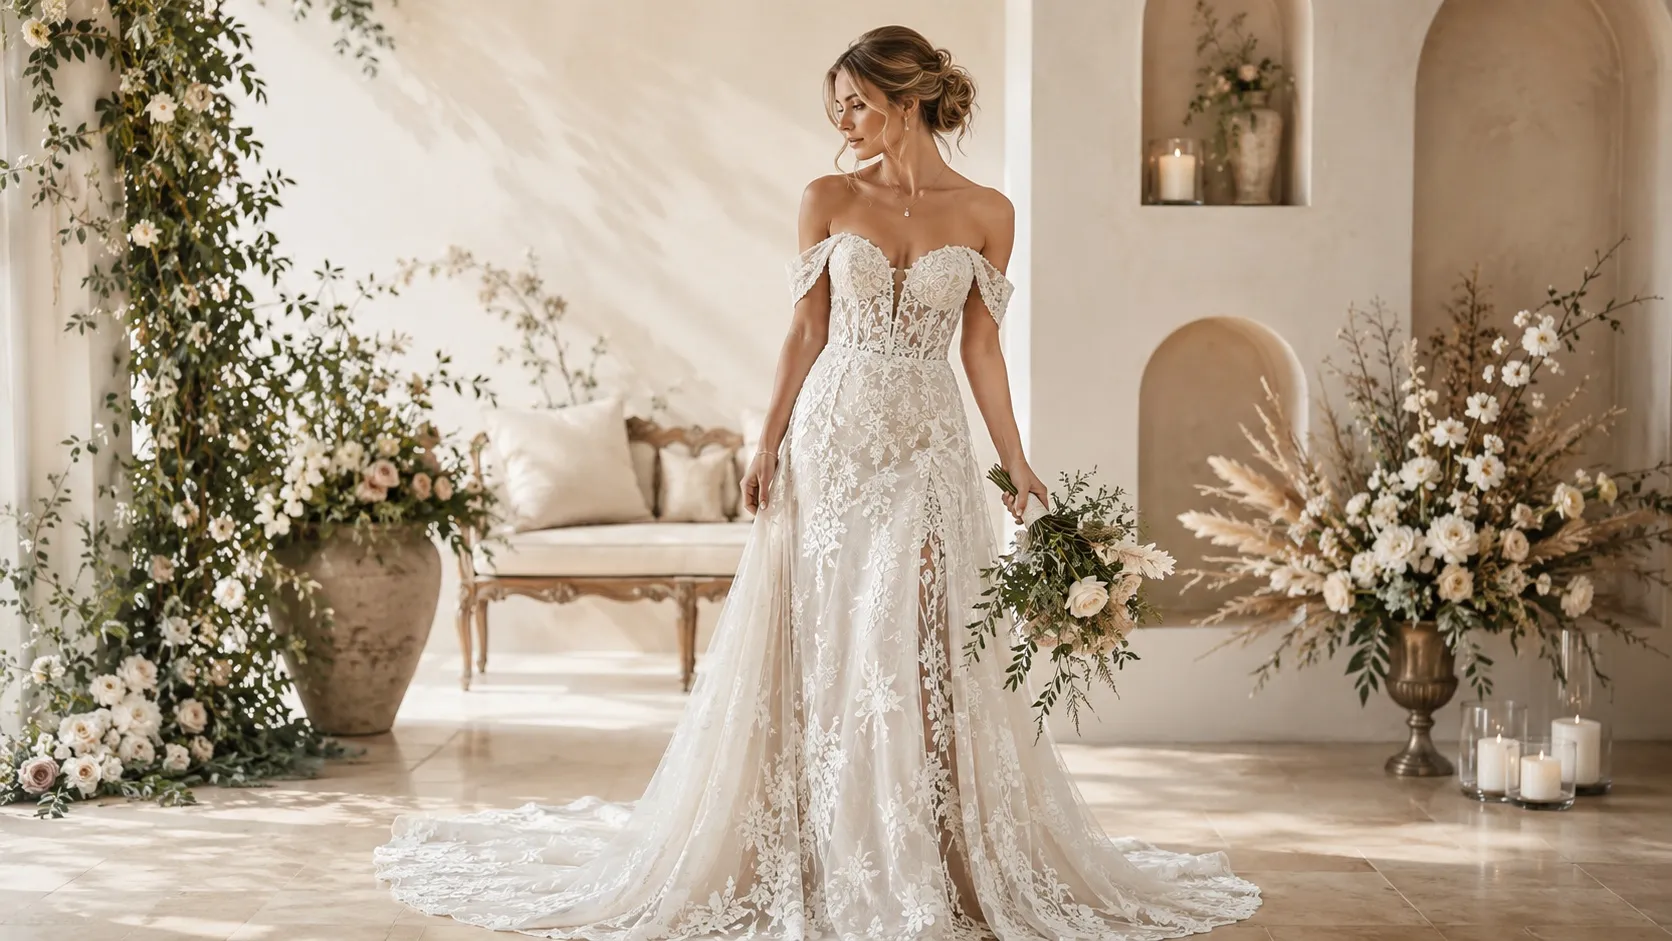
Perfect for the relaxed or bohemian bride, this style relies on twists, overlapping pieces, and soft volume. It works wonders for square and rectangular faces by softening strong jawlines and angular features with its organic, airy perimeter.
Braided Bun
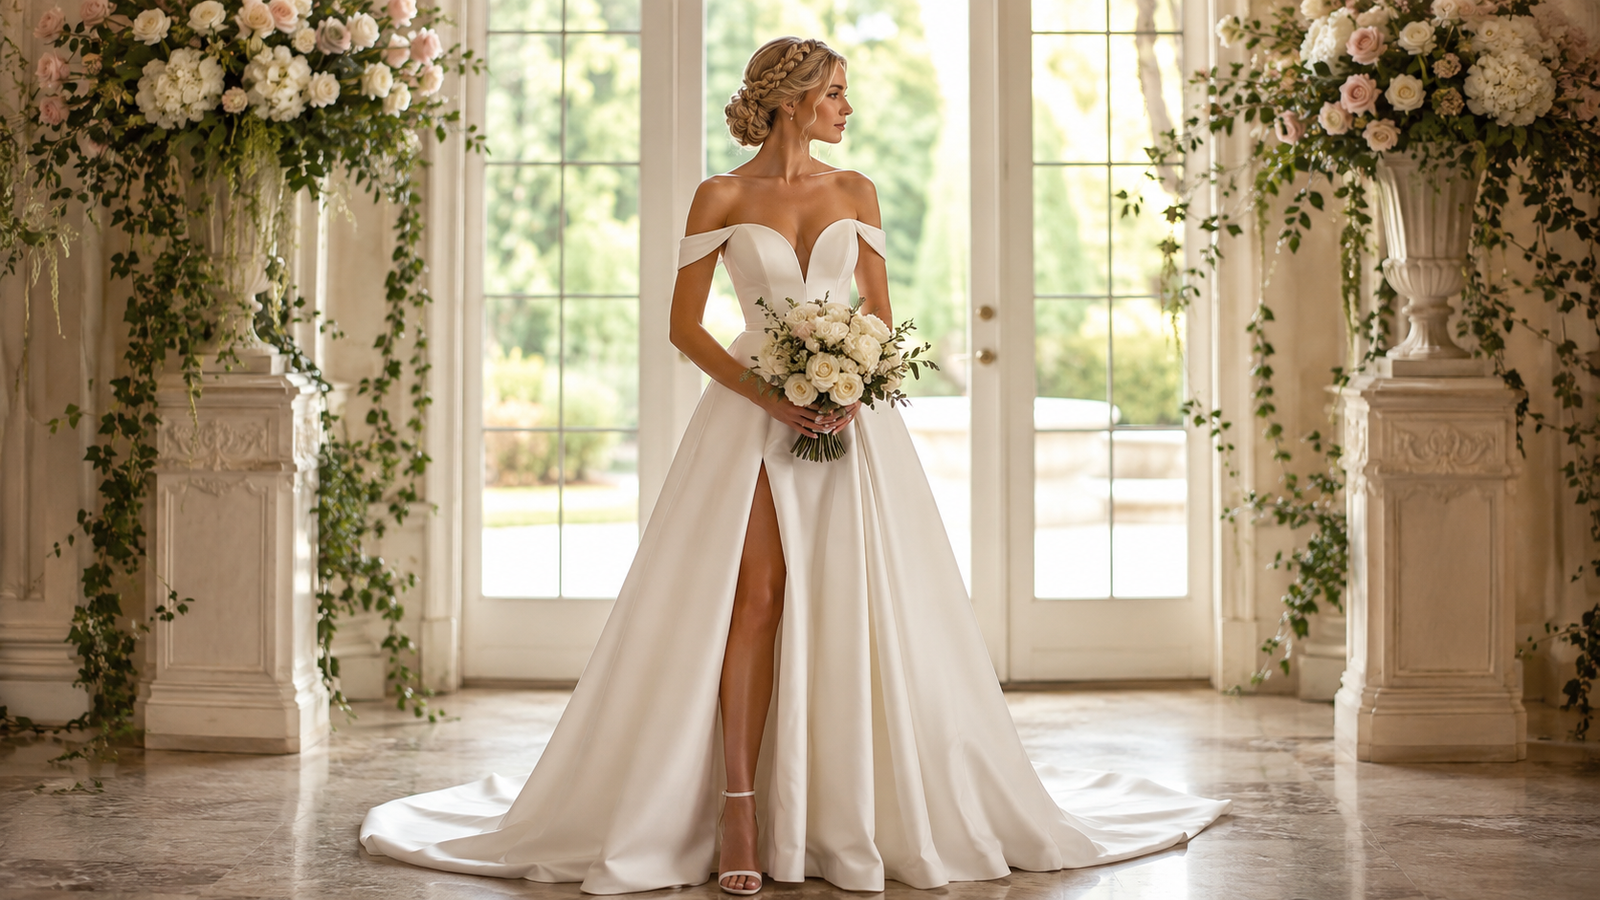
Whether it’s a Dutch braid wrapped into the base or a delicate fishtail woven throughout, a braided bun adds intricate visual texture. This style is incredibly flattering for long or oblong face shapes because the width of the braids can be expanded horizontally to create the illusion of balance and fullness on the sides.
Wedding Hairstyles With a Veil
Securing your veil isn’t just about pushing a metal comb into your hair and hoping for the best. As a stylist, I’ve seen beautiful looks completely flattened or pulled loose by a heavy piece of tulle before the bride even reaches the altar. The secret lies in creating an invisible, rock-solid anchor that works with your specific veil type, ensuring it stays secure from your first look to the last dance.
Veil Placement: Over vs. Under the Style
Where you push that comb into your hair completely changes the vibe of your wedding day look.
Placing the veil over the style
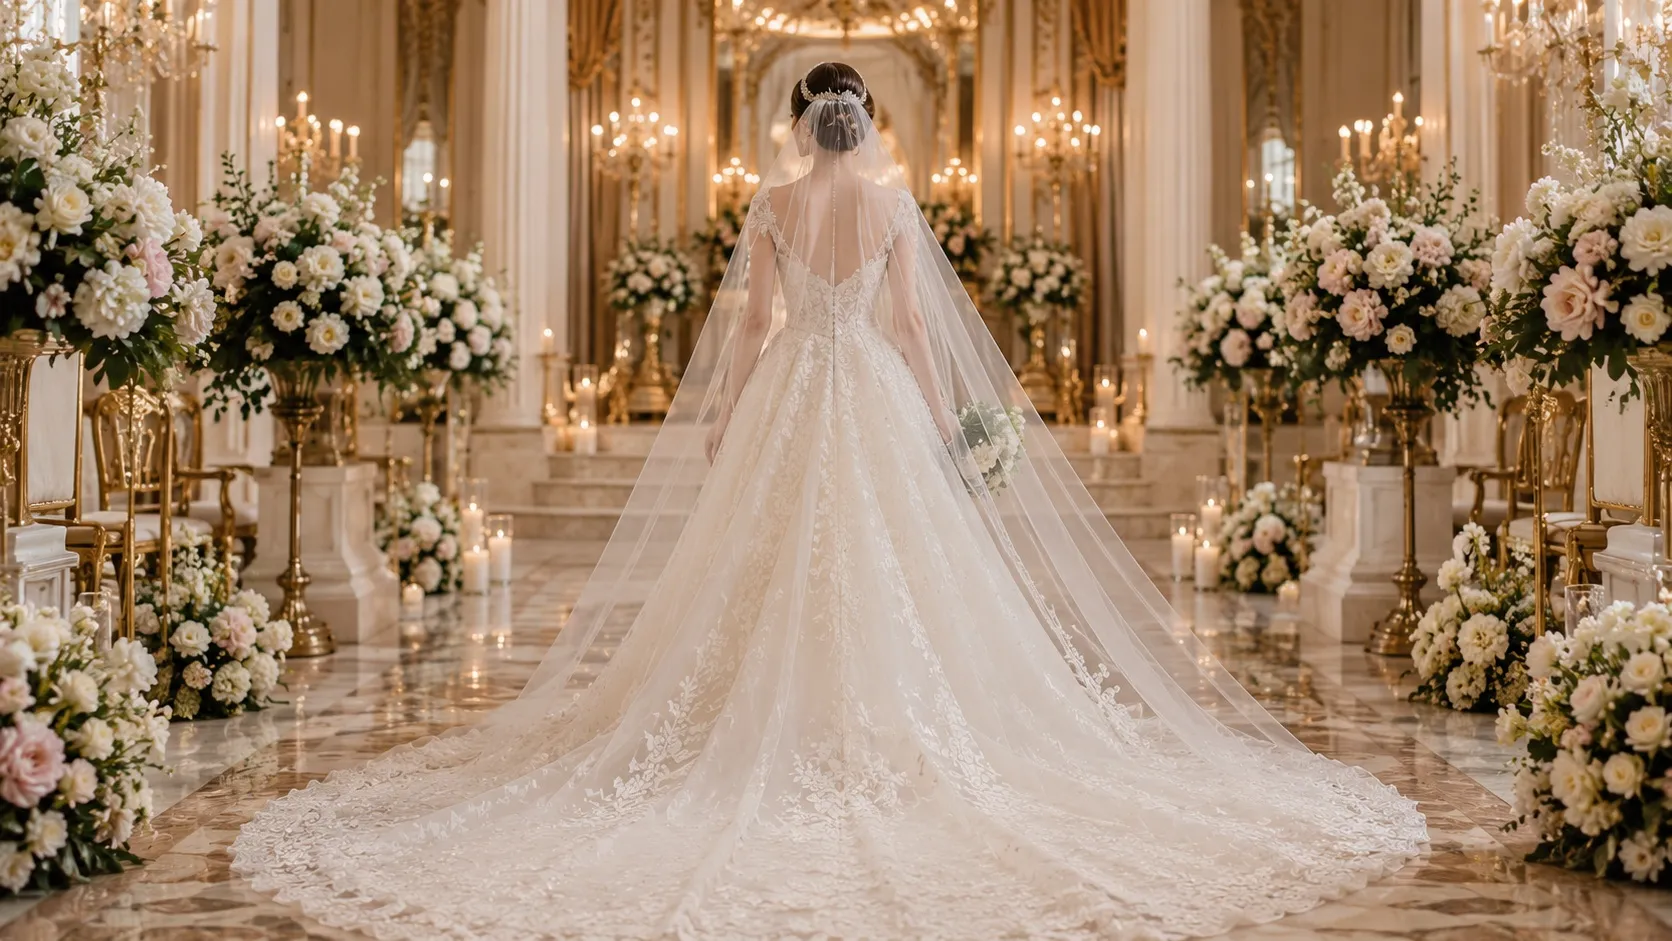
Pinned at the crown or just above an updo, the tulle cascades around your face and shoulders, creating a classic, ethereal frame. This is perfect if you want maximum volume and drama for your walk down the aisle. Just keep in mind that it will hide the intricate details of your hairstyle from the back until you remove it for the reception.
Placing the veil under the style
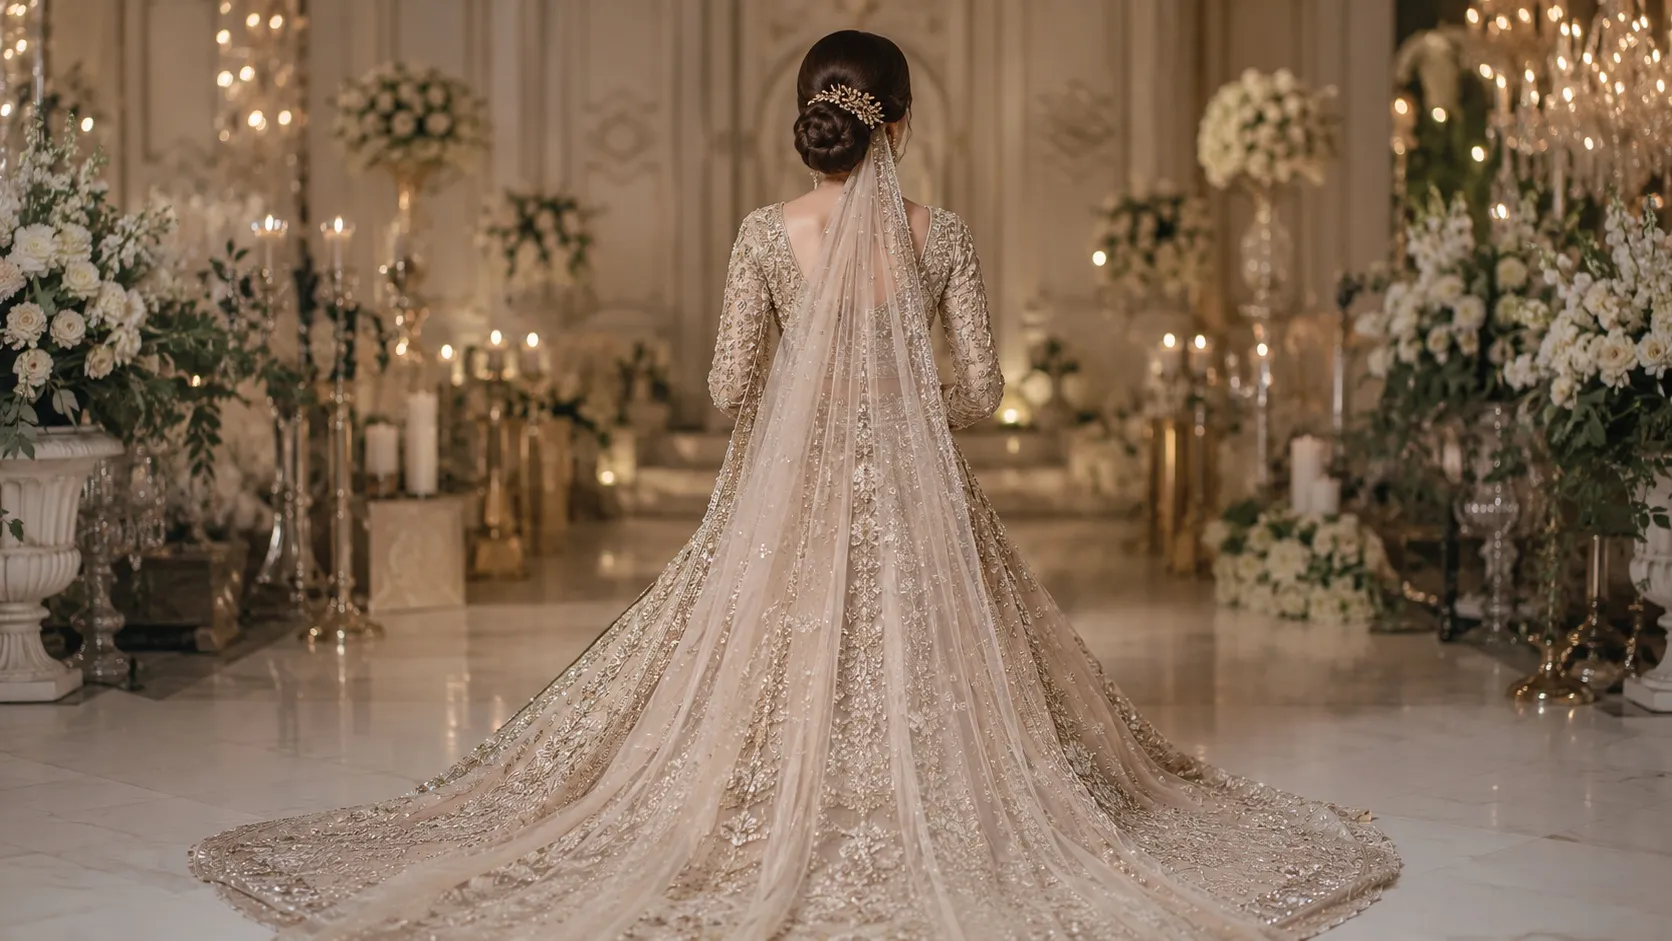
Tucking the comb beneath a low chignon or textured bun keeps the focus entirely on your hair artistry. This placement elongates your silhouette and offers a more modern, clean aesthetic. It also allows the veil to drape straight down your back without interfering with the texture of your updo.
Expert Stylist Tip: If you choose a fine, single-tier veil, do not slide the comb straight down into the hair. Instead, flip the comb upside down, push it upward into your backcombed anchor point, and flip it back over. This locking motion prevents heavy tulle from sliding out, even in high winds.
Choosing the Base Style for Your Veil Type
Different veil lengths exert different amounts of weight and tension on your scalp. To ensure your hair doesn’t sag or lose its shape, match your veil type to a complementary foundational style.
Cathedral Veils
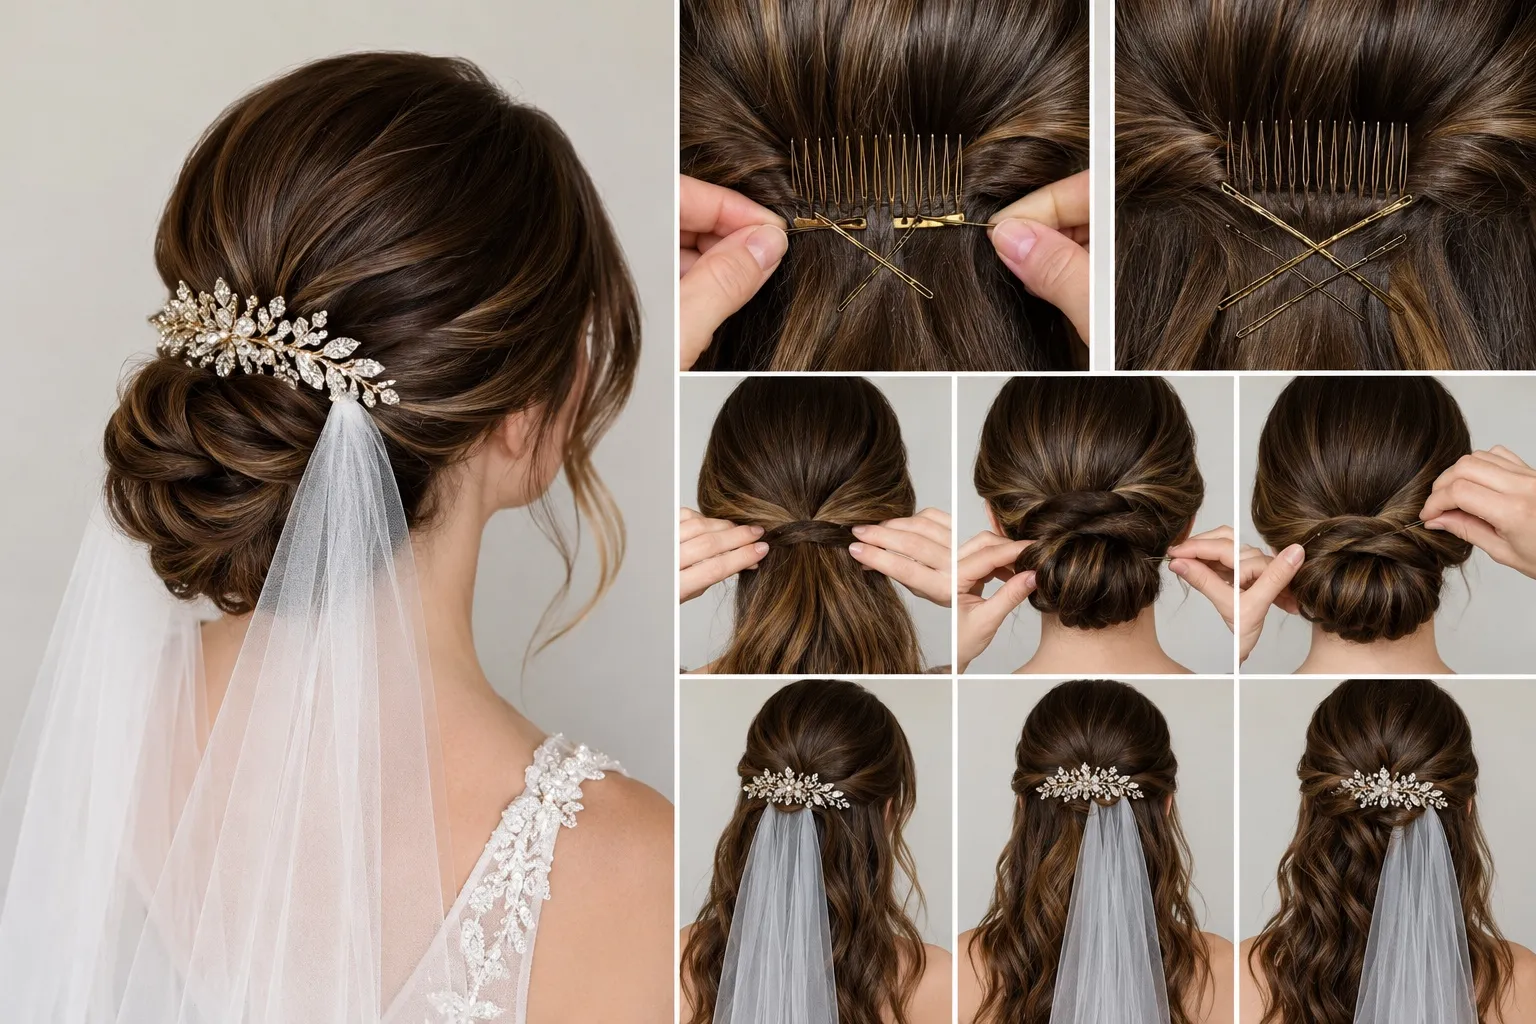
Because these can drag on the floor and catch on the carpet, they require a heavy-duty anchor. A structured low bun or a secure half-up style works best. Your stylist needs to create a hidden “X” of crisscrossed bobby pins right where the comb sits to distribute the weight evenly. (For specific step-by-step bun variations, see our dedicated Hair Length section).
Birdcage Veils
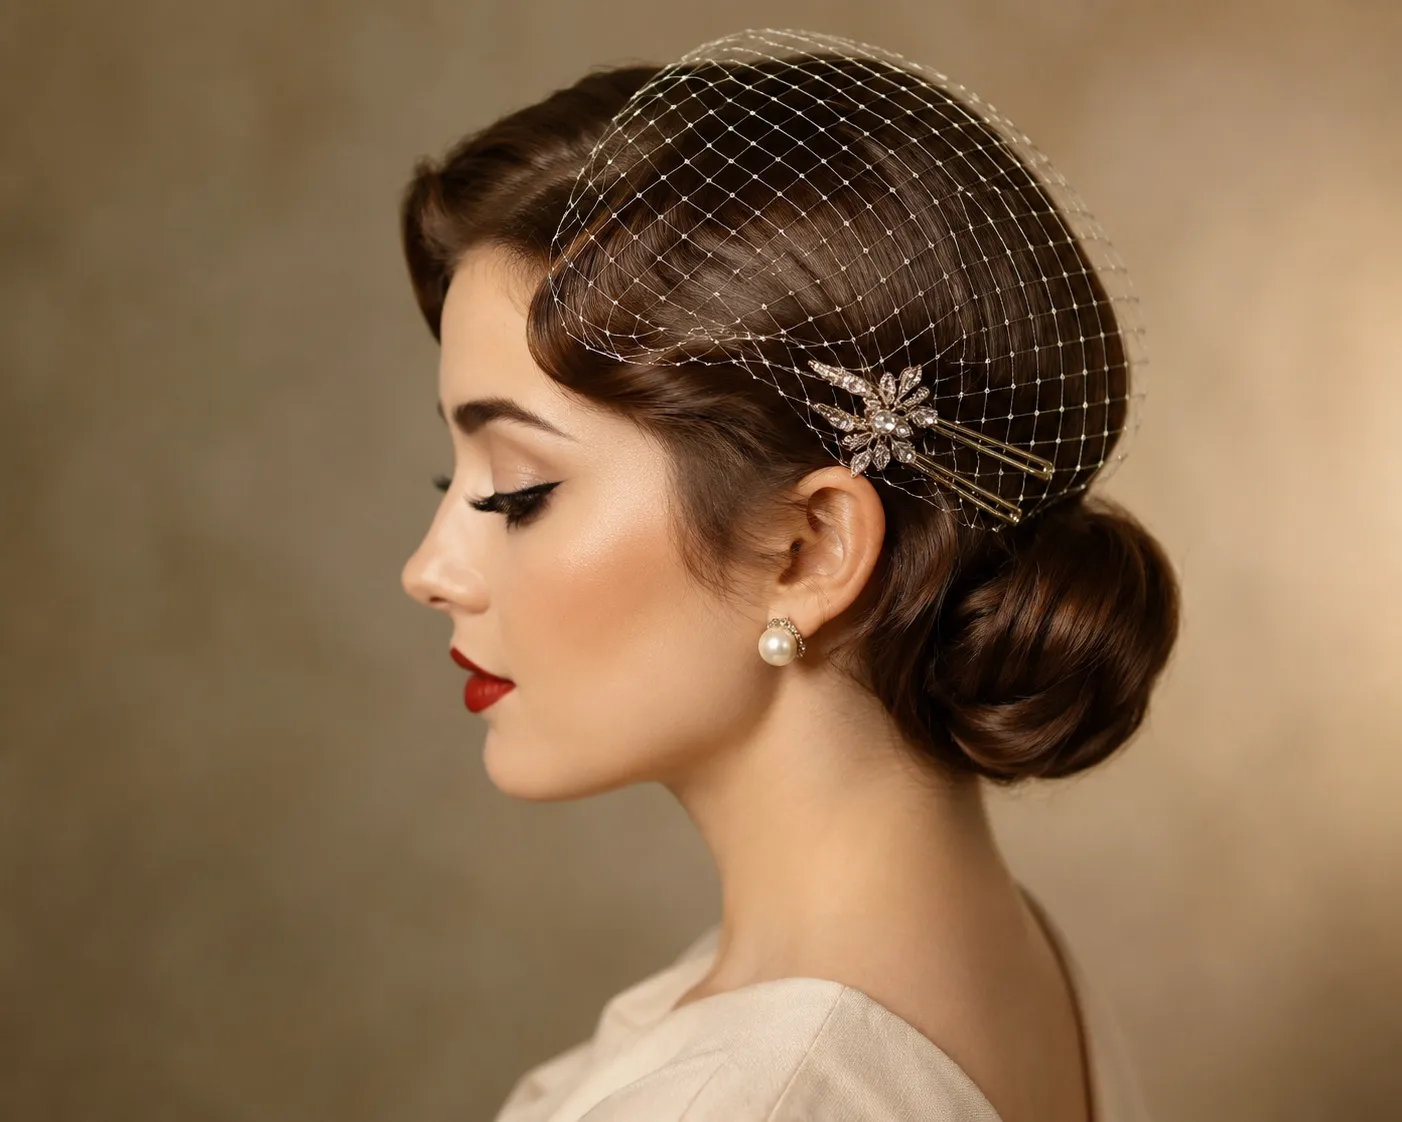
These short, vintage-inspired nets are lightweight but require precise angling. They look best paired with a sleek side-parted chignon, a smooth retro wave, or a clean pixie cut. The key here is using decorative hairpins or alligator clips to pin the netting flush against the side of your head.
Blusher Veils
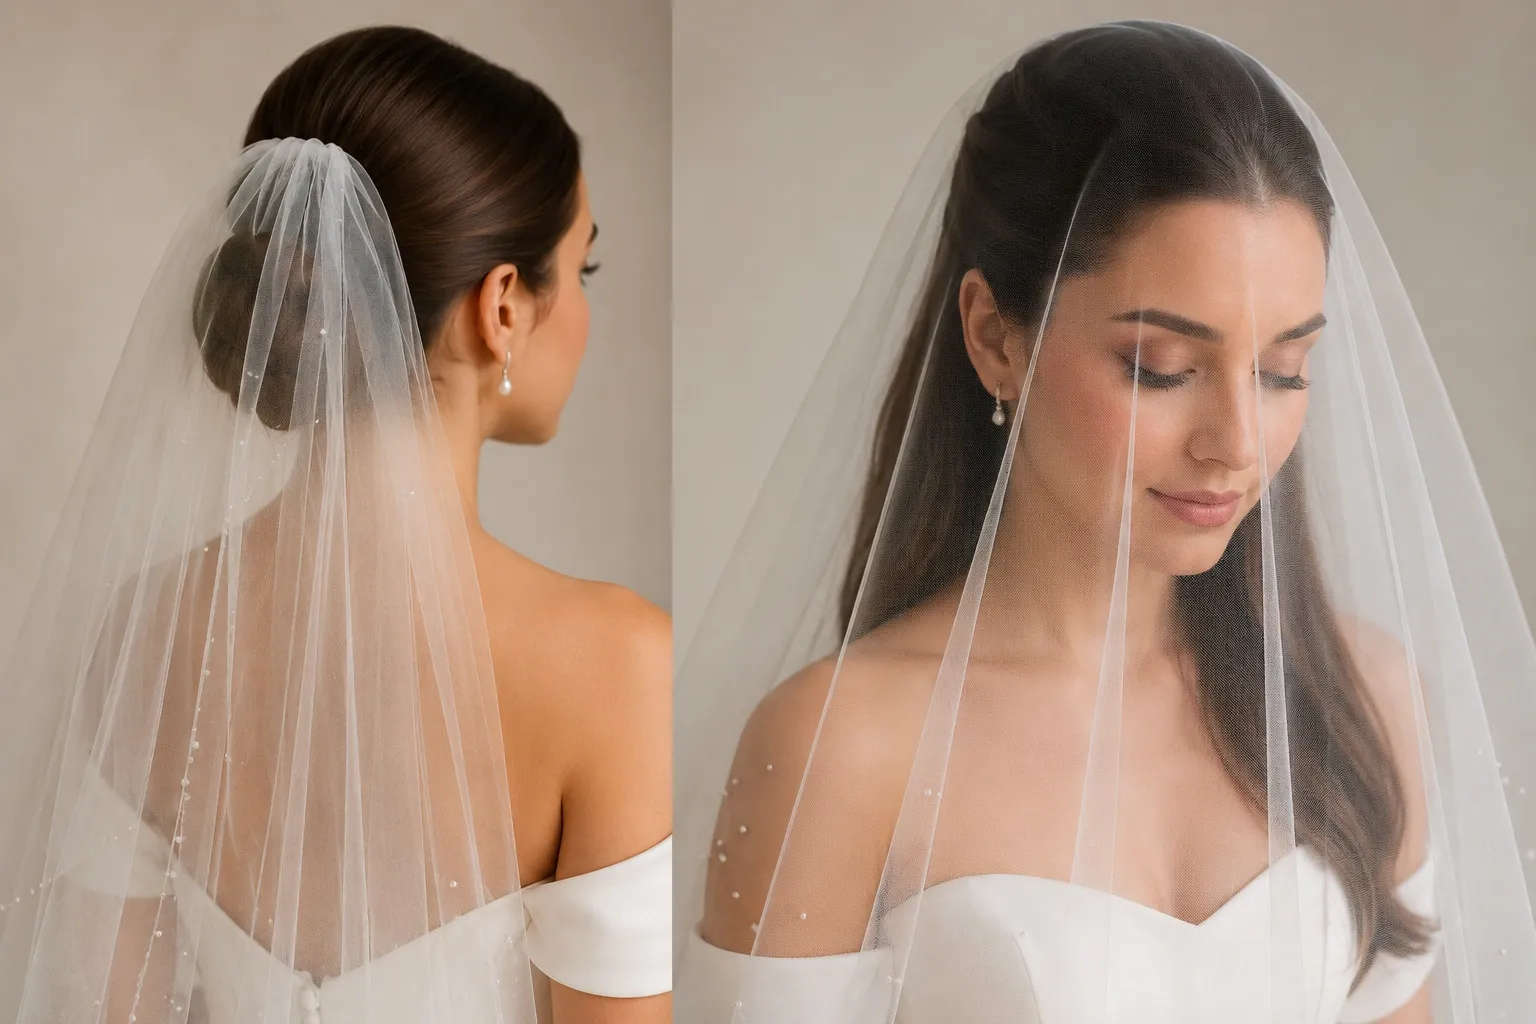
Designed to be flipped over your face and back again, blushers need zero friction. A smooth updo or a highly polished, sleek half-up look ensures the tulle glides effortlessly over your hair without snagging on loose curls or pull-outs.
Wedding Hair Accessories & Clips
Choosing the right piece to crown your look is just as crucial as the style itself. The secret is matching the weight and attachment style of your accessory to your specific hair density and chosen look. If you have fine hair, a heavy metal comb will slide out by the cocktail hour, no matter how many bobby pins your stylist uses. For thick or textured hair, delicate hair pins can easily get swallowed up and lost in the volume.
Always purchase your accessories after you’ve finalized your dress fabric and color. A stark silver tiara can clash beautifully against a warm champagne gown, while a delicate rose gold vine perfectly complements blush undertones.
How to Map Your Accessories to Your Hairstyle
To ensure your piece stays secure from the first look to the final dance, use this quick reference guide to pair your accessories with the styles covered above.
| Accessory Type | Best Suited For | Ideal Hair Type / Placement |
|---|---|---|
| Decorative Pins | Hollywood Waves or Half-Up Styles | Fine to medium hair; tuck them directly into the twist or pin back one side. |
| Comb or Vine | Classic Updos and Low Chignons | Medium to thick hair; anchors best right above the bun structure. |
| Tiara or Crown | High Buns or Voluminous Down Styles | All hair types; needs a solid base of backcombed hair or a headband braid to sit on. |
| Headband | Pixie Cuts, Bobs, or Sleek Down Styles | All hair types; ensures a secure fit without needing pins to hold it up. |
| Floral Clips | Textured Braids and Boho Updos | Thicker hair or extensions; gives the prongs enough grip to stay put. |
Insider Tips for Flawless Styling
Prep before you place: Never let your stylist spray hairspray directly onto rhinestones, pearls, or metals. The alcohol and polymers create a dull film that instantly kills the sparkle in flash photography.
The structural bobby pin trick: If you are wearing a heavy comb, have your stylist create an “X” with two bobby pins hidden inside the hair structure first. You can then slide the teeth of the comb directly behind this hidden anchor for a locked-in hold.
Proximity to the veil: If you plan to remove your veil after the ceremony, choose an accessory with an independent attachment (like individual pins or a headband) rather than a comb built onto the veil itself. This keeps your reception look entirely undisturbed.
Cultural & Traditional Wedding Hairstyles
Indian Wedding Hairstyles — bridal juda, gajra-decorated bun, side braid with maang tikka styling
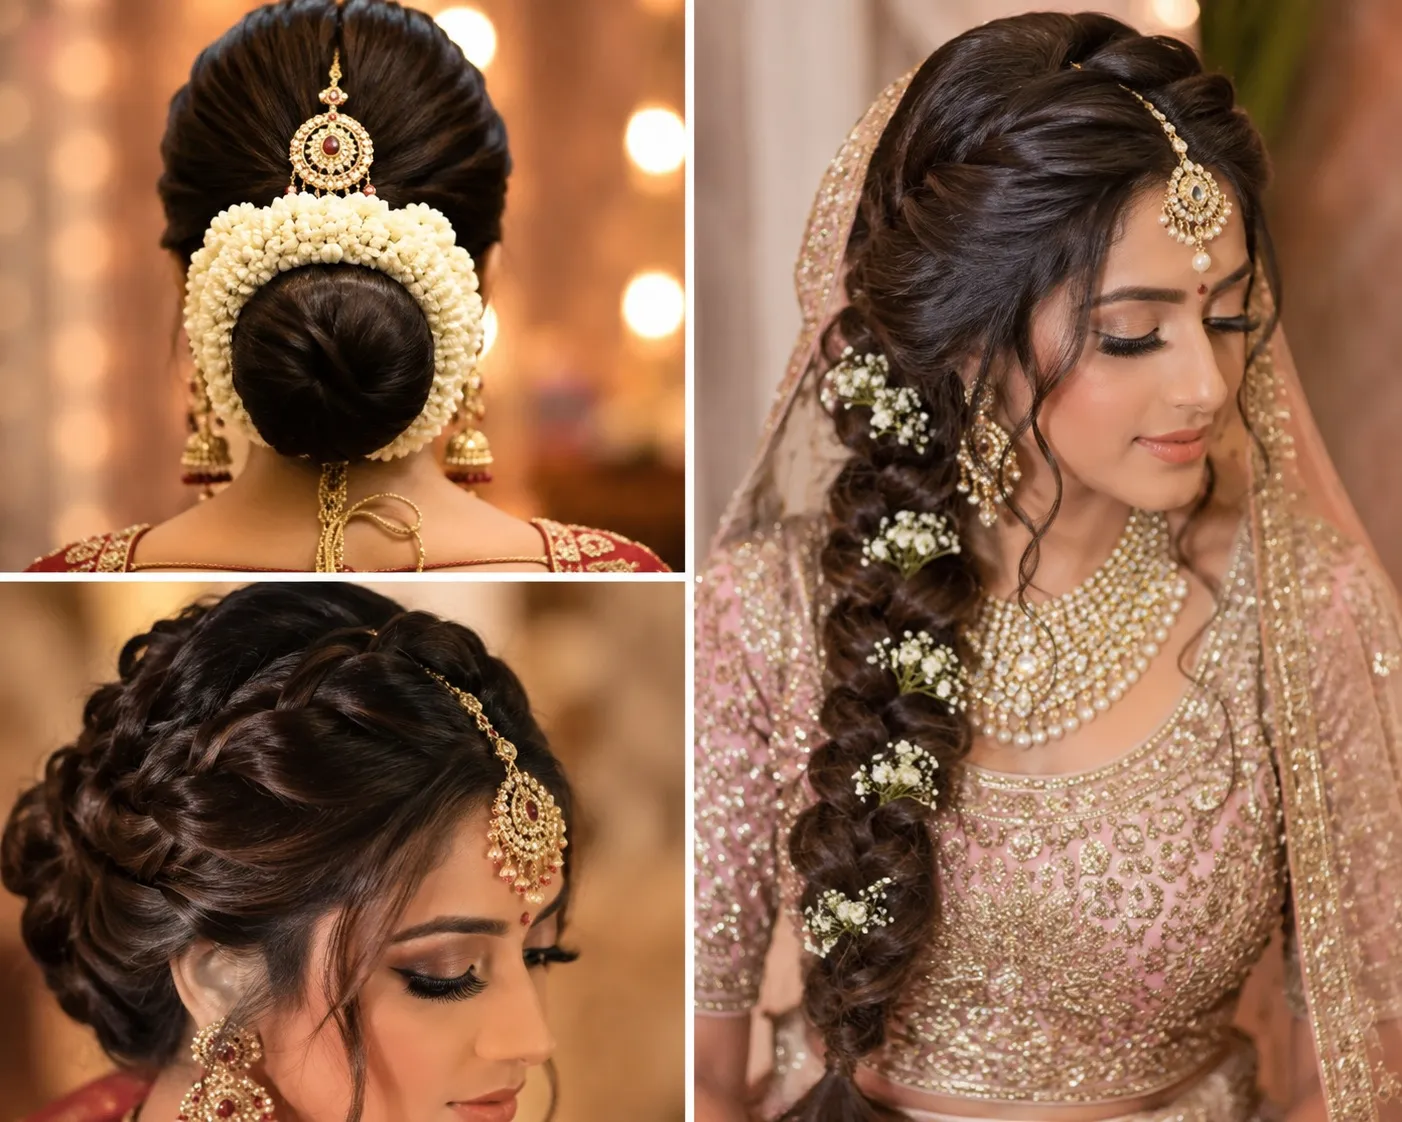
Indian wedding hairstyles are all about secure foundations because they must support heavy veils (dupattas), dense hair jewelry, and hours of continuous movement. For a classic look, a structural bridal juda (a traditional low bun) requires a firm mesh donut or hair stuffing placed underneath your natural hair to distribute the weight of your headpiece. If you anchor the dupatta directly to your natural hair without this internal support, the pulling will cause discomfort by hour three and likely flatten your volume before the reception.
When opting for a gajra-decorated bun, timing and moisture control are everything. Fresh jasmine strands are traditional, but their moisture can wilt your blowout if they are pinned directly against bare hair. Have your stylist use a layer of tissue wrapped around the base of the bun or use high-quality faux silk gajras for the ceremony, switching to fresh flowers just before your grand entry.
If you choose a voluminous side braid with maang tikka styling, placement dictates your facial symmetry.
Secure the hook first: Always anchor the maang tikka hook deep into your back-combed crown section with crossed bobby pins before building the braid.
Balance the weight: A heavy pendant will swing when you walk; a tiny drop of eyelash glue on the back of the tikka keeps it perfectly centered on your forehead.
Prevent fraying: Use a four-strand or fishtail braid technique to give the style texture, weaving in structural hair extensions to keep the length from tapering down into a thin tail.
Wedding Hairstyles for Black Brides — natural curls, protective styles, silk press options
Choosing the perfect look means balancing your desired aesthetic with how your hair reacts to the climate of your wedding day. For brides embracing their natural curls, definition and moisture retention are the main priorities. A defined wash-and-go or a custom twist-out requires a multi-day strategy; do not try a brand-new styling gel on the week of your wedding, as mixing conflicting leave-ins and gels can create white, flaky residue that is impossible to hide under flash photography.
If you are planning on protective styles, timing your installation is the secret to a flawless look.
Faux locs and goddess braids: Schedule your installation exactly 5 to 7 days before the wedding. This gives the scalp time to relax, ensures the braids lay completely flat, and allows you to style them into updos without tension bumps.
Edges and baby hairs: Use a waterproof, non-alcohol-based edge control to lay your perimeter, then tie it down with a silk scarf for 15 minutes right before stepping into your dress.
For a sleek silk press, your biggest enemy is humidity, especially during outdoor ceremonies or high-energy receptions. To make a silk press last, your stylist needs to use a lightweight, clear anti-humectant spray before flat-ironing, rather than heavy oils that weigh the hair down. Keep a silk-lined wrap handy for transition times, and consider a chic, low-wrapped ponytail or a structured updo if your wedding is outdoors, ensuring your smooth texture stays flawless from the first look to the final dance.
Walima & Reception Hairstyles — Red-Carpet Glam, Hollywood Waves, and Structural Updos
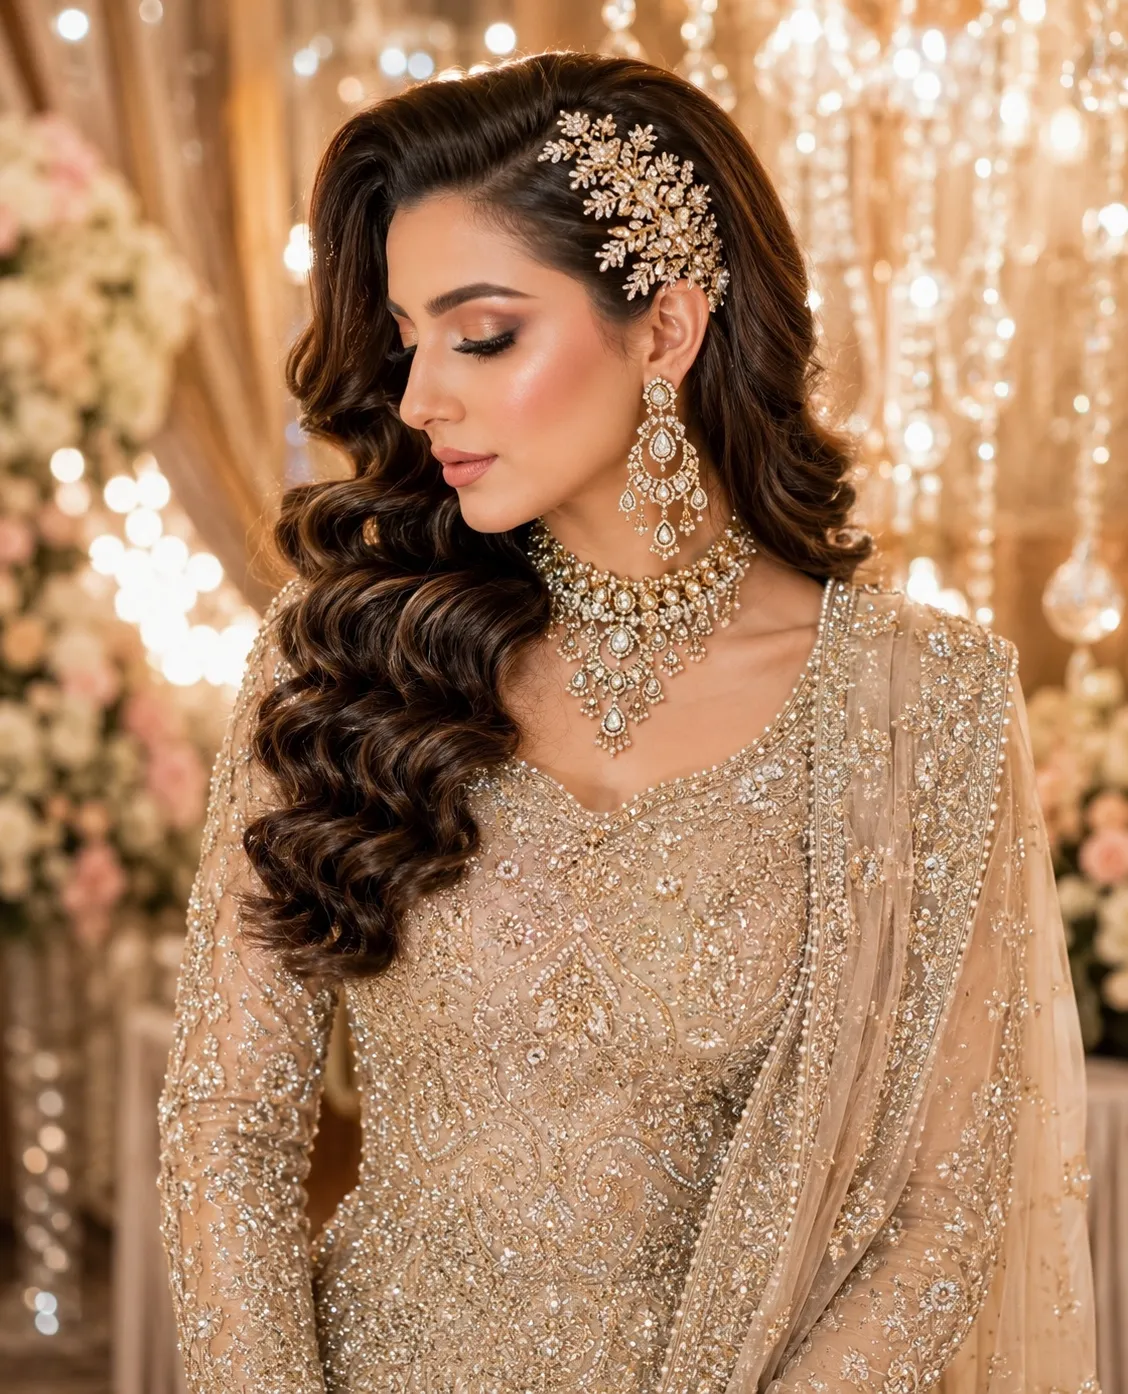
Your Walima look calls for a different energy than your Nikkah—this is the reception where you get to go bolder, more glamorous, and feature high-shine hair artistry. Whether you choose cascading Hollywood waves or a sleek updo, heavier jewelry and an embellished dupatta mean your foundation needs serious structural planning so your look doesn’t shift within the first hour.
Securing Heavy Jewelry (Jhoomer & Tikka)
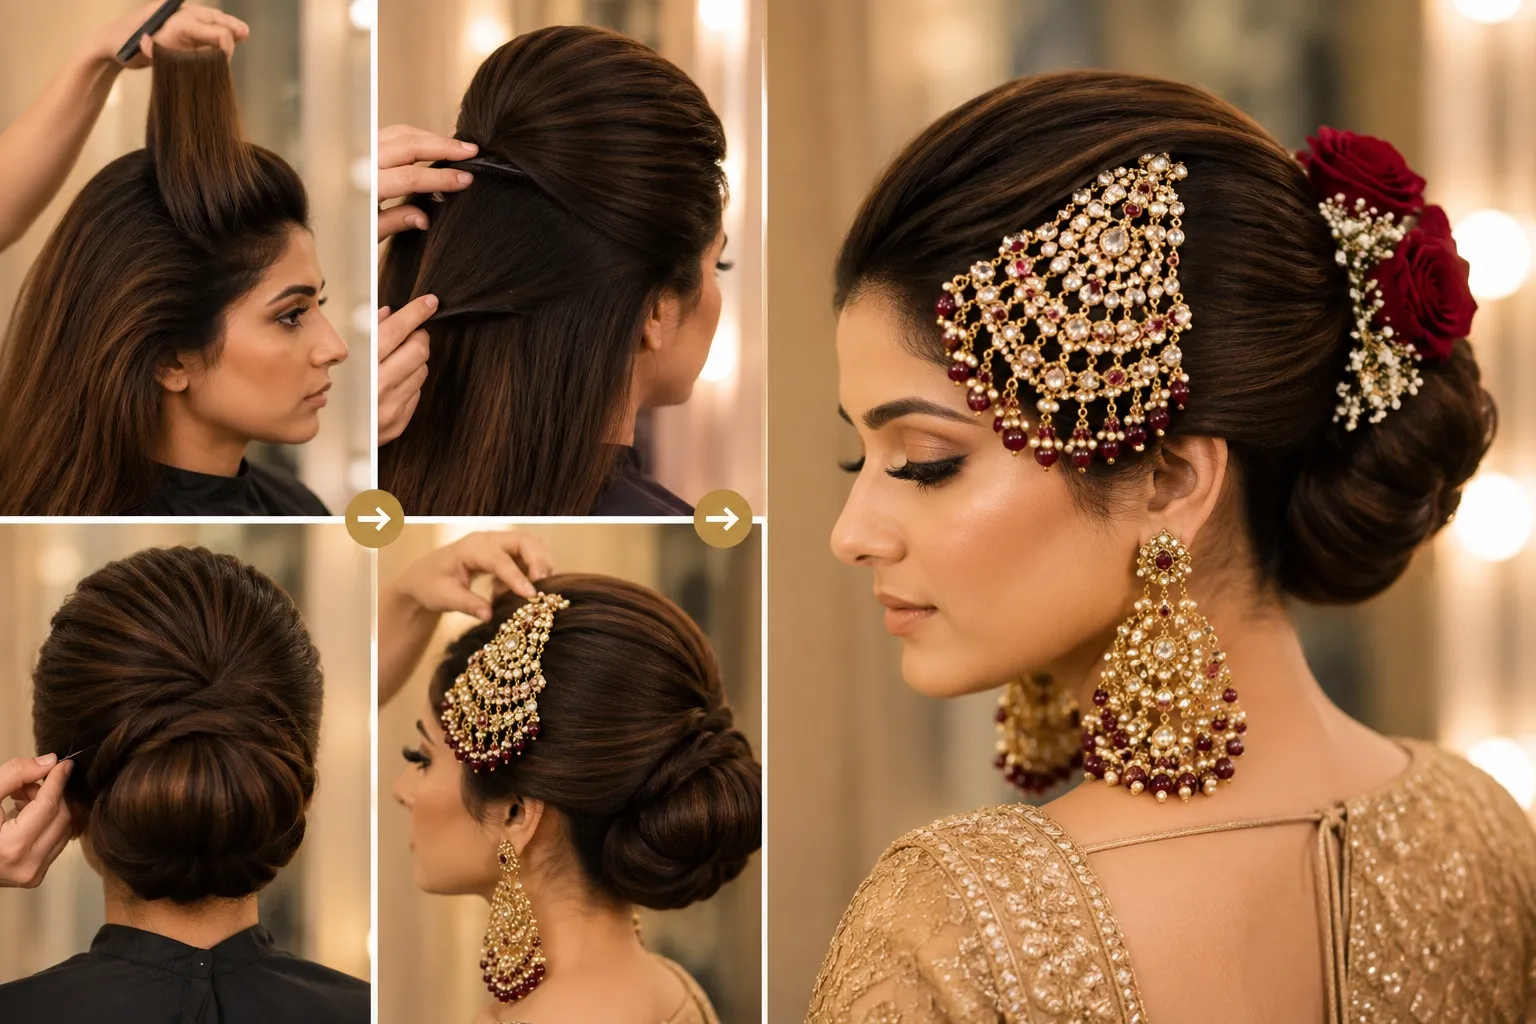
For brides wearing a statement jhoomer or heavy tikka, ask your stylist to build a firm, backcombed crown before placing any jewelry. A soft, unstructured base will cause heavy metal pieces to slowly tilt as the night goes on. A structured low bun or a sculpted updo gives large ornaments a stable, locked-in anchor under bright reception lighting.
Heavy Dupatta Placement & Weight Distribution
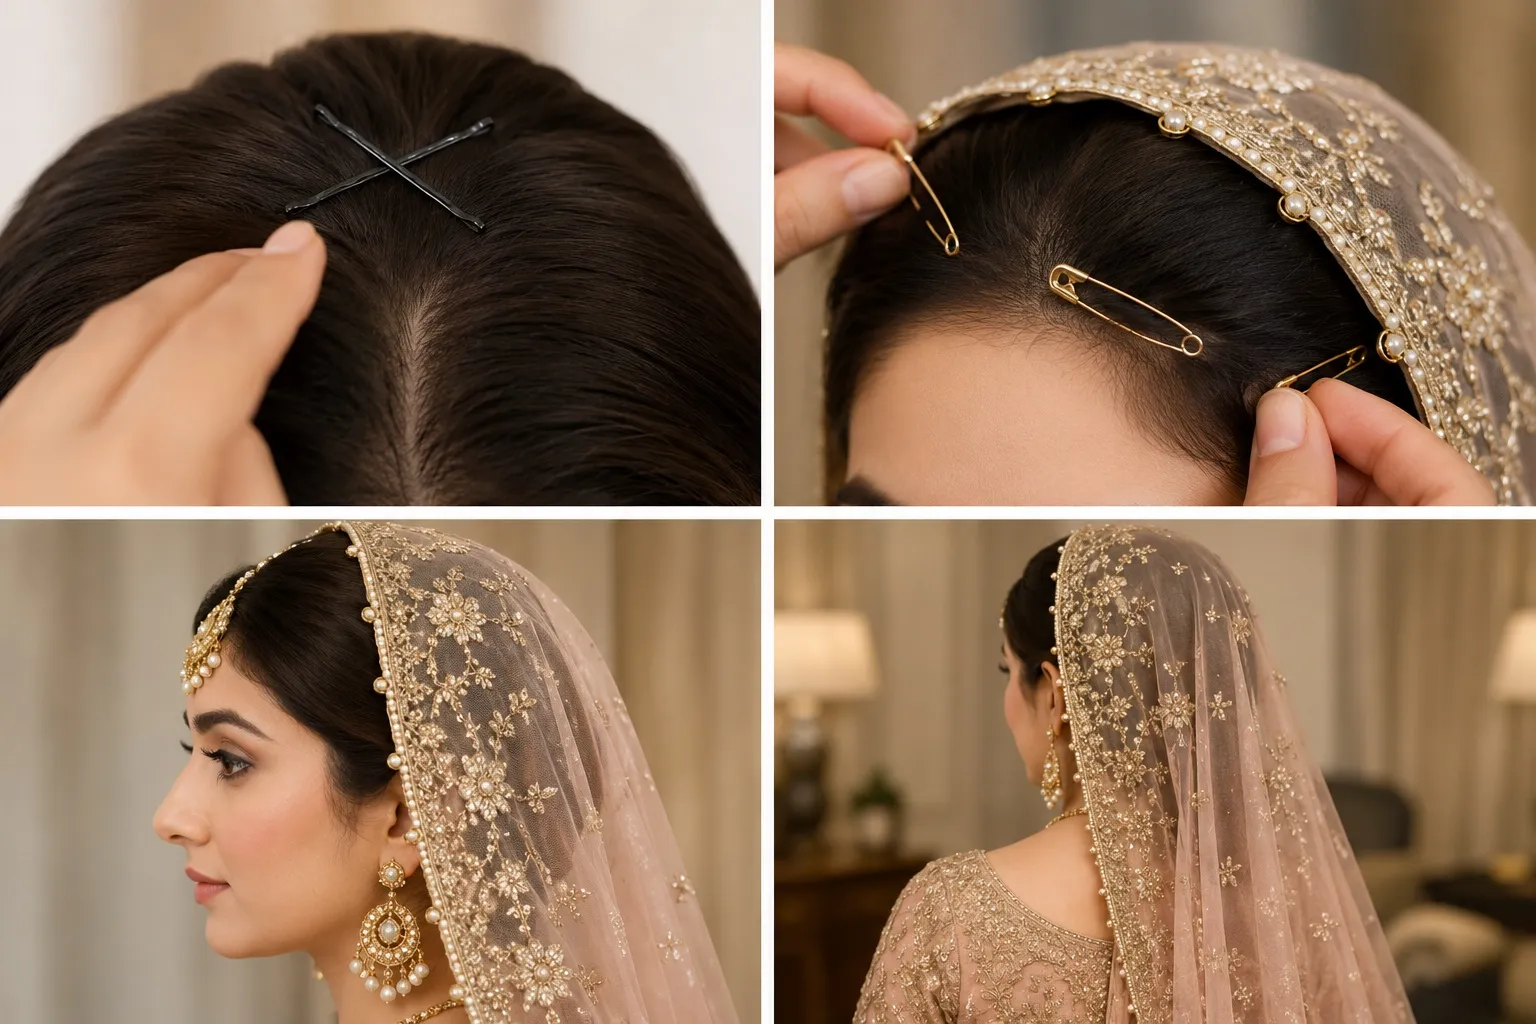
Anchor First, Drape Second: Secure two crisscrossed bobby pins at the crown to create a hidden landing pad before the dupatta touches your hair.
Distribute, Don’t Concentrate: Use two to three smaller safety pins spaced along the hairline instead of one heavy central pin. This prevents severe scalp tension by hour four.
Test the Drape: Walk the room and turn your head side to side before leaving the bridal suite—this reveals hidden slipping that a simple mirror check won’t show.
Pro-Tip: If your Walima outfit is significantly heavier than your Nikkah lehnga, book a separate hair trial while wearing your actual reception jewelry to test the exact weight distribution.
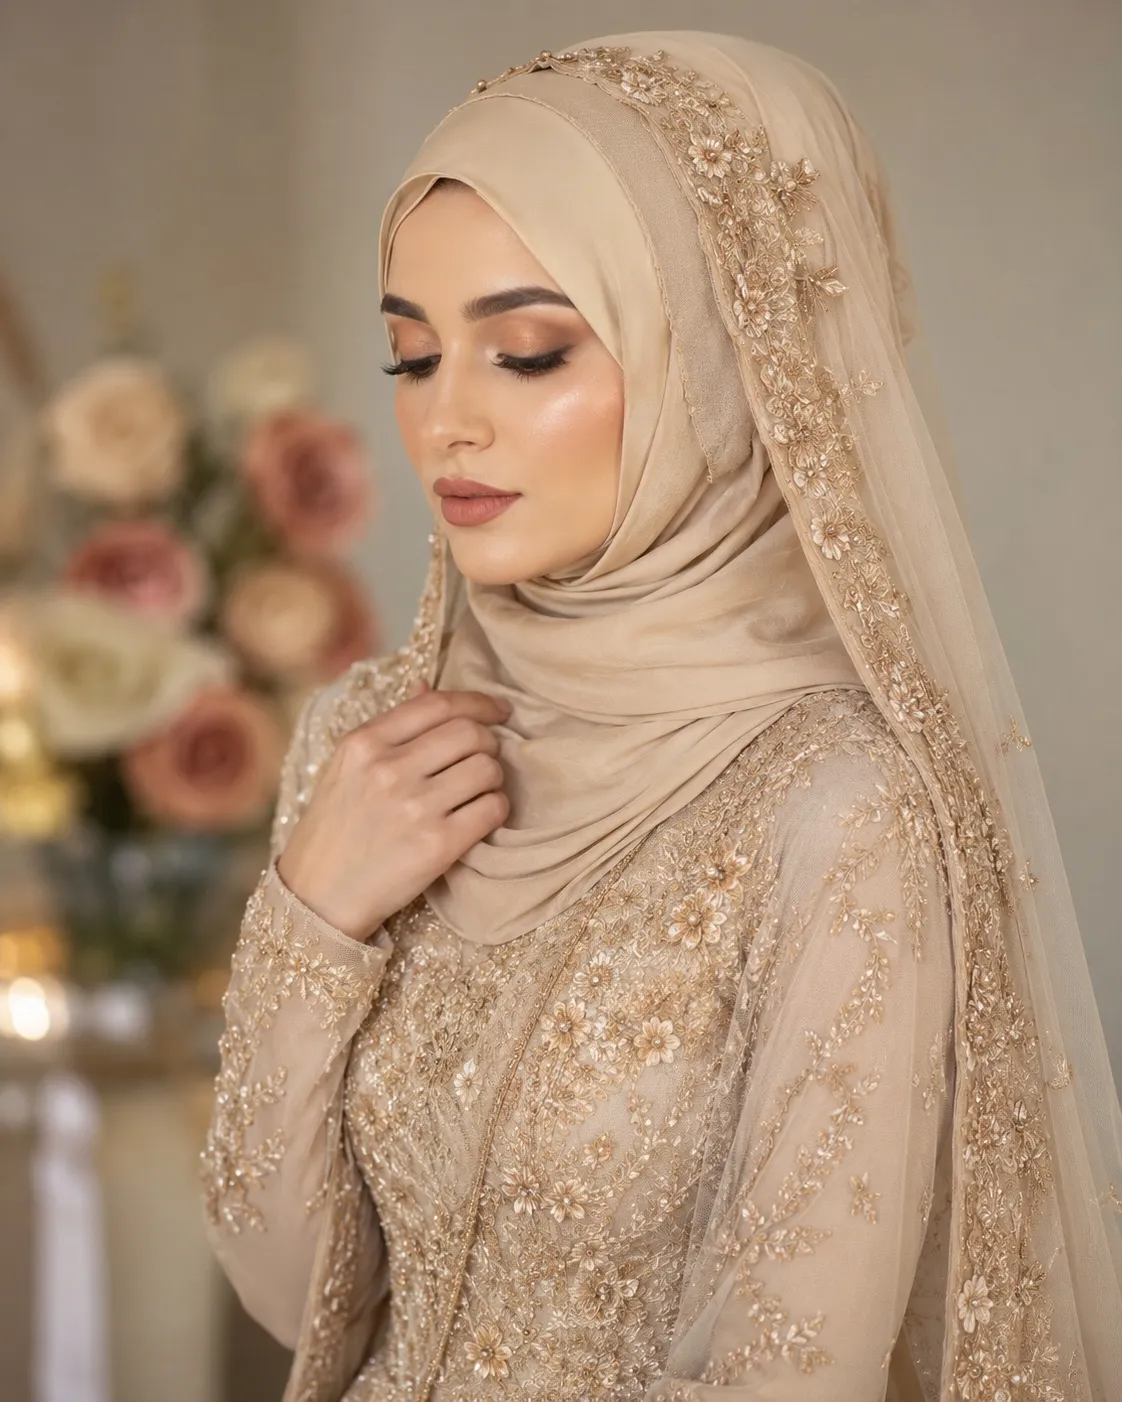
Hijab-Friendly Bridal Styling — Volumized Under-Styling, Under-Cap Security, and Fabric Draping
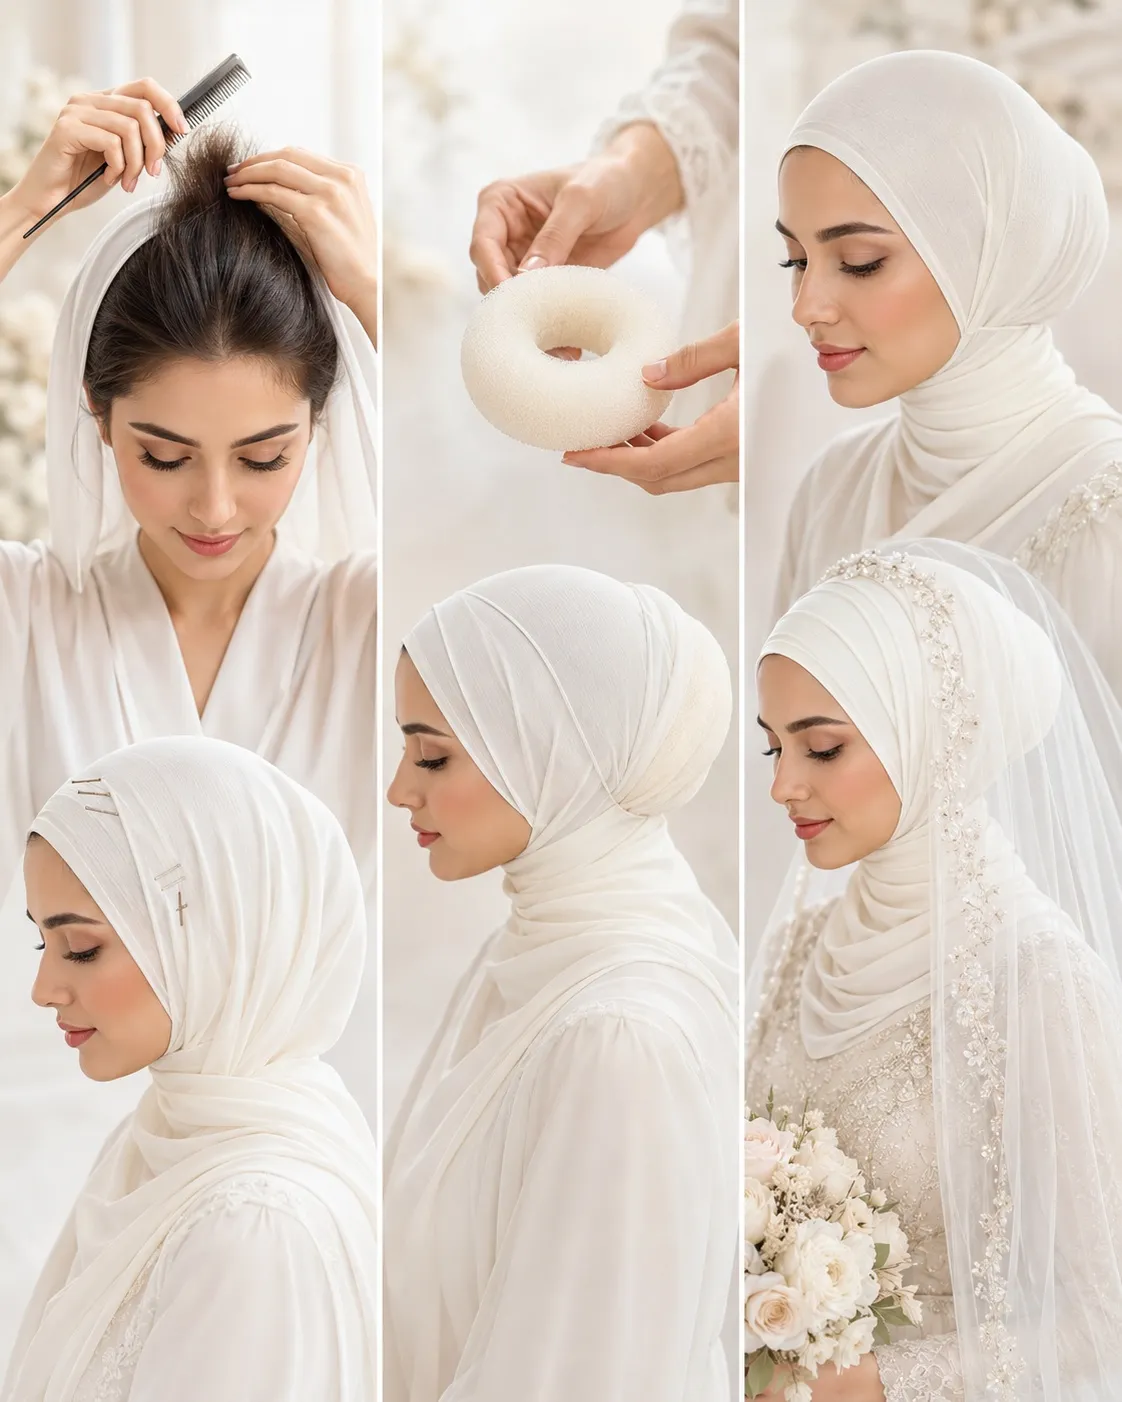
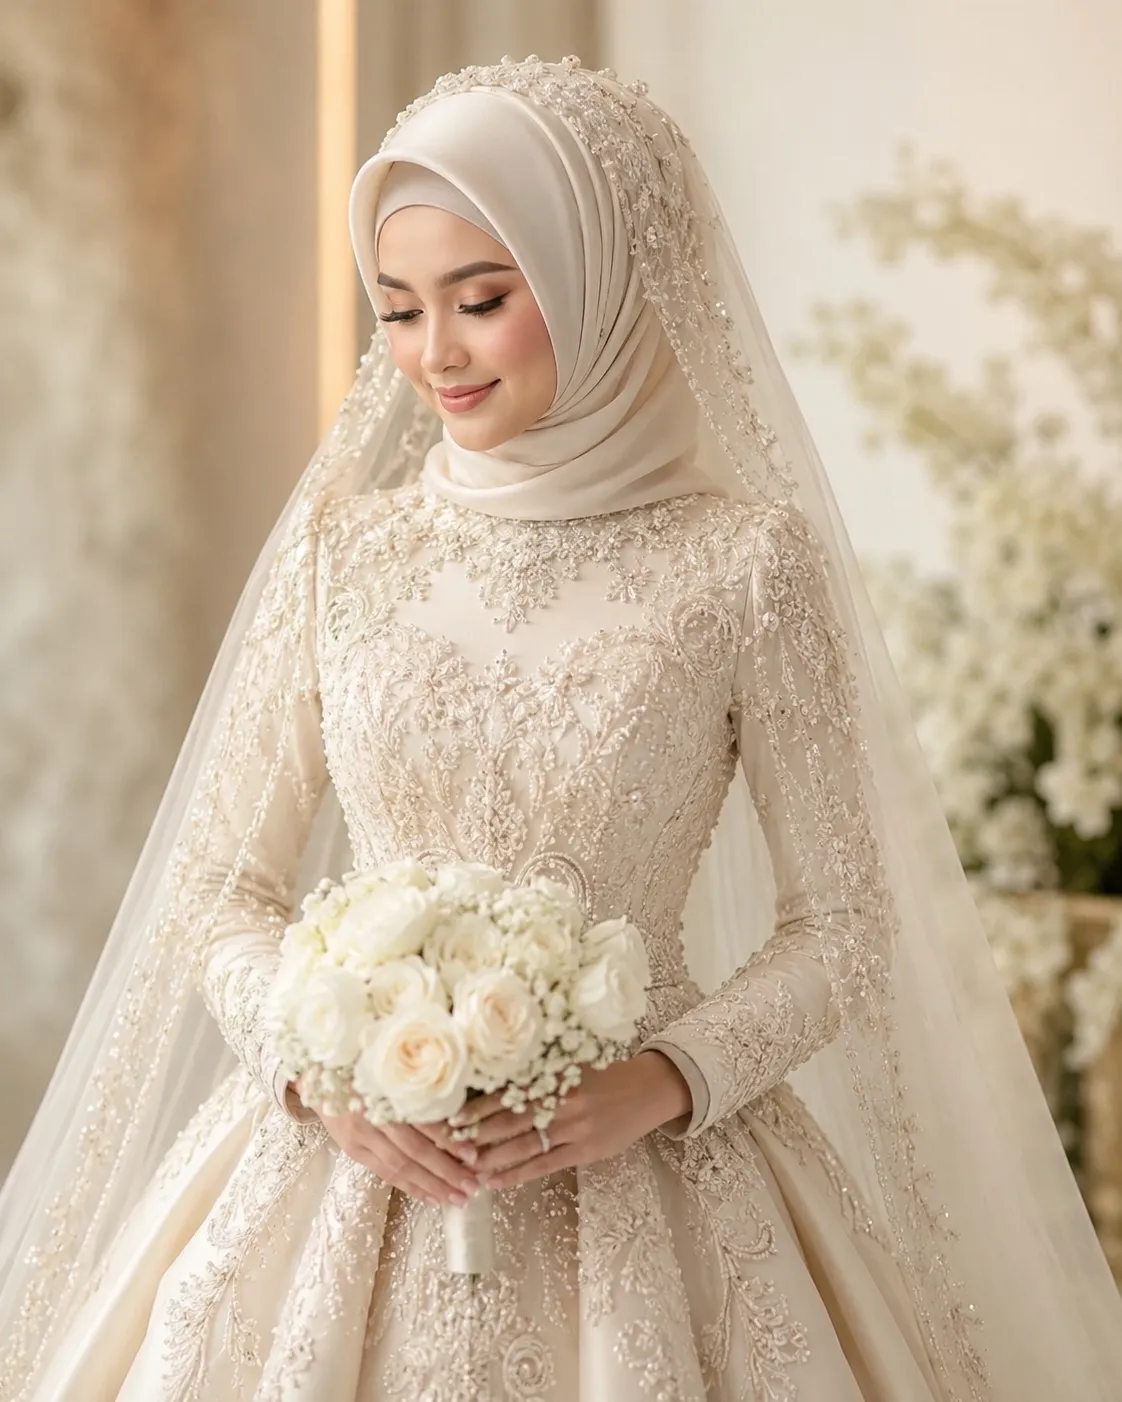
A stunning hijab-friendly bridal look is entirely about the invisible architecture built underneath, ensuring your layers stay flawless and comfortable throughout the day without shifting.
Volume Comes From Padding, Not Product
Crown Lift: Lightly backcomb and pin your natural hair flat at the crown before wrapping. This creates gentle height without adding unnecessary bulk.
Foam or Fabric Volumizers: Place a small, hijab-specific volumizing scrunchie or foam donut at the crown or nape to create a soft, perfectly rounded bridal silhouette.
Under-Cap First: Always use a snug, non-slip satin or cotton underscarf. This prevents the bridal veil from sliding and gives the outer luxury fabric a completely smooth surface to grip.
Nikkah vs Fabric Selection & Event Draping draping:
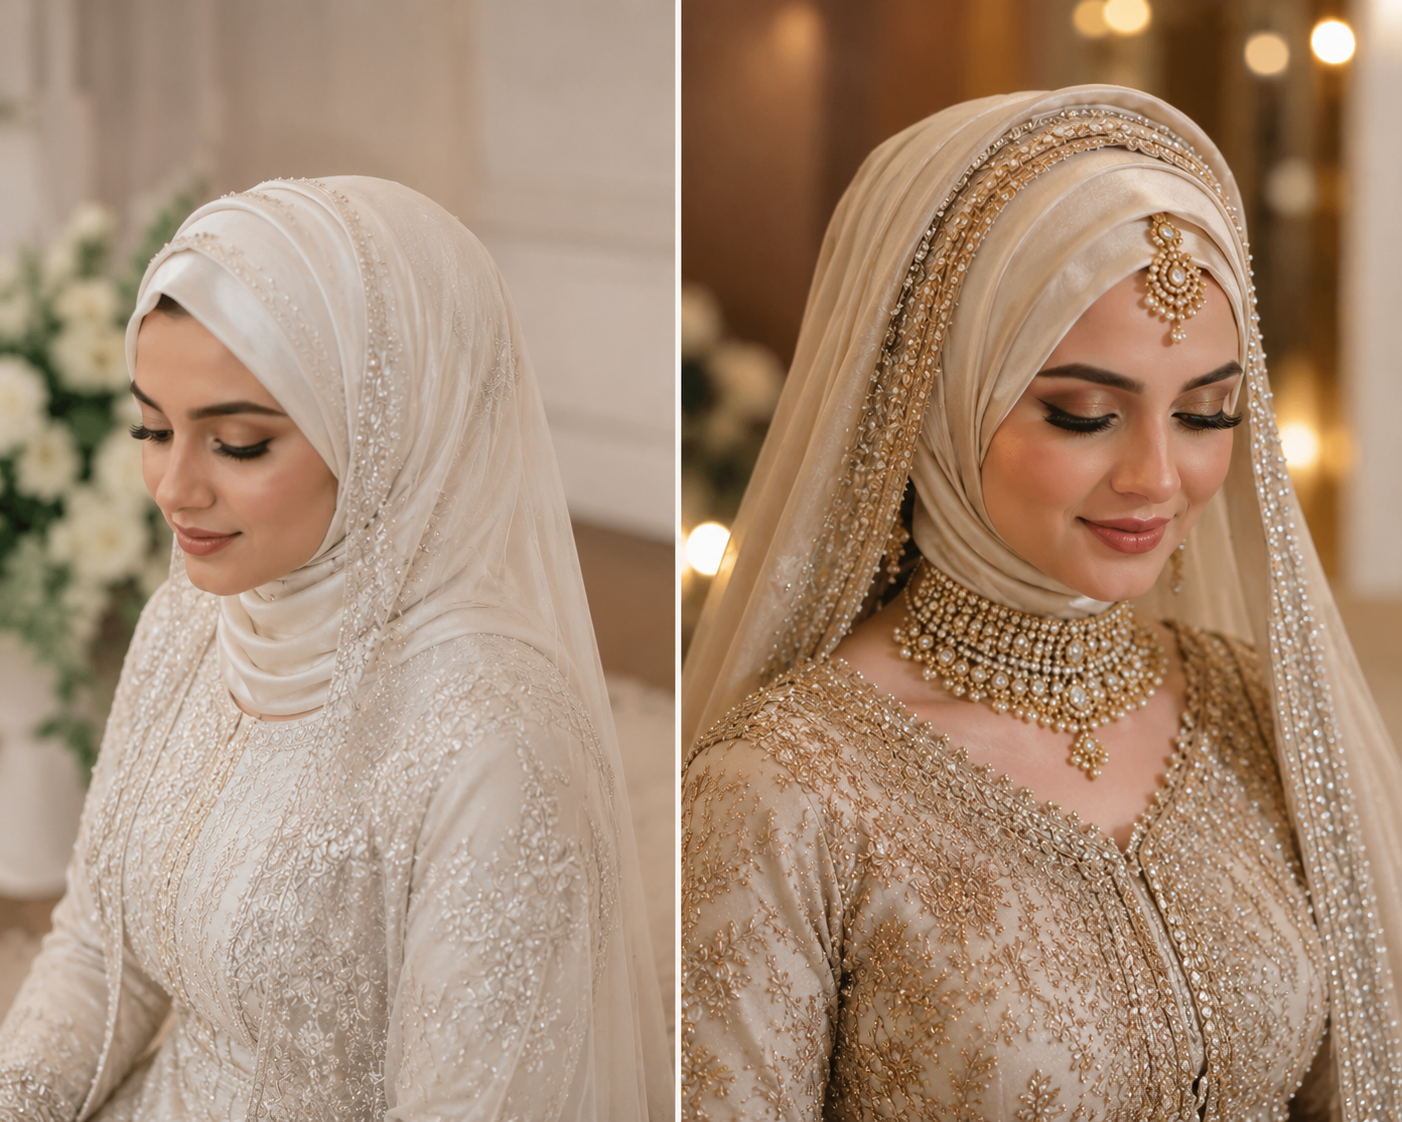
The weight of your bridal fabric dictates how your look should be constructed underneath:
Nikkah Draping: Best suited for lighter fabrics like chiffon, georgette, or soft silk. This style focuses on closer-to-face draping with minimal added volume for a soft, traditional aesthetic.
Walima Draping: Designed for heavier, heavily embellished fabrics. This requires a firmer velvet under-cap base and fuller crown volume to support the weight of the fabric under intense reception lighting.
Pro-Tip: Bring your actual bridal hijab fabric to your hair and styling trial. Different textile weights drape differently, and testing the exact fabric is the only way to guarantee a secure fit.
Easy & Simple Wedding Hairstyles
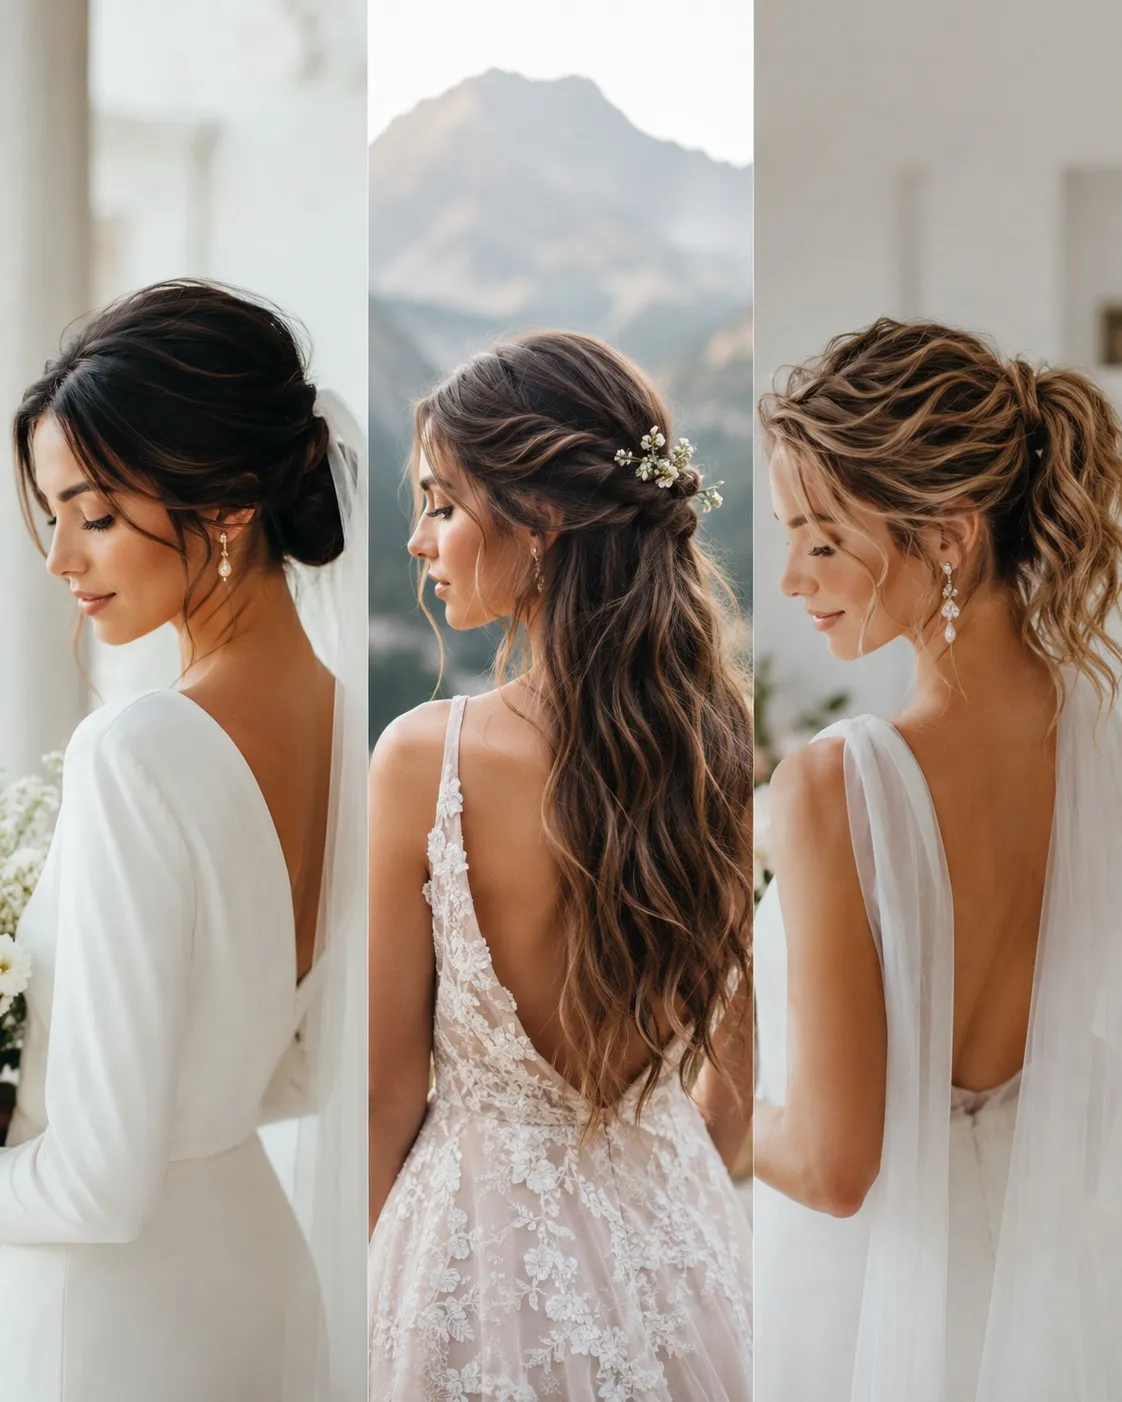
If you are skipping the grand ballroom for an intimate courthouse ceremony, eloping on a mountaintop, or just want to save room in your budget by doing your own hair, you do not need a four-hour salon appointment to look breathtaking. The secret to a successful DIY wedding hairstyle is working with your natural texture rather than fighting it.
Here is exactly how to execute these foolproof, 5-minute styles without any bridal suite panic:
The Polished Low Pony
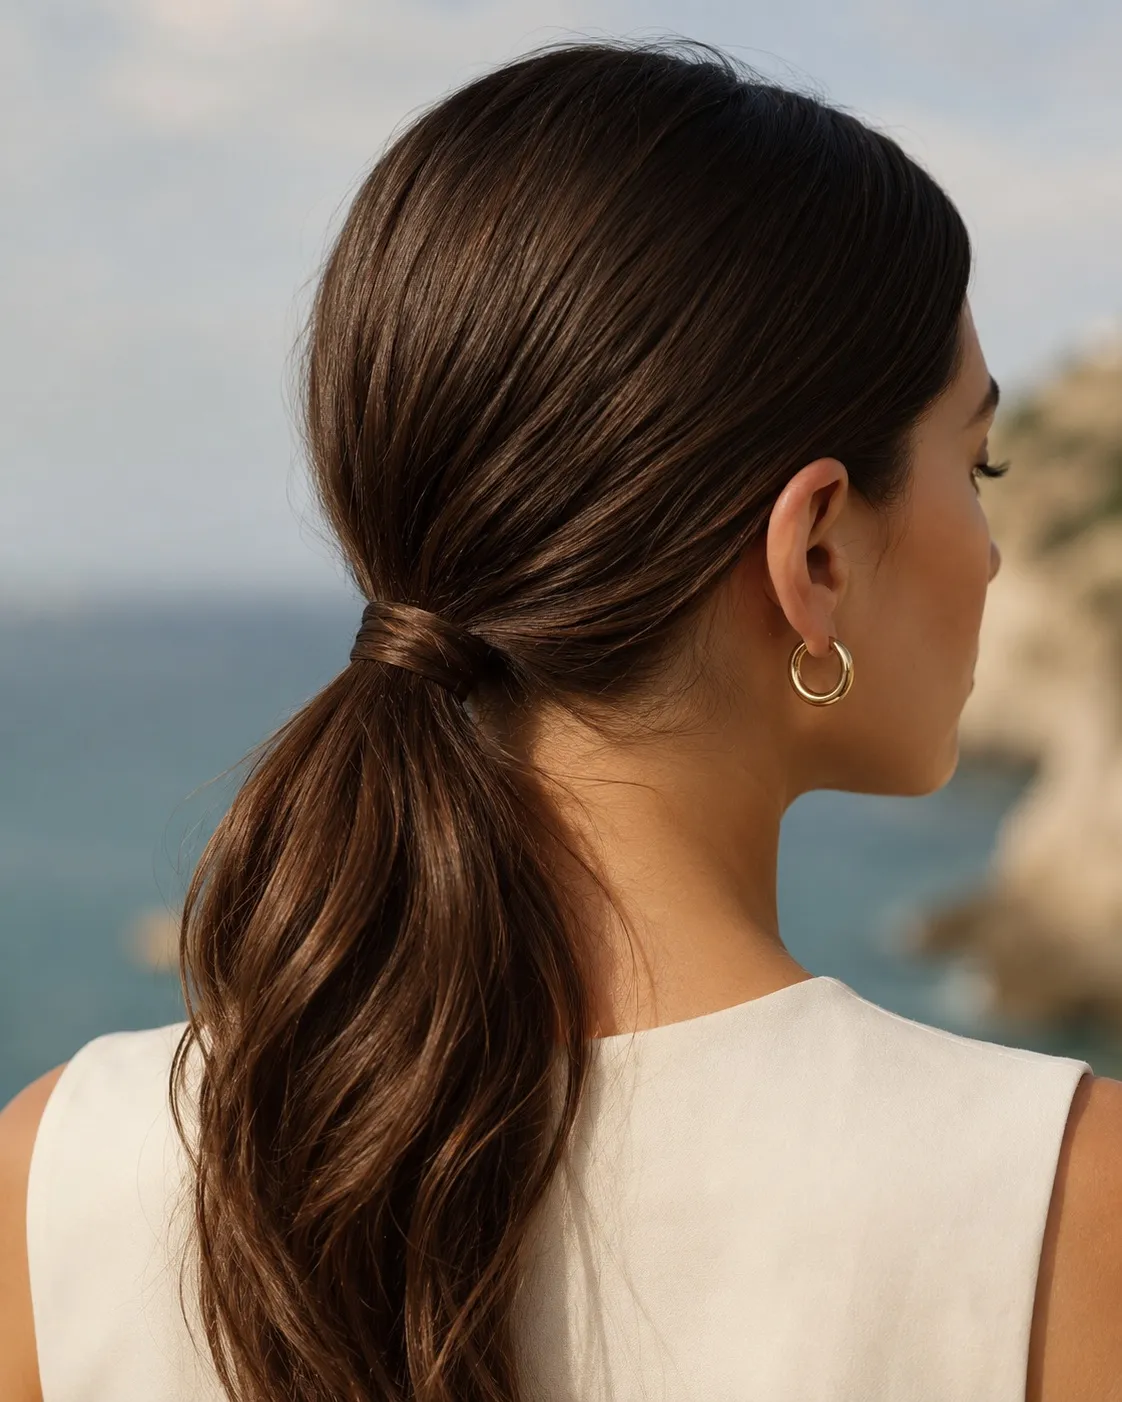
An understated, chic option that holds up incredibly well against wind and outdoor elements.
Prep the Hair: Run a flat iron through your lengths for a sleek finish, or embrace your natural waves. Spritz a light-hold texturizing spray from mid-lengths to ends to give the strands instant grip.
Secure the Base: Gather your hair tightly at the nape of your neck, right in the center, and secure it with a clear elastic band.
The Pro-Stylist Secret: Take a small, half-inch strand of hair from underneath the ponytail and wrap it completely around the elastic band to hide it. Tuck the end into the bottom of the band and secure it with a single bobby pin pushed straight upward into the base.
The Romantic Half-Up Twist
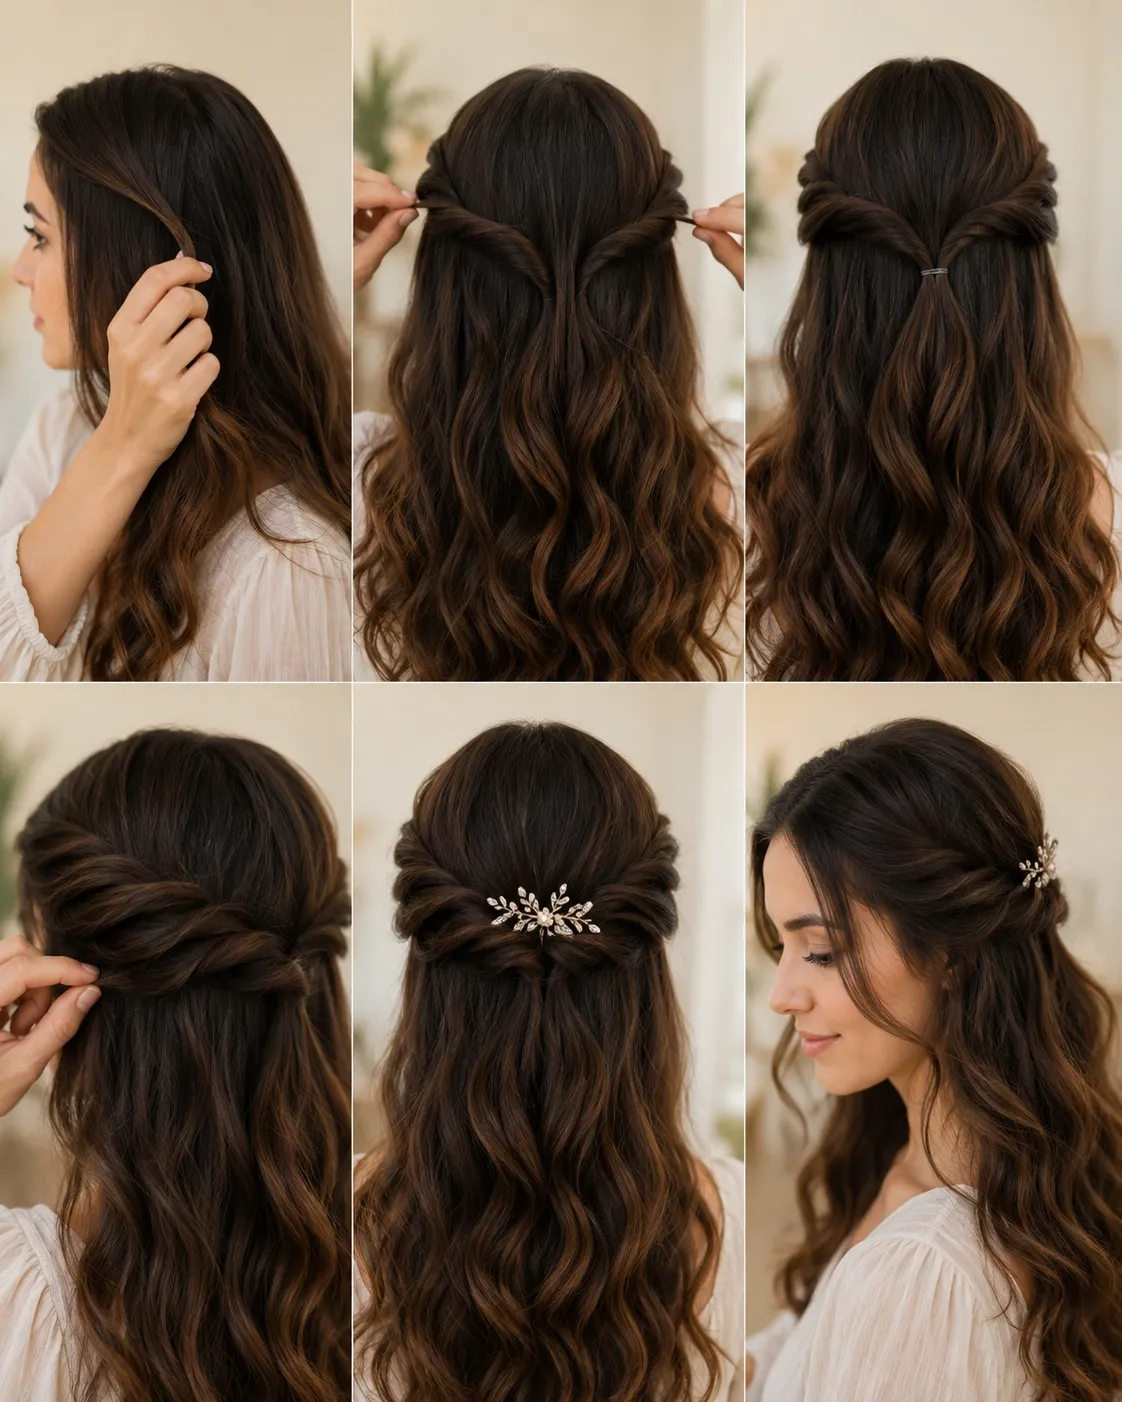
This style keeps the hair cleanly out of your face for photos while letting your natural length and bounce show.
Create the Frame: Part your hair where you normally do. Take a two-inch section of hair from just above your left ear and a matching two-inch section from above your right ear.
Twist and Meet: Twist both sections loosely back away from your face. Bring them together at the back of your head, right around the crown area.
Secure and Pancake: Fasten the two twisted sections together with a small clear elastic. To make it look professional, gently “pancake” the twists by pulling slightly at the edges to loosen them up and add airy volume. Finish by placing a delicate decorative comb right over the elastic.
Wedding Hairstyles for Guests & Bridesmaids
Wedding Guest Hairstyles: Weather and Dress-Code Appropriate Options
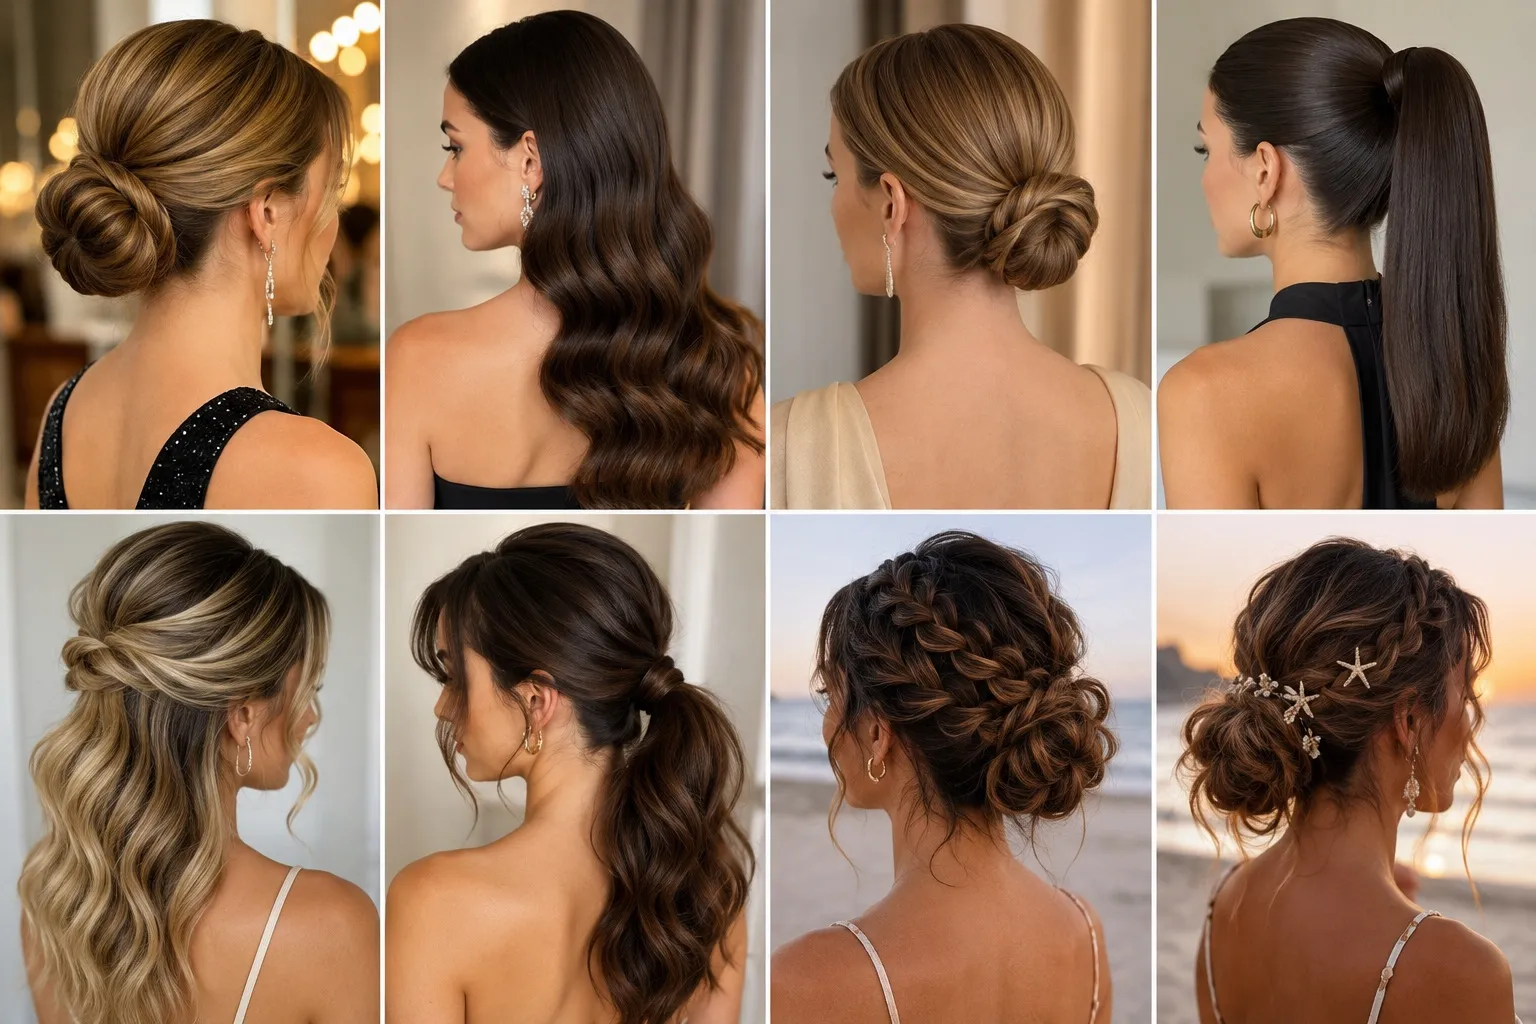
As a wedding guest, your hair needs to strike a delicate balance between looking effortlessly polished and surviving the elements. Your choice should always be dictated by the venue’s dress code and the forecast.
For a black-tie ballroom affair, a sleek, mid-height ponytail or a ultra-smooth chiffon bun keeps things formal and out of your face. If you are heading to a humid, outdoor summer wedding, do not battle your natural texture. Opt for a romantic, textured low updo secured with a strong-hold polymer spray to block out moisture. For casual or beach weddings, soft, half-up waves work beautifully—just ensure you prep the hair with a lightweight anti-frizz serum before heat styling.
Black-Tie: High-shine sleek buns, polished Hollywood waves, or structured chignons.
Cocktail / Semi-Formal: Half-up twists, voluminous blowouts, or a chic, wrapped low ponytail.
Outdoor / Beach: Braided crowns, relaxed low updos, or natural texture enhanced with sea salt spray.
Expert Insider Tip: Never skip a professional-grade texturizing spray in your roots if you are wearing your hair down. Wedding guest hair needs to last through hours of dancing, and texturizer prevents your style from deflating into a flat, sweaty mess by hour four.
Bridesmaid Hairstyles: The Coordinated-But-Not-Identical Approach
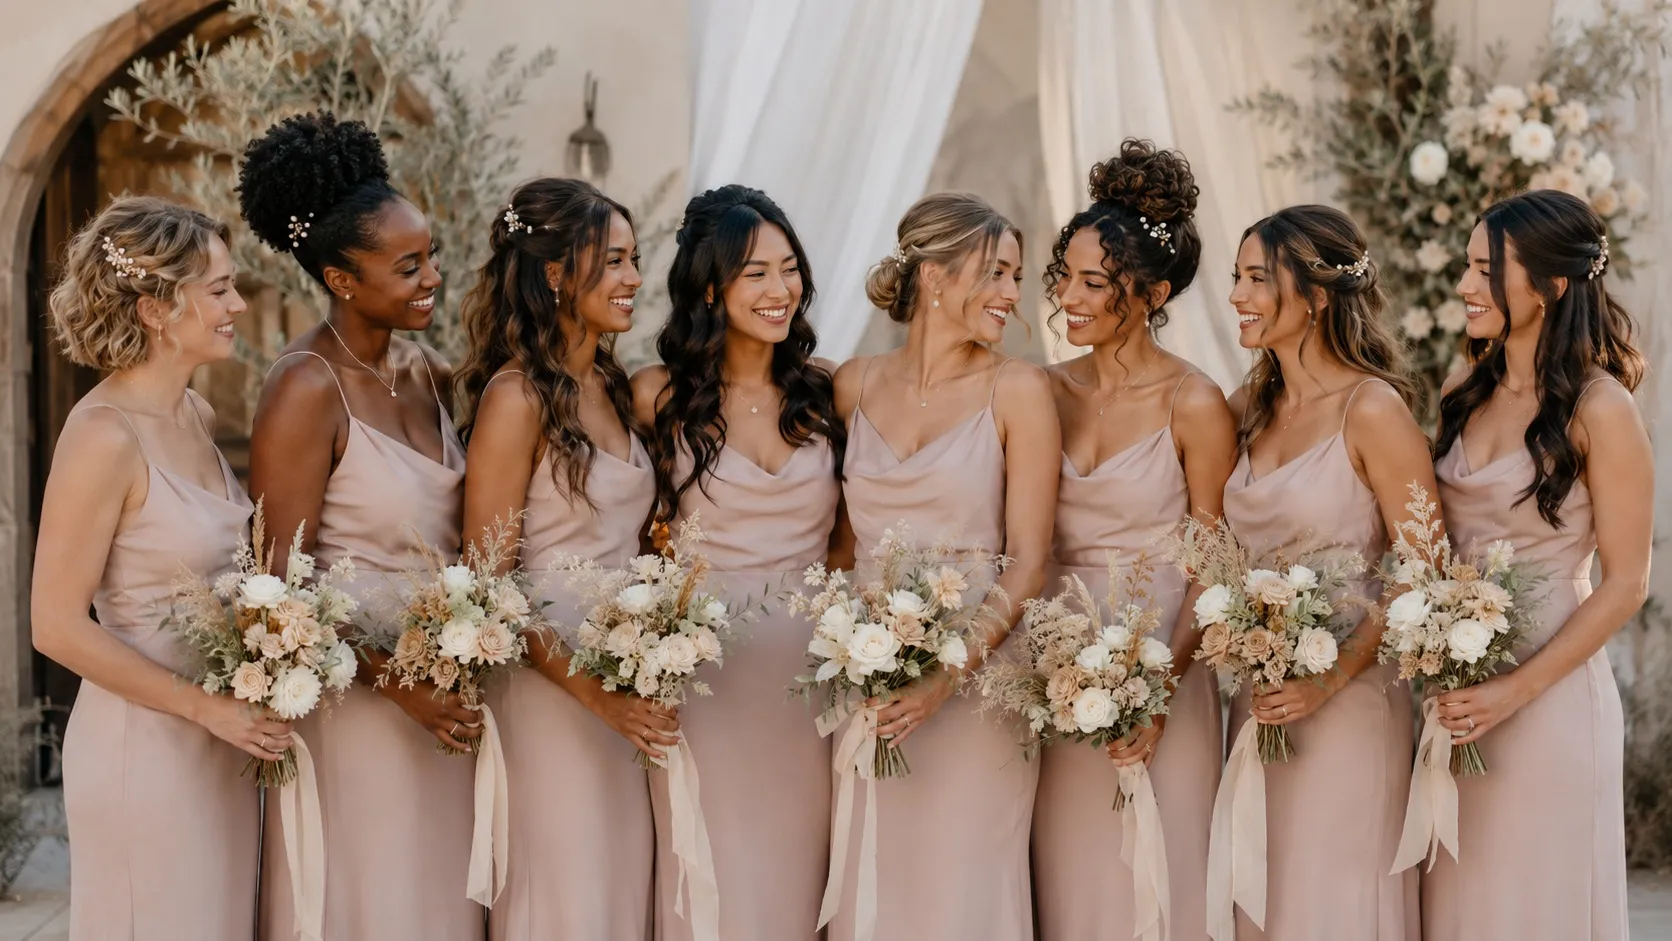
The days of matching clones in the bridal party are over. Forcing eight different women with completely different hair types, lengths, and face shapes into the exact same low bun is a recipe for a stressed-out bridal party and delayed timelines. Instead, aim for a cohesive “vibe” that ties everyone together while celebrating their individual beauty.
Establish a unifying theme, such as “romantic and bohemian” or “sleek and minimalist.” If you want everyone to wear their hair up, let each bridesmaid choose the height and texture of their updo. A bridesmaid with fine, chin-length hair will look stunning in a textured faux-updo, while a bridesmaid with thick, coiled hair can rock a gorgeous, voluminous high puff.
To create a visually stunning lineup, consider these coordinating strategies:
Unified Accessories: Give every bridesmaid the same delicate pearl pins or floral slides to wear, regardless of whether their hair is up or down.
Consistent Texture: Have your stylist use the same curling iron barrel size (like a 1.25-inch wand) across the entire party to ensure the wave pattern matches seamlessly.
The 50/50 Rule: Dictate that everyone wears a half-up style, but allow them to customize the front pieces—some might prefer face-framing tendrils, while others want a clean, pulled-back look.
Mother of the Bride Hairstyles: Age-Appropriate, Elegant, and Low-Fuss
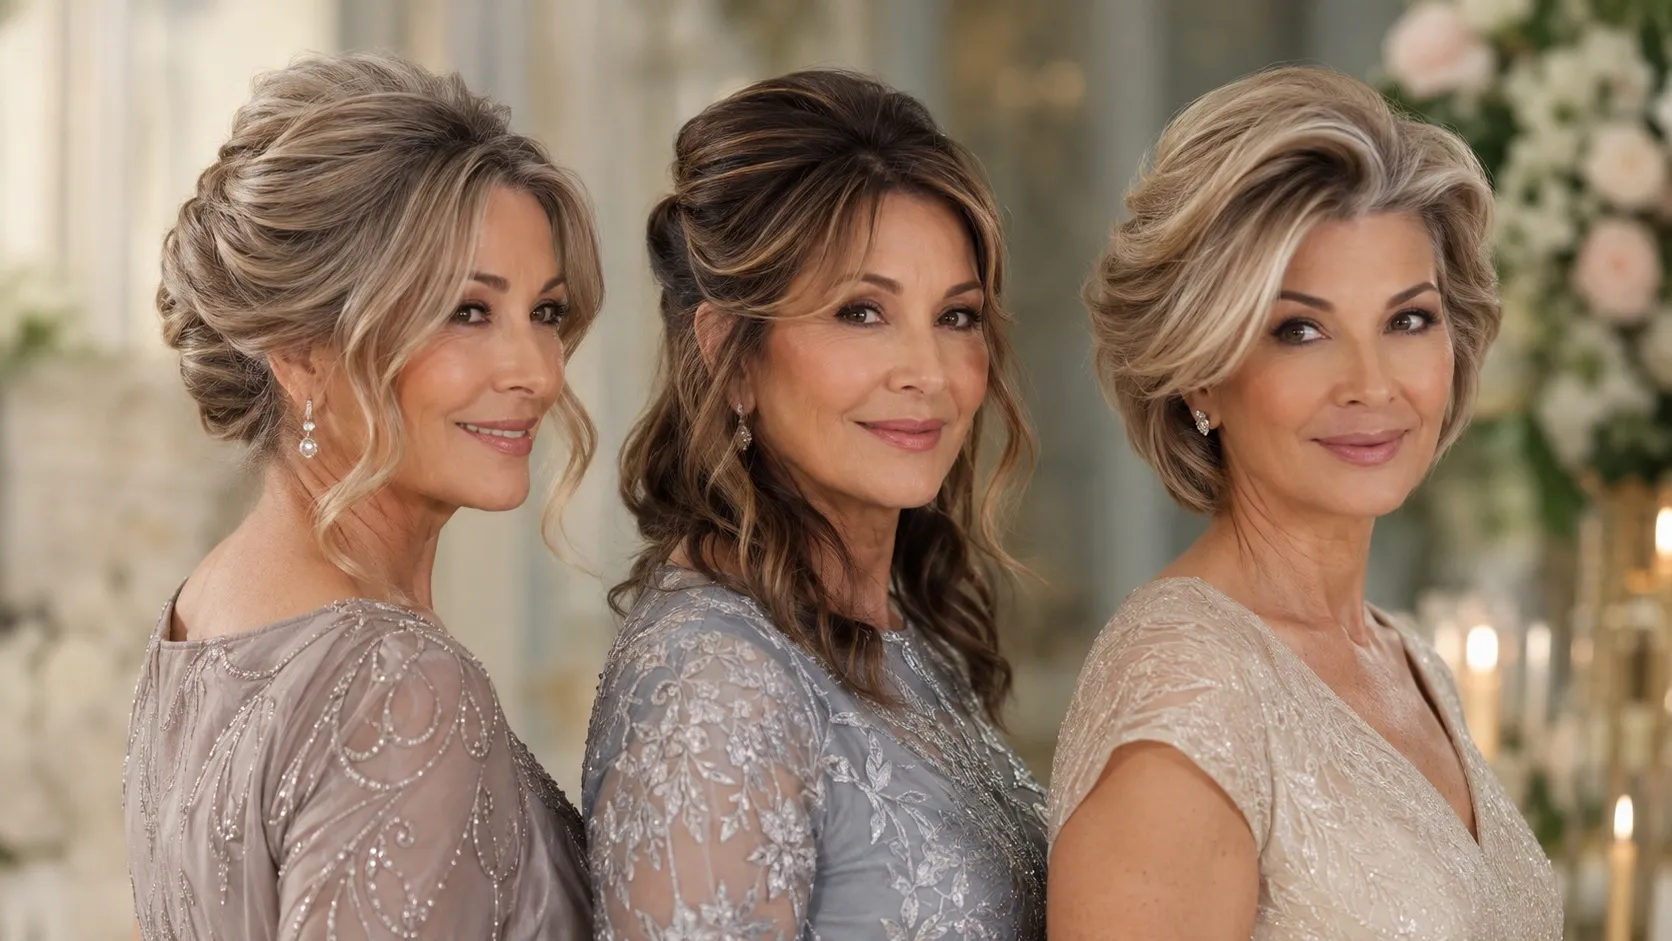
As the Mother of the Bride (or Groom), you will be incredibly busy greeting guests, hugging loved ones, and shedding a few tears. You need a hairstyle that commands respect and looks sophisticated in photos, but requires absolutely zero maintenance throughout the day.
Avoid overly stiff, heavily hairsprayed “helmet” styles, which can look dated and actually add years to your appearance. Instead, focus on volume, movement, and softness around the face. A French twist with a modern, relaxed texture or a softly pinned half-up style with root lift creates an instant, youthful facelift effect.
If you have shorter hair, a tailored, voluminous blowout using a round brush and a lightweight volumizing mousse is incredibly elegant. If you prefer an updo but worry about feeling exposed, ask your stylist to leave out a few soft, asymmetrical pieces around your cheekbones and jawline to soften your features beautifully.
Wedding Hairstyles for Flower Girls
Keeping a little one comfortable and confident is the secret to a flawless wedding day look. When choosing wedding hairstyles for flower girls, the goal is to balance an adorable aesthetic with a secure fit that lasts from the processional to the reception dance floor.
Kids move constantly, have finer and more slippery hair strands, and possess a much lower tolerance for tight bobby pins. Focus on lightweight, secure options that won’t require constant adjustments or cause a mid-day meltdown.
The Half-Up Mini Top Knot
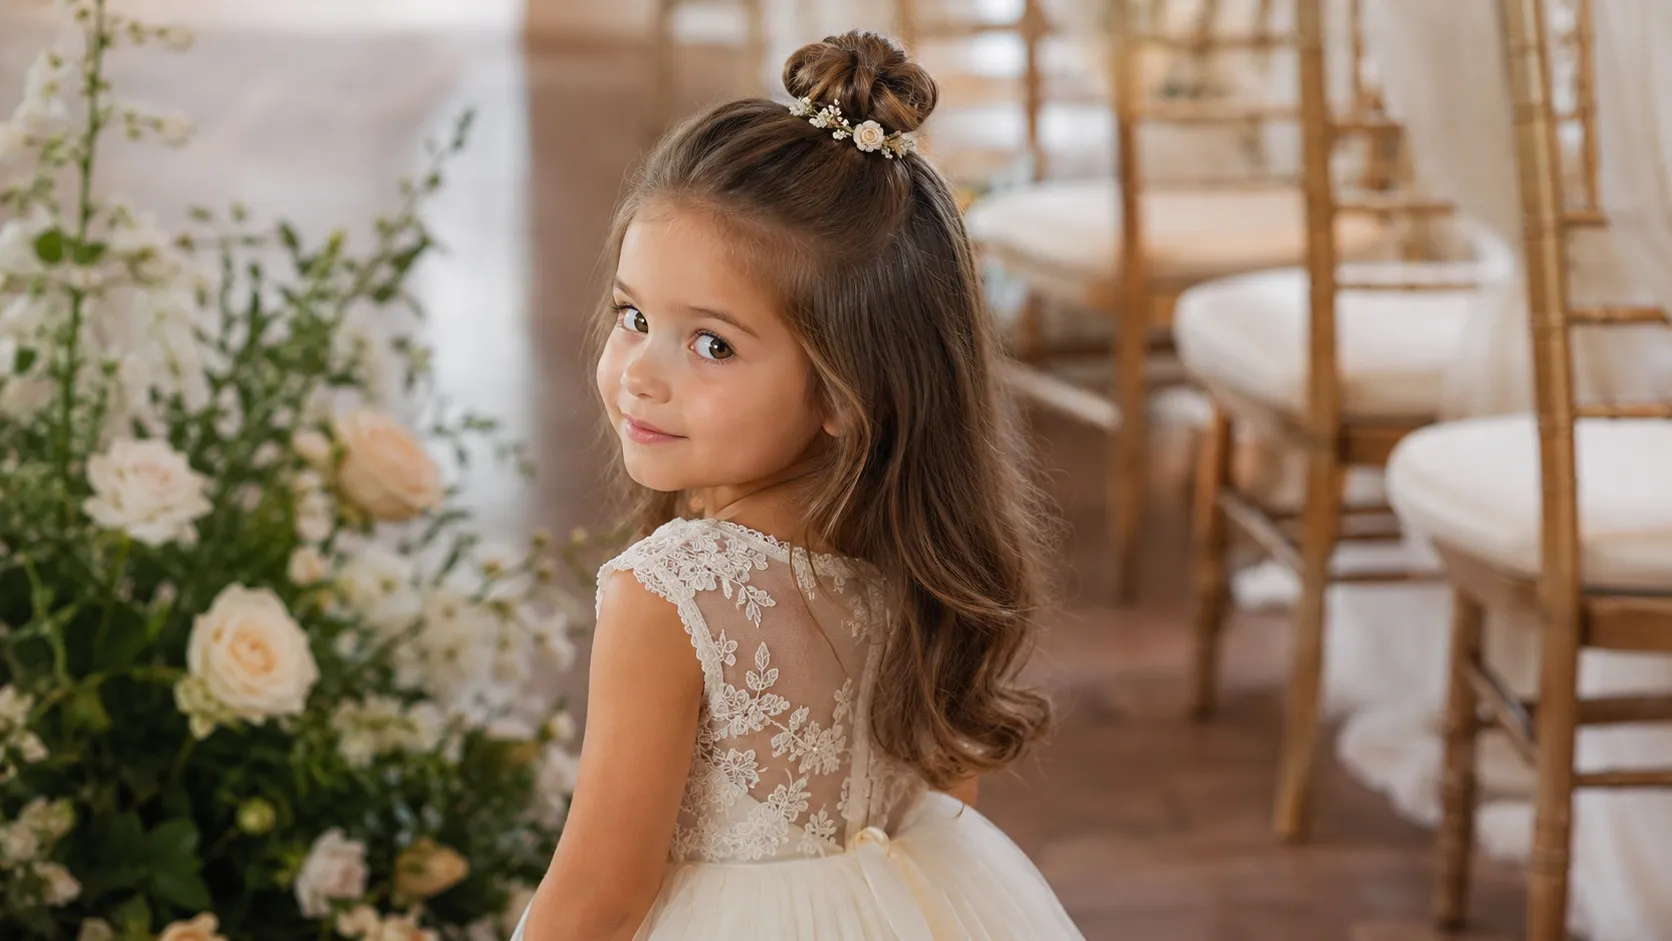
This style keeps fine hair completely out of your flower girl’s face while letting her natural length shine. By securing the top section into a tiny, soft bun, you eliminate the risk of hair falling into her eyes during the ceremony or dinner. Use a seamless, snag-free elastic band instead of a traditional hair tie to prevent pulling and breakage.
Best for: Straight, wavy, or gently curled hair types of medium length.
Pro-Tip: Wrap a small piece of matching ribbon or a tiny faux-flower vine around the base of the knot to hide the elastic without adding heavy weight.
Time Commitment: 15 minutes.
The Crown Braid Accent
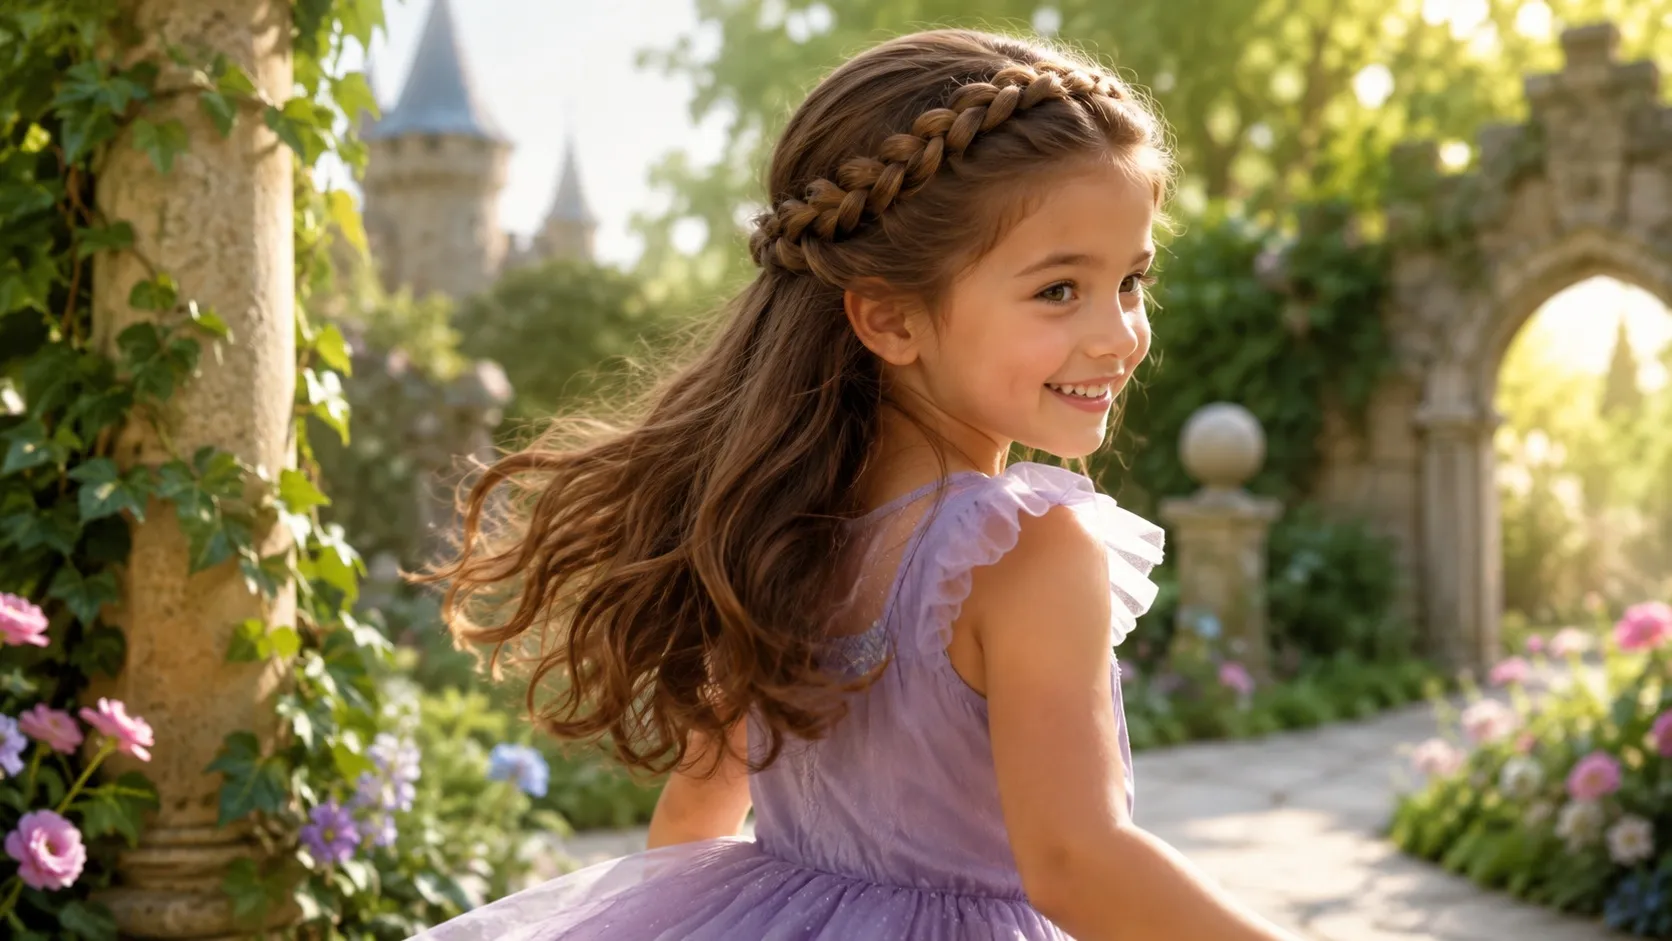
For a whimsical, fairy-tale look that holds up against running and jumping, a soft crown braid is unmatched. Instead of a full, heavy updos, weave a gentle French or Dutch braid along the hairline, securing it safely behind the ear. It offers the princess-like feel of a tiara but stays locked in place without requiring a dozen sharp pins.
Best for: Thicker textures and longer hair lengths that tend to get tangled easily.
Pro-Tip: Prep the hair with a tiny amount of kid-safe detangling spray or light leave-in conditioner before braiding to tame flyaways without making the strands stiff.
Time Commitment: 20 minutes.
The Messy Ballerina Bun with Twists
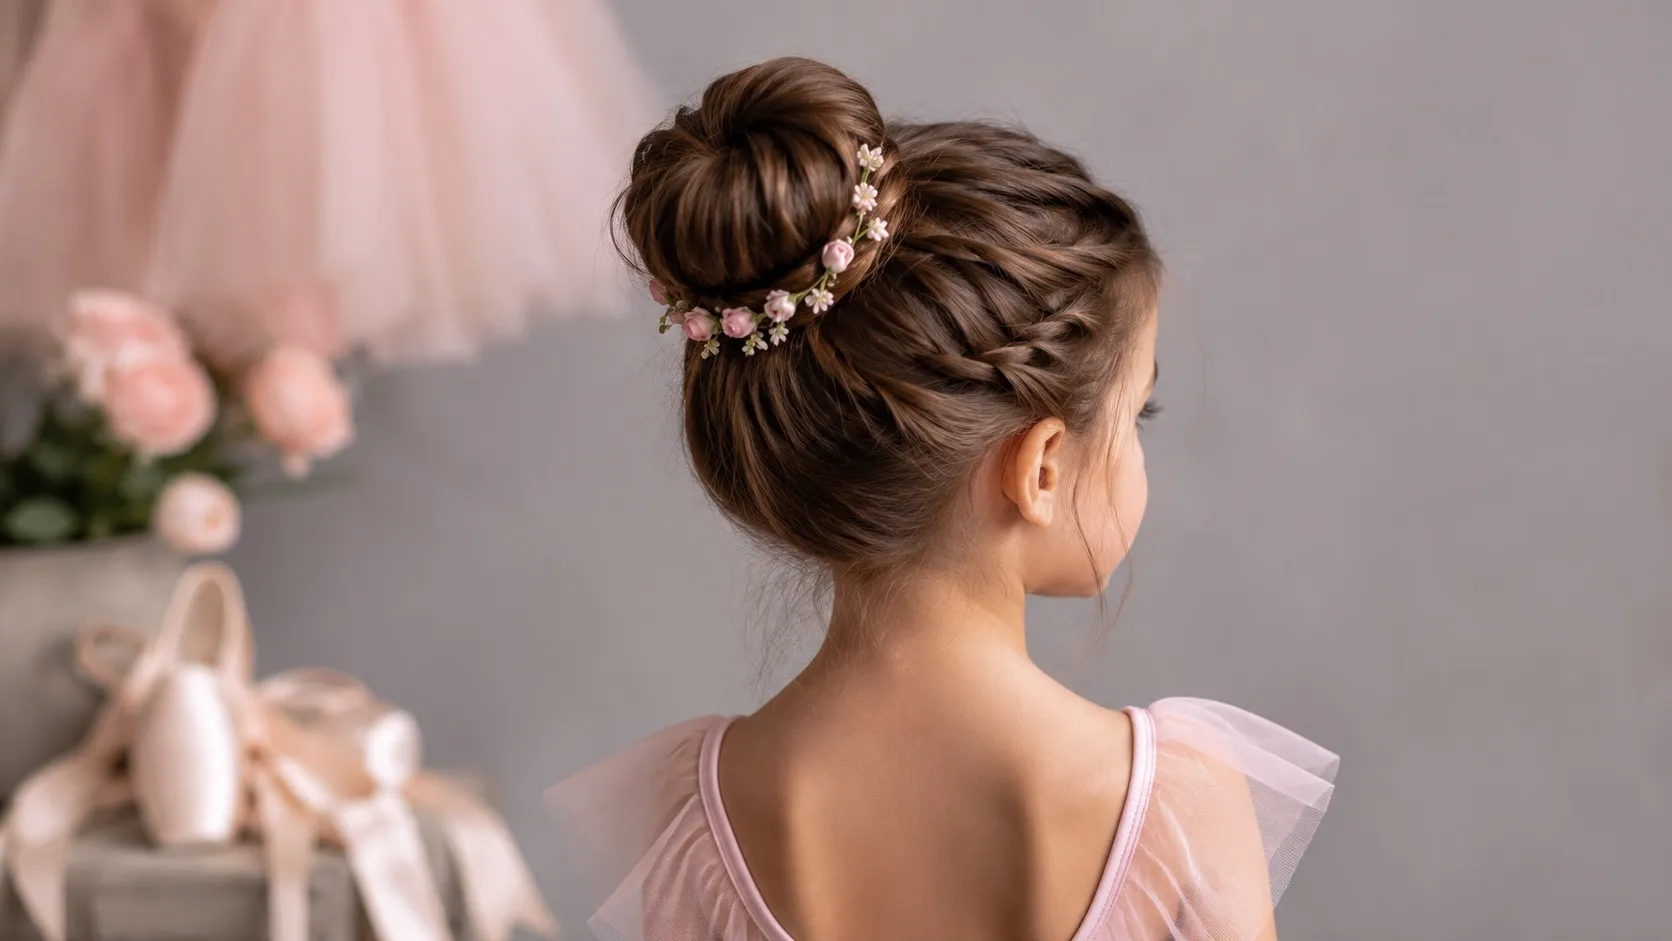
Traditional ballerina buns can feel too tight and heavy for small heads. This softer, modern version distributes the weight evenly and uses two side twists to secure shorter layers or bangs that might otherwise fall out.
Best for: Thick, long, or highly textured hair.
The Pro Technique: Gather the hair into a mid-height ponytail first using a thick, fabric-covered scrunchie. Twist the length loosely around the base and secure it with plastic spin pins instead of sharp bobby pins—they hold twice as much hair without poking the scalp.
The Floral Touch: Wrap a delicate ribbon or a small rosebud garland around the base of the bun for a classic, polished finish.
Insider Stylist Tip: Always skip the heavy-hold aerosol hairsprays for children. The strong scent and crunchy texture can irritate them. Instead, opt for a lightweight, sweet-scented detangling spray or a tiny dab of styling cream smoothed over the top to keep everything neat.
Two Wedding Hairstyles in One Day — What Real Brides Learned
Easier execution: Planning your day around a down-to-up transition is the ultimate secret to a stress-free look change. It is infinitely easier to pin flowing curls up into a textured ponytail or a loose bun than it is to brush out heavy hairspray and re-iron your hair mid-wedding.
Realistic Time Estimates
Watch the clock: A mid-event hair transition takes anywhere from 30 to 90 minutes depending on the complexity. You must account for walking back to your bridal suite, unpinning the old look, refreshing your roots, and securing the new style.
Hairstylist-on-Standby Recommendation
Expert support: If you are changing your dress and your wedding hairstyle at the same time, you absolutely need to retain your hairstylist on standby for the day. Trying to have a bridesmaid copy a look from a video while your photographer is waiting for sunset portraits is a recipe for panic.
Low-Effort Accessory Swap Alternative
Quick change: If your timeline is tight, simply swap your hair accessories instead of doing a full redo. Changing a delicate, traditional pearl comb out for a bold, modern celestial headpiece takes less than two minutes but completely shifts your vibe for the party.
Making Your Wedding Hairstyle Last All Day
Pre-Wedding Hair Prep & Products
Day-before washing: Wash your hair 24 hours before your ceremony rather than the morning of, as completely clean, slippery hair cannot hold a pin or a curl for twelve hours straight.
Product adjustments: Use a clarifying shampoo to strip out heavy silicones, apply conditioner only to the mid-lengths and ends, and completely skip heavy leave-in oils or masks.
Professional Blow-Dry Technique for Smooth, Soft Hold
Damp hair preparation: Your stylist should apply a volumizing mousse or a heat-activated setting spray to damp hair before any hot tools touch your head.
Locking in memory: Rough-drying the hair until it is about 80% dry and finishing with a round brush builds a gritty, structured foundation that keeps your hair soft to the touch but structurally sound.
Touch-Up Kit Essentials for the Reception
Bridal emergency kit: Hand a small clutch to your maid of honor packed with a travel-sized strong-hold aerosol hairspray and texturizing sheets to absorb oil at the roots.
Late-night fixes: Keep extra bobby pins that match your exact hair color and a silk scrunchie nearby to save your wedding hairstyle during the late-night afterparty.
Frequently Asked Questions
Wedding hairstyles generally fall into four primary categories: classic updos, romantic half-up styles, fully down waves, and modern textured ponytails. Updos like chignons offer unmatched security and elegance, while down styles showcase healthy length and bounce. Selecting the right category depends entirely on your gown's neckline and your personal comfort level.
The low textured chignon is universally the best bun hairstyle because it balances security with effortless modern softness. Unlike rigid, high ballerina buns that can pull tightly and cause headaches by hour six, a low bun rests comfortably at the nape of the neck. It flatters every face shape and allows for easy veil placement right above the base of the bun.
A romantic half-up style featuring loose, alternating barrel waves is ideal for creating the illusion of maximum thickness. Pinning the top section back provides an automatic root lift, while the down portion allows you to hide clip-in extensions seamlessly. Avoid sleek, ultra-smooth updos, which tend to expose the scalp under harsh reception lighting.
You should only opt for a second wedding hairstyle if your timeline permits a 30-to-90-minute styling window and you have an artist on standby. If you want a fresh look without the time crunch, a quick accessory swap is the smartest alternative. Simply trading your ceremony veil for a sparkling statement headpiece changes your entire look in under two minutes.
To successfully style your own hair at home, stick to a polished version of a look you already master, such as a Hollywood blowout or a classic low ponytail. Wash your hair the day before to build natural grit, and invest in professional-grade setting sprays to lock in the shape. Always run through two full-timed dress rehearsals before the big day to avoid morning-of panic.
Final Thoughts — Choose the Style You'll Love in Every Photo
The right cut comes down to your current hair texture, face shape, and how much daily styling time you actually want to spend. Choose a style that complements your natural wave, curl, or straight pattern instead of forcing it into something else.
Bring two or three reference photos to your salon visit so your stylist has a clear starting point to customize the length and layers for you.
Trust Your Own Blueprint
Look like yourself: When making your final choice, prioritize the wedding hairstyle that aligns with your everyday comfort level rather than a fleeting online trend. If you never wear your hair entirely away from your face in daily life, an ultra-sleek, tight updo will likely make you feel exposed and self-conscious when your photographer captures your close-ups.
The Photo-Proof Strategy
Test the movement: Remember that your hair needs to look flawless from 360 degrees, not just when you are staring straight into a dressing room mirror. During your appointment, ask a friend to take candid videos of you walking, laughing, and tilting your head back so you can see exactly how the volume and frame hold up in motion.